Pages
▼
Friday, September 30, 2011
Preparing for Vegan Mofo...
This year I’m going to be participating in Vegan Mofo, and I’m super excited about it! For those of you unaware Vegan Mofo stands for ‘Vegan Month of Food’ and is a world-wide online blogging event. Where vegan bloggers devote themselves to furiously writing as much as they can about all things related to vegan food in one month. Some bloggers have themes like creating food inspired by a favorite t.v. show or movie. Some people review products, some people may only blog about drinks or desserts etc... for the month, and some people don’t have any theme at all. They simply devote themselves to creating as many new, amazing and delicious recipes as they can to share and blog about.
To flood the internet for one entire month with vegan food, and other vegan topics is a brilliant idea. To be able to share delicious, and creative vegan recipes in abundance, and to have so many people dedicated to writing about all facets of veganism is a great way to spread our wealth of knowledge to help those who may be new to veganism. To help those who may be vegan-curious, and to help veteran vegans and one another who may be feeling a little uninspired lately. Last year I followed along with a lot of really great blogs who were participating in Vegan Mofo. I ended up just stumbling across the event, and got so wrapped up in it. Many of those blogs I still follow today, and they were incredibly helpful to me at a time in which I was making the transition to veganism. During the month I got to read a lot of cool and inspiring stories about veganism and vegan transformation. I got to see that living and eating vegan isn’t so hard after all, and I felt that sense of comradery. Since I had no vegan friends at the time, and knew of very few vegans aside form cookbook authors and such it made me feel really good and comfortable and at ease to know that there were so many other ordinary/extraordinary people out there just like me. People who’d been through the same things I was going through, or were going through the same things I was. It gave me a sense of community and support. So to now be a part of that, and to have the opportunity to maybe give that feeling back to someone else makes me feel really good. Vegan Mofo was also an indispensable resource as far as getting really good honest feedback on various cookbooks, restaurant, bakeries, retail stores, and vegan products. That information alone is incredibly valuable to a new vegan, and sometimes even to a veteran.
So for my first Vegan Mofo experience I’ve decided to use "Cooking the Books" as my ‘theme’ Since I will be on vacation from October 8th - 22nd probably without internet access I wanted to pick something easy, something I knew I’d be able to do without a lot of stress. Also since I plan to be away for those two weeks, I’m hoping to update at least twice a day for the time that I am home, to make up for the two week absence, and to make sure I meet the recommended goal of posting twenty times in the month. As far as the ‘Cooking the Books’ theme is concerned I’ll be making dishes from various cookbooks, and posting a review of the dish. How it tastes flavor and texture wise. If I needed to add anything or if I left anything out, if I followed the directions exactly or changed somethin and why. How long the recipe averages, and the difficulty of the dish. Thrown in there too I’m sure will be comments about the cookbook as a whole, and probably some personal anecdotes.
So I hope you enjoy my month of vegan food, and I hope you find it helpful. Buying cookbooks is something I always find to be hard. You can never really be sure if it’s going to be good or not. I spent the first few months only borrowing from the library but at this point I’ve borrowed them all and now when I buy them I have to do it on nothing else but a whim and the hope that it’ll be good.
Unfortunately that isn’t always the case, so if you find yourself in the same position I hope you’ll find these posts to be beneficial in helping you decide whether or not a cookbook is worth it. Or maybe you own the book(s) already but haven’t cooked from them, or just haven’t cooked the particular recipe I have, maybe you’ll see a post and be inspired to cook that dish too. If you’re a new vegan or an omnivore maybe you’ll just get some good ideas or feel inspired by knowing all the wonderful things that are possible when you switch to a vegan diet.
Vegan Mofo Starts tomorrow - October 1st so let the blogging begin! And as always happy and healthy eating to you.
I hope that wherever you are, whatever you’re doing you have a happy and fun filled Vegan Mofo!
For lots more Info on the event, and all the blogs participating check out the Vegan Mofo webstie -
http://www.veganmofo.com/
Thursday, September 29, 2011
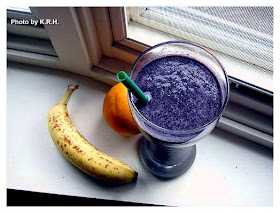
Nutritional Powerhouse Smoothie...
For the past few days I’ve been making a huge morning breakfast smoothie using Vega: Complete Whole Food Health Optimizer. For those of you not familiar with Vega it’s a nutritionally complete powder made from natural plant-based whole-foods. It’s alkaline, easily digestible, gluten-free, soy-free, and GMO-free. It contains no animal products, including eggs and dairy. No wheat, no yeast, no added sugar, no artificial colors, artificial flavors, artificial sweeteners or artificial preservatives, and no herbicides or pesticides. It comes in four different flavors - Chocolate, Vanilla Chai, Nuteral, and Berry - three different sizes - 36oz containers, 17oz containers and small single serving packages - and was formulated by Brendan Brazier. A vegan professional Ironman triathlete and best-selling author on performance nutrition.
It is a complete meal with only 240 calories per serving. However I personally think the 2 scoop serving is a bit much for one person, and so if I’m making the smoothie for just me I use only 1 scoop, which is 120 calories. The product is sweetened with stevia and contains 100% of your RDA - in the full 2 scoop serving - for Vitamin A, C, D, E, K, B2, B3, B6, B12, Thiamin, Folate, Biotin, Calcium, Iron, Phosphorus, Iodine, Magnesium, Zinc, Selenium, Copper, Manganese, and Chromium. It also contains 60% dietary fiber, 52% protein, and 43% Potassium. There is no sodium, only 6g of fat, and only 7% Carbohydrates. It also contains 2,500mg of Omega-3 Fatty acids, 1,500mg Omega-6 fatty acids, 2,500mg Chlorella, 2,500mg Maca root, 300mg Digestive enzyme blend, 83mg dairy-free probiotic blend, and 43,000mg of plant based protein from hemp yellow pea, brown rice, and whole flax seed.
I’ve never really been into protein powders, or things of that nature. Not as a omnivore nor as a vegan. I know/knew plenty of people who drank boost, and whey protein and what not and never really understood it. However a couple of friends of mine have recently been raving about Vega, and since I’m always interested in making sure my husband and I receive optimal nutrition I thought I’d give it a try. As healthy as we eat day to day, lets face it there are those crazy days where we just don’t have the time to consume as many fruits and veggies as we need to or would like to. On those days we’re subjected to eating fast, carby, usually fatty foods, which always leave us feeling so gross and drained. This is the perfect solution to that. All you need to do is add Vega to water and shake, but if you’ve got a bit more time or want to give yourself an extra kick you can blend it with some water or non-dairy milk, and some fruit of your choice. It really does keep you feeling full so you can power through those busy mornings without having to munch down a cliff bar, or stop off at starbucks for a bagel.
As far as taste goes it’s a nutritional supplement, so it kind of tastes like one. A little chalky like most of them are, but the berry flavor is pretty good and made even better by blending it with a banana or some blueberries. I actually quite like the chocolate one as well, I didn’t think I would, but it’s pretty great. I thought it was less chalky and less powdery then the berry flavor, and it’s totally brilliant blended with 1 C almond milk 1 C water and 1 banana. Tastes just like a chocolate banana smoothie and who doesn’t love that?
Anyway all week I’ve been playing around with different combinations of ingredients. I used all kinds of different fruits, I used kale and some other greens, and all of my concoctions were okay, but this morning I really hit the jackpot. This smoothie was so good that I think it’ll be the only one I make when I use berry flavored Vega. So if you have Vega give it a try, and if you don’t have Vega but are curious about it I really suggest trying it out. Especially if you’re concerned about getting the proper nutrition through your diet, or just if you have a busy life and need something more substantial then a cup of coffee and a power bar in the morning.
*** Note - This recipe makes enough for 2 medium sized eaters. So I suggest halving it if it’s just for you. Unless your particularly hungry, or a big eater. Or you can always drink half of it, then refrigerate the other half to enjoy later in the day. ***
Nutritional Powerhouse Smoothie
4 C purified water
2 Medium sized Bananas
1 C Frozen Blueberries
½ C Frozen Mixed Berries (I used a blend of Raspberries, Blackberries, and Mulberries)
2 Scoops Vega
- Add ingredients into a highspeed blender in order listed above. Blend on high for 30 to 60 seconds until smoothie is well blended and smooth.
- Pour into two large glasses and enjoy!
***Note - If you’re not used to getting much fiber in your diet I recommend not going anywhere that won’t have a bathroom available. Also be sure to drink lots of water throughout the day to help the fiber move through your system.***
Vega’s Website - http://myvega.com/
Wednesday, September 28, 2011
Chinese Inspired Broccolini Soup...
You know that delicious soup you always get in Bad Chinese restaurants? The one that usually comes complimentary with the meal. It’s got that rich salty broth that goes down so smooth it’s almost like drinking a glass of oil. It comes served in delicate cup sized bowls, with wide spoons that have short handles. It’s got all those beautiful uniform slivers of julienne vegetables swimming around in liquid MSG. All except those big honkin’ broccoli florets. Whole and intact with a texture that’s soft yet crunchy. Yeah, you know the soup I’m talking about. Well, the other day that’s what I was craving. I mean really, really craving! All I could think about was broccoli cooked to perfection and bathed in a mouth-watering salty broth. Which is odd since it’s been ages since I’ve eaten bad Chinese and even longer since I’ve given that particular soup a moments thought.
The tastebuds want what they want I suppose, so I finally broke down and decided to try my hand at re-creating a healthy vegan version of that soup. The only problem was that A) aside from a few essentials like Broth, cabbage, broccoli, green onion and carrots I had no idea what else went into that kind of soup - as I said it’s been ages.- and B) I didn’t have any broccoli!
But do you think I let that stop me? Of course not. I had a pound of broccolini which I decided was just as good if not better then broccoli, and the freedom of imagination to do whatever else I pleased. So armed with nothing but my patchy memories I entered the kitchen to work a little magic, and magic is definitely what happened. Now while I can’t say that this soup is in anyway authentic, nor can I say that it tastes exactly like the salty Chinese soup of my childhood memories I can say that this soup is delicious and oil-free. More importantly it has the two main components for such a soup, broccoli, and salty flavor. Which in the end I guess was all I was really looking for. To me this is the perfect soup to eat on a cold fall or winter day when all you want to do is cuddle up in a blanket and read a book. The perfect soup to eat when you’re feeling a little under the weather. Hot, nourishing, and super simple and quick to make. Depending on the deftness of your knife skills you could have a big pot made in about 30 minutes. Who doesn’t love that?
Chinese Inspired Broccolini Soup
1 Small Yellow Onion - Quartered and sliced into thin quarter moons
10-15 cloves garlic crushed or pressed (or very finely minced)
2 Tbsp Ginger Root Grated
1 lb Broccolini (or broccoli)
4-6 C Low-Sodium Vegetable Broth
3 Carrots grated
2 C Napa Cabbage sliced thin
1 Bunch Green Onions sliced (Green & White Parts)
2 Tbsp Red Miso Dissolved in 1/4 C Water (or to taste)
2-4 Tbsp Low-Sodium Soy Sauce (or to taste)
½ tsp Japanese 7 Spice Blend (or to taste)
- Add your Onion, Garlic and Ginger to a medium sized soup pot with about a 1/4 C of vegetable broth. Saute on high until onions are soft and translucent and garlic and ginger are fragrent. Roughly 7-10 minutes.
- While onions are sauteeing slice the stems of your broccolini into small rounds. Leaving the broccolini florets intact. Unless you want more bite sized pieces as I did, then you can slice the florets as well. Add the stems ( but NOT the florets) into the pot along with the onions as they’re sauteeing.
- Add the vegetable broth to the pot and bring to a boil.
- Once boiling reduce heat to medium or medium-low and add Cabbage, carrots, Green onion, Broccolini Florets, Japanese 7 Spice, Soy Sauce, and Miso. Stir to combine then cover and let simmer over medium for 5-10 minutes.
- Because carrots, napa cabbage and green onions are sliced or grated so finely they will cook in no time at all. If you have decided to slice up your broccolini florets they too will cook fast, and so the cooking time will be close to five minutes. If you’ve left the broccolini florets large and intact they could take 10 minutes or slightly longer to get to that nice soft crunch stage. So just keep an eye on it.
- When Broccolini is at your level of tenderness, taste soup for flavor, adjust as needed and serve hot, maybe with a nice side salad.
*** Note - Japanese 7 Spice is a seasoning blend made up of ground Orange Peel, Black, White and Toasted Sesame, Ginger, Nori, Cayenne, and Szechuan Peppercorns. It’s got a hint of citrus from the orange, a bit of heat form the pepper, and a touch of salt from the Nori. It’s a really wonderful combination of flavor that I think really adds something to this soup. However if you don’t have it you can always improvise by creating your own 7 spice blend. But generally Asian Markets, speciality spice stores, or specialty grocers should have it. For those in the Chicagoland area I get mine at The Spice House.***
*** Note - Gluten-Free if using Wheat-Free Tamari Soy Sauce***
Thursday, September 22, 2011
Cajun Spiced Poblano Fajita-Tacos...
I absolutely love tacos. Taco night was always one of my favorite ‘eating events’ when I was growing up, and I say event because it was. My brother, Step-Dad and I were always in competition for how many tacos each one of us could eat. I usually capped out at around seven, which usually brought me neck and neck with my brother, give or take a taco on either side, but our Step-Dad always won. He could pack away as many as ten or twelve tacos in one sitting! Something I couldn’t do even if I hadn’t eaten all day.
One of my favorite thing about tacos is the assembly. I love the do-it-yourself style of eating. Where several dishes of food are laid out before you, and you’re given a plate on which to create your taco masterpiece. I liked the aesthetic of looking across the table and seeing 5 or 10 different serving bowls. I liked even more the ability to put exactly what I wanted in exactly what quantity in each of my taco shells. Making each one just a little bit different, then seeing which I liked best. I have a lot of fun memories of taco night growing up, even if they all seem to end with all of us bloated and sick laying in front of the t.v.
Fajitas are another food I have fond memories of, although they entered my life a lot more recently. For some reason, after my husband and I got married we started eating a lot of fajitas. I’m not sure why exactly. I guess because they were delicious and easy to make, and at that time I was still learning and mastering the art of cooking. I’ll tell you though, I sure mastered the art of the perfect fajita, it’s time tested and family approved. I made killer fajitas at least once a week, and then I started doing the Fajita-Burrito. A Chipotle rip-off that’s a lot cheaper and not as time consuming as you might think to do your self.
Fajitas and tacos always give me the same kind of feeling. Usually I’m eating them with a group of people, friends or family. We’re gathered around a large table with food laid out before us, and we’re digging in to drippy deliciousness, with juice running down our arms and food exploding from our soft-shells. There’s always storytelling, and laughter, jokes and sometimes competition, and it’s always a great time.
As a vegan however tacos are not something I eat often. In fact in my almost year of being vegan I can think of only one time where I’ve eaten a ‘traditional’ vegan style taco. This of course has more to do with the fact that we simply just don’t eat a lot of wheat or soy based meat products, rather then the idea that a good vegan taco can’t be found or made. It can be. Fajitas on the other hand never dropped completely off the radar as eating a vegetarian fajita doesn’t require a meat substitute, and we still enjoy a good fajita-burrito.
But then one night - not so long ago - I was really, really in the mood for tacos, and having no tofu, no seitan, and no tempeh on hand the Poblano fajita-taco was born. A great combination of fajita style filling with a taco style assembly that I gave a twist by adding spicy poblano peppers. Not only are they delicious and filling - just TRY and eat 7 of these babies, I dare you! I can barely pack away 2 fully loaded shells - but they give you all that comradery of the traditional beloved taco night. A lot of bowls laid across the table, a lot of messy, drippy, food bursting out of shells eating, the joy of creation, and a lot of fun.
By the way, these could just as easily be served in a more 'traditional' hard taco shell, I just personally prefer tortillas, or soft shells, always have.
Cajun Spiced Poblano Fajita-Tacos
1 ½ Large Red Bell Pepper Sliced
1 Large Yellow Bell Pepper Sliced
2 Medium Poblano Peppers Sliced (Less or more if you don’t/like heat)
1 Medium-Large Yellow Onion halved then sliced
Cajun Seasoning to taste
Chili Powder, garlic powder and Smoked Paprika to taste
1 Tbsp Olive Oil
1 Pack Whole Wheat Tortillas (Or favorite Tortilla. I used Sun-dried Tomato tortillas, and Chili Tortillas which added an extra bit of heat)
Optional but Recommended Add-Ons
1-2 Avocados sliced
2-3 Tomatoes diced or 1 pint grape or cherry tomatoes halved or quartered
1 Bunch Green Onions diced
½ Head Iceberg Lettuce shredded
½ Bunch Cilantro finely chopped
Tofutti Sour Cream (or other non-dairy sour cream of choice)
Daiya Cheddar Cheese (or other non-dairy cheddar cheese of choice)
Mild or Medium salsa of choice
- Heat tbsp of oil in large saute pan. Add onions, and all peppers. Saute over medium heat for roughly 10-20 minutes until onions and peppers are very soft. Poblano might still have a bit of firmness to them at this point but that’s okay.
- Halfway through cooking add your seasonings. I generally use anywhere between 1-3 tsp of Cajun seasoning depending on who I’m eating with. The Cajun seasoning I use has a powerful kick to it, and some people don’t like too much heat. Cajun seasoning brands will vary, as will your tolerance of heat. I recommend you start off moderately, with ½ tsp and work your way up from there if you’re not sure how much heat is too much for you. The same goes for Chili Powder and Smoked Paprika, each of these will bring a smokey heat of their own and so I suggest you start off moderately. I generally don’t use more then ½ tsp of Smoked paprika, or more then 1 tsp of chili powder, you may want to start off with 1/4 tsp of each and work your way up. Garlic is of course personal preference and I never measure this. I give the garlic powder bottle a few hearty shakes and that’s always enough. You want a little garlic flavor here but you don’t want it to be overpowering. After all this isn’t garlic’s show!
- Now for the assembly. Spread some non-dairy sour cream and/or salsa onto a tortilla. Top with your poblano filling, then your preferred add-ons. Sprinkle with a little Daiya cheddar and cilantro, roll it up tight and enjoy!
I really do recommend all of the add-on’s. Each one adds it’s own unique flavor and texture to the fajita-taco. However my husband assures me that they are just as good sans sour cream, cheese, and avocado, three things of which he is not a fan.
*** Note - You could also spread a little roasted red pepper humus on your tortilla in place of (or in addition to) the sour cream. I’ve done this and it was delicious!***
*** Note - Soy-Free if using soy-free non-dairy sour cream. Gluten-Free if using Corn Tortilla's or other Gluten-Free Tortilla's***
Tuesday, September 20, 2011
Kale Salad with Fresh Figs and Roasted Balsamic Mushrooms...
This salad makes a nice simple meal that’s both delicious and filling. A perfect salad to enjoy during one of autumns warmer evenings. It also makes for a lovely presentation as a starter salad. The lemon juice, maple syrup, cherries, figs and mushrooms make for the perfect combination of sweet, savory and sour. Enjoy by candlelight, with soft music and a bottle of Pinot Noir.
Kale Salad with Fresh Figs and Roasted Balsamic Mushrooms
Salad
1 Bunch Kale
2 Carrots Julianne or grated
½ -1 large red pepper sliced thin
½ Large red onion sliced into thin half or quarter moons
Handful of dried Cherries
Handful of Sunflower Seeds
4-5 Fresh Figs Quartered
1 Batch Roasted Balsamic Mushrooms
4-6 Cloves Garlic finely minced
2 Tbsp Olive Oil
2-3 Tbsp Lemon Juice
1-2 Tbsp Maple Syrup
pinch sea salt and black pepper
Roasted Balsamic Mushrooms
20-25 small to medium Cremini Mushrooms
2-3 Tbsp Balsamic Vinegar
1-2 Tbsp Olive Oil
½ tsp rubbed sage
½ tsp crushed Rosemary
1/4 tsp ground thyme
1 tsp dried oregano
5 garlic cloves minced fine
Dash of Agave (optional)
- First remove the stems from your mushrooms. You can keep them and use them or discard them. I kept mine. Then place mushrooms in sealable container along with minced garlic, vinegar, oil, agave and seasonings. Place in the refrigerator for 1-2 hours to marinate, turning once.
- When you’re ready to make your salad, preheat your oven to 400'F (202'C) then chop your kale into bite sized pieces and place in a large serving bowl. Add the olive oil, Lemon Juice, Maple syrup minced garlic, and pinch of sea salt and black pepper. Stir thoroughly until all kale is coated. Then set aside to marinate at room temperature.
- Lightly spray a small baking dish with non-stick spray. Dump your mushrooms along with the marinade into the dish and roast at 400'F (202'C) for roughly 20 minutes until mushrooms are nice and soft.
- While mushrooms are roasting prep your veggies but don’t add them to the kale just yet.
- When mushrooms are done remove them from the oven and let cool for 5-10 minutes so that they are still warm but cool enough to eat without burning yourself.
- Add Carrots, red pepper, red onion, dried cherries and sunflower seeds to the kale, mix to combine.
- Distribute salad evenly amongst two plates and add quartered figs. Use a slotted spoon to remove the cooled mushrooms from the roasting pan and place them onto the salads. At this point you can either discard the mushroom marinade or reserve it to drizzle a tsp’s worth over each salad.
- Serve and Enjoy!
Wednesday, September 14, 2011
Autumn Cinnamon Plum Pancakes....
There is nothing I appreciate more than creative cookery, yet I find that when it comes to breakfast there is a severe lack of imagination. I like to try and make a nice breakfast for my husband at least once a week - pancakes are his favorite - and at this point I’ve used and reused every single pancake or waffle recipe from every single cookbook I own. Even breakfast menus in restaurants are always the same. Pumpkin or ginger pancakes in the fall. Blueberry, and black berry pancakes in the summer. Traditional pancakes all year round along with banana ‘bread’ pancakes, apple pancakes, chocolate chip pancakes, and pecan pancakes. A person can only wolf down so many blueberry pancakes in a lifetime. What’s worse is I find that so many pancake recipes call for either dried or frozen fruit, so few use fresh seasonal fruit, and I find that really unfortunate. So I’ve decided to make it my mission to develop and create interesting pancake recipes using fruits and other ingredients you might not normally consider.
Variety is the spice of life after all, so I hope you enjoy this recipe that utilized warming fall spices along with fresh fall produce, and even if you’re not a fan of plums this recipe might just surprise you.
Autumn Cinnamon Plum Pancakes
1 3/4 C Whole Wheat Pastry Flour
2 ½ tsp Baking Powder
2-4 Tbsp Brown Sugar
1 ½ tsp ground Cinnamon
½ tsp salt
1/4 tsp Allspice
1/8 tsp Nutmeg
1/8 tsp Cardamom
1 C Unsweetened Almond Milk
2 tbsp Canola Oil
1 tsp vanilla extract
4 plums = 1 C Plum Puree
Extra plums for garnish (optional)
- Put a medium sized pot of water on the stove and bring to a roaring boil. Place plums in the boiling water and boil for roughly 5-10 minutes until soft and skins are starting to come loose.
- Drain plums in a colander reserving and blanch in a bowl of ice water. After a couple of minutes in the ice water the skins should be loose enough to rub off or peel away. If the skins give you a bit of trouble don’t worry peel away as much as you can it’s okay if a little skin is left.
- Remove pits from the plums and then puree in a food processor till smooth. Should yield roughly one cup.
- In a medium sized bowl combine pastry flour, baking powder, brown sugar, salt, cinnamon, cardamom, allspice, and nutmeg. Mix until well combined.
- Make a well in the center of the dry ingredients and pour in the Almond milk, canola oil, vanilla extract, and plum puree. Mix until just combined. Taste and adjust spices and sugar as needed.
*** NOTE - Keep in mind that if your plums are a little on the tart side the batter is going to taste tart and possibly unpleasant. However once the pancakes are cooked the tart flavor will have mellowed out completely. If your plums are sweet, and the batter tastes sweet you may want to consider using only 2 Tbsp of brown sugar or less, it’s up to you. If the plums are tart I recommend the 4 Tbsp of brown sugar. ***
- Use a quarter cup measuring cup to pour batter in a greased heated pan (medium to medium-low heat) or
electric griddle and cook until edges of batter start to brown and top is bubbly. About 3-4 minutes.
- Flip pancakes over and cook another 2-4 minutes until pancakes are nicely browned on both sides.
- Serve garnished with fresh plum slices, a dash of powdered sugar and a drizzle of maple syrup. I think fresh blueberries would go very well with these pancakes as well if you have them on hand.
Enjoy on a beautiful sunny fall morning with a mug of chai tea, and a glass of orange juice while you watch the leaves change color outside your window.
PS: The Farm Sanctuary Walk for Farm Animals Charity Walk on Saturday September 10th was Fantastic. We had a lot of fun, got to talk to some wonderful people including Gene Bauer (The Co-founder and president of Farm Sanctuary.) Got to sample some delicious treats from local restaurants and just had an all around great time. The weather was beautiful, warm and sunny with a nice breeze and even though we were about $35 short of our goal we had a fantastic time, I can’t wait to do it again next year. Thanks again to all who supported us.
Friday, September 9, 2011
Farm Sanctuary Charity Walk - REMINDER...
Hey everyone , just a reminder, it’s September 9th and our Farm Sanctuary walk is only 1 day away. We’ll be walking on Saturday September 10th to raise money and awareness to stop cruelty towards animals. Our goal is to raise $500 and so far we’ve raised $365, that means we’re only $135 away from reaching our goal!!! We’re really excited to be participating in this event, because it’s an issue we feel so passionate about, and we look forward to your support.
If you haven’t donated yet, we hope you will consider it. No matter how much you’re able to give every dollar counts, especially when it’s going to such a good cause. Whether it’s $1 or $10 we appreciate your help and support.
Thank you so much to those who have already donated. With so much hatred in this world any kindness we show to another being can only reflect positively upon us!
So if you’re interested in making a donation please visit our Team page, ‘The Good Karma Kitchen’ and click on either My or Matthew’s name to donate.
http://events.walkforfarmanimals.org/index.cfm?fuseaction=donorDrive.team&eventID=501&teamID=5375
Just make sure you get your donations in by 8:30am tomorrow Saturday September 10th. We’ll be walking bright and early!!!
Thank you so much for your support.
Peace, Love and Compassion
Kyleigh & Matthew
Tuesday, September 6, 2011
Spotlight Food - Figs...
Fig season is in full force now, and I don’t know about you but I’m pretty ecstatic! I love everything about figs from their sweet taste, to their smooth flesh, and their crunchy seeds. They’re such a unique and mysterious fruit, with a wonderfully complex yet hard to describe flavor. Bold yet subtle at the same time. The only thing I don’t like about figs is their ridiculously short window of availability. Dried figs of course are available year round, and they too are delicious, but nothing beats a ripe fresh fig. Their season however only lasts from June until October, and in my neck of the woods I don’t usually see them for sale before Mid-August. If I’m lucky they hang around until early November but usually they’re gone by mid October. So I have to take advantage of them when I see them.
I know a lot of people who say they don’t like figs. Yet I wonder how many of us have really sat down and given figs a fair shake. Still I know even more people who claim to have never even eaten a fig before and I can’t help but wonder, why? I know that before my transition into vegetarianism I’d never truly eaten a fig. For whatever reason they just weren’t a part of my families food culture, and therefor hadn’t made it on to my radar. I’d had fig flavored things of course, mainly processed ‘bar’s and ‘cookies’ none of which I really cared for, but I’d never actually eaten an honest to goddess plain fresh fig, nor a dried one for that matter. In fact, I may never have eaten a fig at all were it not for an intriguing recipe I found while reading one of my very first Vegan cookbooks. As I’ve mentioned before I have a habit of making dishes that call for an assortment of ingredients that sound strange combined together. I have an even bigger habit of making any dish that contains an ingredient I have either never eaten or never heard of. So in typical fashion after happening upon said recipe I promptly went out and bought myself a pound of fresh figs, and a 2 pound bag of dried. I was very lucky that I found this recipe just as September was bleeding into October otherwise I’d of had to wait another year to try fresh figs.
Needless to say It was love at first bite. They’re just so unusual. Their flavor and texture so completely different then anything else I’ve ever eaten. I couldn’t believe I’d never tried them before. Figs have held a strong cultural importance over the ages, and feature strongly In many mythologies and religions, because of this I almost feel that by biting into a fresh ripe fig I’m biting into history. Now my passion for figs is endless. I always keep my pantry well stocked with the dried variety - Black Mission being my favorite - but when fig season rolls around I am in a state of bliss! I am on a constant and never ending search for new and exciting ways to enjoy my beloved fruit. If you have never eaten a fig, you most certainly should! Even if you think you don’t like them. Just give figs a chance!
History/Cultivation
Figs are the fruit of the Ficus tree, a deciduous tree native to Southwest Asia, and the Mediterranean Region. The edible figs is thought to be one of the first plats cultivated by humans. In the Neolithic village of Gilgal l (In the Jordan Valley north of Jericho) nine subfossil figs were found dating back to 9400-9200. This find predates the domestication of wheat, barley, and legumes by one thousand years and may possibly be the first known instance of agriculture. From there figs spread to Ancient Egypt, Crete, Greece and Rome, where they became staples in the traditional diet, as well as revered as a sacred fruit and symbol.
The fig tree is sacred to the Greek God Dionysus, and appears frequently in stories of Greek, Roman and Religious mythology. The fig tree is referred to many times throughout the Bible, most notably in the book of Genesis where Adam and Eve use the leaves from the fig tree to cover their genitals. Forever crystalizing the fig leaf as a symbol of modesty. The fig/fig tree is also mentioned in the Qur’an as well as Hindu, Jainist and Buddhist texts. In fact it was under the Bodhi tree - A large, old, sacred fig tree - that the Buddha was said to have achieved enlightenment.
Though figs had been enjoyed for centuries throughout the Mediterranean, The Middle East, Asia and North Africa, it wasn’t until the 16th century that they found their way to the Western Hemisphere, by way of Spanish explorers. In the late 19th century upon establishing a mission in San Diego, California Spanish Missionaries also planted fig trees. However the trees planted were inferior to those in Europe and so it wasn’t until the 20th century after further development of cultivation techniques that California began heavily cultivating and processing figs. Today California remains one of the largest producing regions of figs, along with Turkey, Egypt, Greece, Portugal and Spain.
Health Benefits
Figs are one of the highest plant sources of Calcium. According to the USDA data for Black Mission variety figs, the dried figs are richest in fiber, copper, manganese, magnesium, potassium, calcium and vitamin K.
Since figs are such a good source of potassium they have the ability to help lower high blood pressure. Not eating enough fruits and vegetables, combined with eating the typical high-sodium diet typical of so many Americans can create a potassium deficiency. A person who has a low intake of potassium coupled with a high intake of sodium has a much greater chance of developing hypertension. Since potassium is a mineral that helps control blood pressure, it’s important to remember to make figs and other potassium rich foods a regular part of your daily diet.
Figs are also an incredibly good source of fiber, and like prunes have a natural laxative effect, which is helpful for weight management. Studies have shown that woman who increased their fiber intake with supplements significantly decreased their energy intake, yet their hunger scores did not change. Meaning figs and other high fiber foods are a better more effective way to increase fiber, loose weight and stave off those hunger cravings.
Fruit and cereal fibers have also been shown to help protect against postmenopausal breast cancer. Results of a study involving 51, 823 woman over a period of 8 ½ years showed a 34% reduction in breast cancer risk for those consuming the most fruit fiber compared to those consuming the least.
Figs are a great source of calcium and as such they promote bone density. Subsequently since they’re also a good source of potassium they may counteract the increased urinary calcium loss caused by a high sodium diet. Which will help to prevent bones from thinning out at such a fast rate.
Interestingly fig leaves have also become a recent topic of interest. You may not have thought the leaves of the fig tree were something worth eating, but in many cultures fig leaves are a common part of the cuisine. Studies are now showing that fig leaves have anti-diabetic properties and can actually reduce the amount of insulin needed by persons with diabetes who require insulin injections.
In animal studies fig leaves have also been shown to lower the triglyceride levels in the blood. While in vitro studies have shown fig leaves to inhibit the growth of certain types of cancer cells. However researchers have not yet determined exactly which substance in fig leaves could be responsible for their remarkable healing effects, as further studies need be conducted.
Fruit is also important in protecting against macular degeneration which is the primary cause of vision loss in older adults. It’s reported that 3 or more servings of fruit daily can help reduce your risk of age related macular degeneration by 36%
So as with all of my previous spotlight foods figs are not only a delicious nutrient packed food but a beneficial one as well! Not to mention biting into a fresh ripe fig is a nice change of pace from chowing down on the typical banana or apple. It’s good to keep things interesting.
Preparation
Personally my favorite way to eat figs is just plain, by themselves. I like to snack on fresh figs, or dried ones. However another great thing to do with either fresh or dried is make your own home made fig bars, cookies, cakes, pies, or tarts. You can stuff and/or roast fresh figs with almonds and cashew cream to serve as an appetizer. Figs go particularly well in spinach, kale or arugula salads. You can blend fresh figs with some oil, vinegar and fresh herbs to make a nice salad dressing or marinade. You can poach fresh figs in wine or juice to serve with non-dairy yogurt or non-dairy ice cream. You can include dried figs to your morning oatmeal, granola, or cereal. You can include them in trail mix. You can make fig jam, salsa or spread, for crackers or bread. You can make fig bread either with dried or fresh figs. You can top off a bowl of non-dairy yogurt with some nuts and dried or fresh figs.
There is a lot you can do with these little gems, if you’re willing to get creative. I suggest you get to know your figs and don’t be afraid to try something new! Enjoy!
Happy and Healthy Eating to you!
Sunday, September 4, 2011
Multi-Grain Spaghetti with Kale In A Roasted Garlic Butter Sauce...
The other day I was really in the mood for pasta, but rather then a traditional marinara or just a little olive oil I wanted a rich, buttery garlic sauce to serve over my spaghetti. I had something scampi like in mind, except I wanted to roast the garlic and blend it into the sauce rather then just mince it and saute it. The following recipe Is what I dreamt up, served with a few slices of multi-grain bread, sliced tomatoes and a mix of olive oil and balsamic vinegar it was an instant hint at my table! I hope you enjoy it as well.
Multi-Grain Spaghetti with Kale In A Roasted Garlic Butter Sauce
8 oz Multi-Grain spaghetti
1 Bunch Kale
1 Bunch Green Onions chopped
½ Bunch Parsley finely chopped
1 Tbsp Olive Oil
Roasted Garlic Butter Sauce
2 Heads Garlic, Roasted
½ C non-dairy Butter (such as Earth Balance I used original but I’m sure any of their flavors would work)
1/4 C White Wine (to taste)
1 Tbsp Olive Oil
1 ½ tsp dried Oregano
1 Tbsp dried Basil
1-2 Tbsp Lemon Juice (to taste)
A Pinch Sea salt and Black Pepper to taste
*** Note- To Roast Garlic peel away the outer skin from the bulbs. Slice a quarter inch or so off the top of each bulb and drizzle lightly with olive oil. Wrap in aluminum foil, and place on a baking sheet in a 400'F (202'C) oven for 45 minutes to 1 hour, until garlic is soft and easily pierced with a fork. Let cool, before using. ***
To make the Roasted Garlic Sauce....
- Place Earth Balance into a small pot on the stove and let melt over low heat. Remove each clove of garlic from the bulb. Since it’s roasted and soft this should be fairly easy. The garlic cloves will come nicely away from the skin, and you can squeeze out the smaller cloves.
- Once all cloves of garlic have been removed from the bulb, mash them with a spoon or the back of a fork.
- Once Earth Balance has melted, add olive oil, lemon juice, white wine and the mashed garlic to the pot. Stir until well combined and creamy. It’s okay if there are a few lumps of garlic, no worries.
- Add in the oregano, basil, pinch of sea salt and pepper, stir and let simmer over low about 5-10 minutes. Taste for flavor and adjust as needed. Keep warm until ready to serve.
Pasta...
- Fill a pot with water, bring to a boil and once boiling cook and drain pasta as directed by package.
- Chop your kale into bite sized pieces and place in a large saute pan with a little bit of water. Saute on Medium-Low until Kale is bright green and beginning to wilt. About 5-10 minutes.
- Once kale has softened and decreased in size, add the green onions and parsley to the kale. Stir to combine and then pour the Roasted Garlic Butter Sauce into the pan. Stir again to coat kale thoroughly.
- Toss your cooked spaghetti with 1 tbsp of olive oil, and distribute amongst plates. Top each plate of pasta with the kale mixture, then toss and serve.
*** Note - The sauce may not look like a lot once you’ve made it, but for 8oz worth of pasta it is quite a bit. If you like your pasta slightly more dry and less saucy I recommend you only pour half of the sauce over the kale. Reserving the other half to distribute over your individual plates as wanted/needed. Remember you can always add more, but you can’t take it away once you’ve added it! ***
*** Note - If you use gluten-free multi grain spaghetti as I did then this dish is gluten-free. I used a multi-grain combination of rice, quinoa, and amaranth, which was very good. Obviously to omit serving the pasta alongside bread if you have gluten intolerance. ***
Friday, September 2, 2011
Marinated Kale Salad with Tomato Bhaji...
A few days ago I was at a salad bar/hot bar, looking for something to eat but finding nothing very appealing. I was about ready to settle on a simple bed of romaine with a few falafels and some humus when I ran into a friend, who was on her way out. After exchanging the usual "Hello, How are you’s" she exclaimed that she’d just eaten the best thing ever! She told me she’d combined the Rainbow Kale Salad from the Salad bar, with the Tomato Bhaji from the hot bar, mixed them together and found herself in heaven. She insisted I try it. I was a bit skeptical, I’d never even heard of tomato bhaji before and when I went over to check it out it just looked like Marinara sauce. However after we said our goodbyes I decided what the heck, it wouldn’t hurt to try it, she’d never steered me wrong before. I read the ingredients on the tomato bhaji and discovered it was an Indian, or at least an Indian inspired dish. Being a lover of Indian Food how could I resist now? Needless to say it was a phenomenal combination, and for days afterward all I could think about was the kale-bhaji combination.
The Bhaji on it's own....
I was so taken with the dish, that I desperately wanted to re-create it so that my husband could revel in it too. Since he’s not very keen on Salad bars - all that food sitting out in the open with Buddha knows who touching it, kind of puts him off - I knew the only way he’d taste if was if I made it at home. Thankfully I’d had the foresight to try and memorize as many of the dish’s ingredients as I could.
The Kale Salad on it's own....
So once home, I started a Google search for Tomato Bhaji recipes. The kale salad I could make my own version of, of course so that was a non issue. The problem was that while I found plenty of tomato bhaji recipes not a single one of them had all of the ingredients I’d memorized, and some of them had ingredients I know for certain were not listed on the tag of the dish I ate. To make things even more complicated most of the tomato bhaji recipes differed form each other as well, not only in ingredients but in quantities. My next step was to check my Indian cook books, both of which did not contain any recipe labeled tomato bhaji. There were a few tomato curry recipes but they were wildly different then the bhaji.
I was totally stumped. What was I to do? The only thing I could I guess, which was to make a few notes on a scrap piece of paper, roll up my metaphorical sleeves and proceed into the kitchen with all of my best intentions. I focused hard on the taste, texture and flavor of the dish I remembered eating days earlier. Remembered it’s perfect combination of sweet, sour and a hint of spice, combined that with all of my accumulated culinary knowledge and my ingenuity in the kitchen and.... voila! Success! A great success actually and I don’t say that lightly. There were definitely some harry moments along the way. A few times where I thought for sure I was going to fail and the whole thing would be awful, but I’m confident this tastes 95% accurate to the dish I ate at the salad bar. Now I can’t make any claims that it’s authentically Indian, since I don’t even know if the original dish I ate was authentic, but it certainly is delicious. It’s a wonderful, new, healthy and creative way to eat your greens, and it’s so damned good you’ll want to eat the entire pan. I know my husband and I nearly finished the entire thing off. My husband went back for thirds, something he doesn’t normally do, so my hope is that you’ll enjoy it that much too!
Marinated Kale Salad with Tomato Bhaji
Simple Kale Salad
1 bunch Kale
½ Red Onion sliced thin
2-3 tbsp olive oil
2-3 tbsp lemon juice
1-2 tbsp maple syrup
sea salt to taste
Tomato Bhaji
1 Tbsp Olive Oil
18 Garlic cloves crushed
½ tsp Black Mustard Seeds
1 Large Yellow Onion (½ finely diced, the other half pureed along with the green chili)
½ Red Onion (leftover from your Kale Salad)
½-1 Green Chili (or more depending on how much heat you like)
1 ½ tsp ground Coriander
3/4 tsp Gram Masala
1/4 tsp ground Turmeric
5 Tomatoes finely diced
3 Tbsp lemon juice (to taste)
2 heaping tsp Red Curry Paste (more if you like heat)
1 6oz can tomato paste
4-5 tsp Dark Brown Sugar (more or less to taste)
Sea Salt to taste
- Make Salad first. To Assemble remove large ribs from kale and rip into bite sized pieces. Place in a bowl with the lemon juice, olive oil, and maple syrup and massage dressing into the kale. You can do this by hand or if you don’t wand to get your hands dirty mix very well with the back of a wooden spoon until kale is evenly coated and starting to break down a bit. A few minutes. Add in onion, and salt and give another good mix. Place in the fridge until ready to serve.
- Add mustard seeds to a dry skillet and cook over medium heat for a few minutes until they begin to pop and smell fragrant. Remove seeds to a bowl and place pan back over the heat.
- Heat the olive oil in a pan over medium heat, add crushed garlic and saute for 2 minutes.
- Cut your yellow onion in half. Take one half and cut it into smaller chunks then add it to a food processor with your green chili. Puree until smooth. Add this mixture to the garlic and stir.
- Finely chop the remaining half of your yellow onion, along with the remaining half of the red onion from your kale salad. Place into the pan, along with the mustard seeds and saute covered for 3-4 minutes until very fragrant.
- Add Coriander, Turmeric, and Gram Masala to the pan and stir making sure onions are evenly coated. Saute covered another 3-5 minutes until onions are soft and translucent.
- Add your diced tomatoes, stir to make sure everything is evenly coated, then saute covered for 2-3 minutes. Add salt, stir to coat, and saute covered another 2-3 minutes until you see liquid forming in the pan and the tomatoes are beginning to break down.
- Add in the tomato paste, red curry paste, lemon juice and brown sugar. Stir until well combined then cover and bring to boil. Once boiling, reduce heat to simmer and allow to simmer covered for 15-20 minutes. By this time the dish should be thick and saucy like a marinara.
- Taste for sweet, sour and heat, and adjust seasonings as needed.
- To serve distribute your kale salad amongst plates, and top with several scoops of the tomato bhaji. Mix thoroughly before eating and enjoy on its own or with a slice of whole wheat naan or roti.
The whole thing mixed together...
*** Note - Remember that the dish is meant to be a perfect blend of sweet and sour, neither the sweet nor sour should be more prominent then the other. Also while some heat is required you don’t want it to be too spicy, nor do you want it to lack spice otherwise you’re essentially just eating tomato sauce. So keep that in mind if you’re going to adjust the seasonings. ***