Showing posts with label Cilantro. Show all posts
Sunday, September 13, 2015
Vegan Mofo #14: Peruvian Corn Puree with Fried Tofu...
Corn is a staple food in Peru, it’s been around since the time of the Inca’s. There are two main varieties, one that grows near the coast that has a slightly bland flavor, and one that grows in the mountains that has a sweeter flavor. Though I don’t typically eat much corn when I’m at home, we did eat quite a bit of it while we were there. It’s cheap, filling and plentiful which makes it such a relied upon crop. Fish too is a staple food in Peru, what with Peru having such a long coastline fish and seafood are abundant. Peruvian cuisine is an interesting blend of South American tradition, Inca influence, Spanish influence, with some Indian and Asian influences due to various waves of immigration over the years.
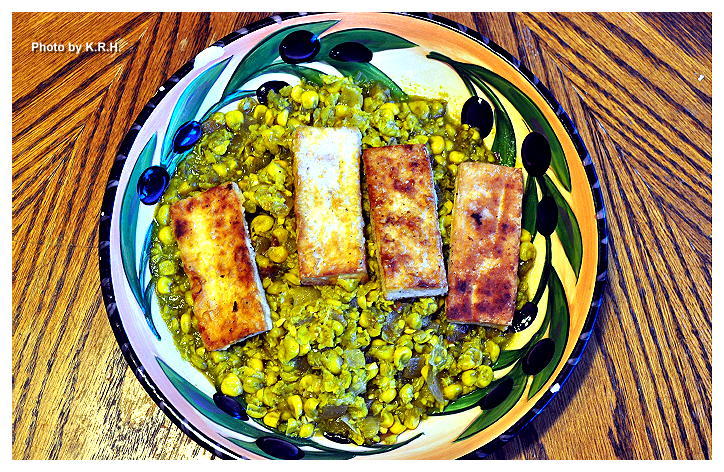
For this recipe I used tofu in place of fish, and though it doesn’t have an overly fishy taste I think ti works really well here. I kept the tofu a little on the bland side because the corn puree has so much flavor. The planks of tofu make the perfect little scoops for eating up the corn. Though this is a relatively simple dish you’ll be immediately impressed by the powerful flavor punch!
Peruvian Corn Puree with Fried Tofu
2 tsp Olive Oil (or more as needed)
1 16oz Bag Frozen Yellow Corn thawed
2 ½ Cups Water (or more if needed)
½ Bunch Cilantro
1 Red Onion Diced
2 Vegan Chicken Bouillon Cubes
½ tsp Ground Cumin
½ tsp Smoked Salt
1-2 tsp Sriracha
1 lb Extra Firm Tofu drained and pressed for 1 hour.
1/4 Cup All Purpose Flour
Sea Salt and Black Pepper to taste
Kelp or Dulse flakes if desired
Lime Juice and extra Sriracha to serve
- Place the thawed corn in a high-speed blender with 1 cup of water and blend on medium for a few seconds until you have a chunky puree.
- Heat 1 tsp of olive oil in a large pan over medium high heat. Add the onion and saute until nice and golden. Add the cumin, smoked salt, bouillon cubes, sriracha and a ½ cup of water. Whisk together and simmer for 2 minutes or until bouillon cubes have dissolved.
- Add the corn puree to the pan with the onions and spices and stir to combine.
- Blend the cilantro and the remaining 1 cup of water together on high, until completely smooth. Add the cilantro mixture to the pan and stir to combine with the corn. Simmer for 10 minutes. Taste for salt and heat and adjust seasoning as needed.
- Divide the corn puree among serving bowls, wipe out the pan and fry your tofu.
- Heat the remaining oil in your pan over medium high heat.
- Slice your slab of Tofu into 3 pieces. Slice each piece into 3 more pieces so you have 9 planks of tofu.
- Place the flour in a shallow bowl and season with sea salt, pepper and either kelp or dulse.
- Dredge each plank of tofu through the flour until it’s coated on all sides.
- Carefully place each plank of tofu into the hot pan and fry until golden brown on each side. About 5-6 minutes a side. Make sure to flip at least once, to prevent burning or sticking.
- Serve each bowl of Corn Puree topped with a few planks of tofu, a drizzle of lime juice, and a bit of extra sriracha if you like things spicy. Enjoy!
Labels:
Cilantro,
Corn,
Cumin,
Limes,
Onions,
Quick and Easy,
Sriracha,
Tofu,
Vegan Mofo,
Veganize-It
Tuesday, July 22, 2014
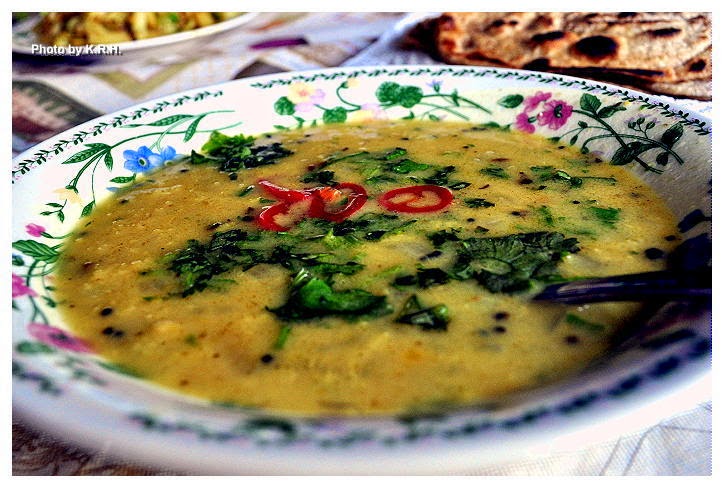
Moong and Toor Dal Tadka with Coconut and Red Chilies...
I know what you’re thinking, hot soup or dal in the middle of summer? You’re crazy! And normally I would agree with you only I just recently came off five days of being ridiculously ill with what was probably Norovirus and so I didn’t want to push the limits of my digestion. Since Thursday afternoon I’d been living off of crackers, bread, tea, and on Saturday evening when I finally began to feel stable enough to take in something heartier I made a very brothy vegetable soup. It was pretty basic - potatoes, carrots, celery, onion, broth, water, and spike seasoning. It was tasty, but come Monday when I was feeling roughly 85%-90% better I wanted to eat something fun!
I’ve really been craving Indian food lately, specifically lentils, and when I think of lentils I automatically think of dal, there are few things more nourishing and comforting then a big ‘ole bowl of dal. Specifically I wanted dal tadka, which I’ve only recently discovered There’s a great little Vegetarian Indian Restaurant not far from where I live that serves a wicked good Dal Tadka, I had it the week my mother was in town visiting me, and I’ve been kind of dreaming about tadka ever since.
Tadka incase you don’t know is really just a cooking technique in which you fry whole spices in oil so that they release their natural oils, and after a minute or so you pour the whole thing - oil and all - into the dish you’ve prepared. It sound a bit strange maybe since we’re used to putting spices in our food at the beginning of cooking rather then at the end but let me assure you that this technique imparts some truly phenomenal flavor! And that’s exactly what I wanted.
Now, I’m not going to lay any claims saying that this is in any way a traditional dal tadka, or even a traditional dal, but it is delicious. It’s full of ingredients that are delicious and healing, however if you’re unaccustomed to cooking Indian food at home you may not have them all on hand. Still, they should be easy enough to find at your local Indian grocery - that’s where I get mine - and they are well worth hunting down. Trust me once you taste the slightly bitter, onion flavor of Nigella seeds you’ll be hooked! Similarly the buttery, garlic/onion flavor of asafetida can not be matched, and black mustard has a unique flavor itself, different from that of yellow mustard. As for pickled red chilies I make them myself, and so I’m not sure if you can actually buy such a thing anywhere. Though if you have a basic pickling recipe you can easily pickle some of your own chilies. It’s not necessary but I love the added flavor note.
Moong and Toor Dal Tadka with Coconut and Red Chilies
Dal
1 tsp Olive Oil
1 Large Yellow Onion Diced
1 C Moong Dal - soaked for 1 hour and rinsed
½ C Toor Dal - soaked for 1 hour and rinsed
4 C Water
½ tsp Ground Turmeric
1 - 1 ½ tsp Salt - to taste
1 13.5oz can Full Fat Coconut Milk
½ Bunch Cilantro Minced
Tadka
2-3 tsp Olive Oil
1 ½ tsp Black Mustard Seeds
½ tsp Nigella Seeds
½ tsp Coriander Seeds
½ tsp Fenugreek Seeds
1 tsp Asafetida Powder
6 Garlic Cloves Minced
1-2 Red Chilies Minced - depending on heat preference.
To Garnish -
Extra Minced Cilantro
Sliced Pickled Red Chillies - optional but highly recommended!
For the Dal
- Heat the Olive oil in a large soup pot over medium high heat. Add the diced onion and saute for 5-6 minutes until lightly golden.
- To the pot add the soaked and rinsed Moong Dal as well as the Toor Dal. Stir to combine.
- Add the 4 cups of water, the turmeric, and the salt. Cover and bring to a boil. Boil for 10 minutes then reduce the heat and let simmer for 20 minutes.
- Check on the doneness of your dal. If the lentils are still hard, or too firm for your liking continue to simmer for an additional 10 minutes until they become soft. If the lentils are soft already, and have reached a somewhat mushy consistency add in the coconut milk and stir to combine. Simmer for 5 minutes.
- Remove the pot from the heat and add in the minced cilantro. Stir to combine.
For the Tadka
- Heat the oil on high in a heavy bottomed frying pan. Once hot add in the mustard seeds, nigella seeds, coriander seeds, fenugreek seeds, asafetida powder, minced garlic and minced chili. Fry for one minute or until the seeds pop, the garlic has turned golden and the chilies have softened slightly. It’s okay if the spices brown a little, it adds to the flavor.
- Remove the pan from the heat and scrape the entire contents - spices and residual oil - into your pot containing the dal.
Assembly -
- Stir the Tadka into the dal until it’s been well combined. Let sit for 5-10 minutes to let the flavors mingle. Then divide amongst serving bowls and garnish with additional cilantro and pickled red chilies if desired.
- Serve with basmati rice, and/or Indian Flatbread. I made a batch of Roti to scoop the dal up and it was a delicious accompaniment.
Labels:
Asafetida,
Cilantro,
Coconut Milk,
Coriander,
Dal,
Fenugreek,
Garlic,
Gluten-Free,
Indian Fusion,
Lentils,
Main Meal,
Mustard Seeds,
Nigella Seeds,
Onions,
Soup,
Soy-Free,
Sugar-Free,
Turmeric
Wednesday, April 2, 2014
Coriander Is The Spice of Life...
I probably say this about every spice but I really, really love Coriander. Did you know that coriander is both an herb and a spice? This is because both the fresh leaves and the seeds are used. In North America we commonly refer to the seeds (ground or whole) as coriander, while we refer to the fresh leaves as cilantro. While I tend to use both in my cooking I typically reserve coriander seeds and powder for dishes of a Mediterranean, Mexican, Indian, or Middle Eastern flair, where as Cilantro I’ll toss into just about anything. I use a ridiculous amount of Cilantro, and probably buy anywhere from 3-4 large bunches of it per week. I love everything about it from it’s unique flavor to it’s smell, and it works well in almost any dish.
Interestingly enough did you know that many people can’t stand the leaves because they experience un unpleasant soapy taste or rank flavor when eating them? This is due to an aromatic chemical compound within the leaves that is somewhat related to a chemical group found in the Stink Bug. Apparently the different perceptions of coriander leaves is genetic - like that whole Asparagus/stinky pee thing - with some people having absolutely no reaction to the chemicals whatsoever, while others can’t stand it. Glad I’m one of the people who can stand Coriander/Cilantro, because I don’t know what I’d do without it! But enough about all that, lets get to some history.
History/Cultivation
Coriander is native to a wide range of areas spanning Southern Europe all the way to South Asia, and since it grows wild in so many areas it’s hard for us to pinpoint exactly where it was first cultivated. There is however plenty of evidence to suggest that Coriander has been in use for a very, very long time. For example fifteen desiccated coriander mericarps were found in the Pre-Pottery Neolithic B Level of the Nahal Hemel Cave in Israel which is potentially the oldest archeological find of coriander. Roughly half a liter of coriander mericarps were recovered from the tomb of Tutankhamun, and since the plant does not grow wild in Egypt archeologists interpret this as proof that coriander was cultivated by the ancient Egyptians.
Coriander also seems to have been cultivated in Greece since roughly the second millennium BC. A Linear B Tablet recovered from Pylos refers to the species being cultivated for use in perfume as well as for it’s culinary/medicinal properties Large quantities of the species being recovered at an Early Bronze Age layer at Sitagori in Macedonia could indicate cultivation of the species at that time..
If you want to get a little less Scientific coriander is also mentioned in the Old Testament of The Bible. It’s also said to have been used by the Romans to preserve meat and flavor bread, and it’s associated with Hippocrates who apparently used it as an aromatic stimulant.
Lastly coriander was brought to the British Colonies in North America around 1670, and became one of the first spices cultivated by early settlers.
Health Benefits
Recent animal-based research has confirmed that coriander can control blood sugar, cholesterol, and free radical production. When it was added to the diet of diabetic mice, it helped stimulate their secretion of insulin and lowered their blood sugar. When it was given to rats fed a high fat, high cholesterol diet, coriander lowered levels of total LDL cholesterol and triglycerides while increasing the levels of HDL cholesterol. This effect appears to be caused by increasing synthesis of bile by the liver and increasing the breakdown of cholesterol into other compounds. Finally in rats coriander was also shown to reduce the amount of damaged fats in their cell membranes.
Interestingly in parts of Europe coriander has been traditionally referred to as an ‘anti-diabetic’ herb, and has been documented as a traditional treatment for Type 2 Diabetes.
A study published in the June 2004 issue of the Journal of Agriculture and Food Chemistry suggests that coriander could be a natural way to fight Salmonella - which is a frequently and sometimes deadly cause of foodborne illness. Together US and Mexican researchers isolated the compound dodecenal, which laboratory tests showed is twice as effective as the commonly used antibiotic drug gentamicin at killing Salmonella.
Coriander - like many spices - also contains antioxidants, which can delay or prevent the spoilage of food seasoned with it. Though antioxidants were found in both the seeds as well as the leaves the antioxidant effect of the leaves proved to be greater.
Coriander has also been used as a folk remedy in Iran to treat anxiety and insomnia. While it’s long been used in Indian Medicine as a diuretic, as well as a carminative and digestive aid.
Lastly the essential oil produced from coriander has shown to have antimicrobial effects.
So it’s antioxidant, antibacterial, anti-diabetic, and antimicrobial - what more could you ask for?
Preparation -
I like cilantro in just about anything but some of my favorite ways to use it are in fresh salsa, guacamole, black bean soup, in grain salads like tabbouleh, in dal’s, in curries - especially spicy curries or coconut based curries - in chili, in cornbread, sprinkled over top of roasted potatoes or carrots, in lentil soup - or any soup - sprinkled over top of salad, in chutney, dressing’s, dip’s, and even on pasta. It’s great with lightly sauteed white beans, and goes pretty well with just about any Mexican, Latin American, Indian, Asian, North African, Mediterranean, or Tex-Mex style cuisine.
You can even make a holistic tea out of it by boiling the seeds - though I’ll be honest and say I have no idea what that might taste like.
There’s really so much you can do with cilantro that as long as you don’t have an aversion to it you should just start liberally using it in everything.
Interestingly enough did you know that many people can’t stand the leaves because they experience un unpleasant soapy taste or rank flavor when eating them? This is due to an aromatic chemical compound within the leaves that is somewhat related to a chemical group found in the Stink Bug. Apparently the different perceptions of coriander leaves is genetic - like that whole Asparagus/stinky pee thing - with some people having absolutely no reaction to the chemicals whatsoever, while others can’t stand it. Glad I’m one of the people who can stand Coriander/Cilantro, because I don’t know what I’d do without it! But enough about all that, lets get to some history.
History/Cultivation
Coriander is native to a wide range of areas spanning Southern Europe all the way to South Asia, and since it grows wild in so many areas it’s hard for us to pinpoint exactly where it was first cultivated. There is however plenty of evidence to suggest that Coriander has been in use for a very, very long time. For example fifteen desiccated coriander mericarps were found in the Pre-Pottery Neolithic B Level of the Nahal Hemel Cave in Israel which is potentially the oldest archeological find of coriander. Roughly half a liter of coriander mericarps were recovered from the tomb of Tutankhamun, and since the plant does not grow wild in Egypt archeologists interpret this as proof that coriander was cultivated by the ancient Egyptians.
Coriander also seems to have been cultivated in Greece since roughly the second millennium BC. A Linear B Tablet recovered from Pylos refers to the species being cultivated for use in perfume as well as for it’s culinary/medicinal properties Large quantities of the species being recovered at an Early Bronze Age layer at Sitagori in Macedonia could indicate cultivation of the species at that time..
If you want to get a little less Scientific coriander is also mentioned in the Old Testament of The Bible. It’s also said to have been used by the Romans to preserve meat and flavor bread, and it’s associated with Hippocrates who apparently used it as an aromatic stimulant.
Lastly coriander was brought to the British Colonies in North America around 1670, and became one of the first spices cultivated by early settlers.
Health Benefits
Recent animal-based research has confirmed that coriander can control blood sugar, cholesterol, and free radical production. When it was added to the diet of diabetic mice, it helped stimulate their secretion of insulin and lowered their blood sugar. When it was given to rats fed a high fat, high cholesterol diet, coriander lowered levels of total LDL cholesterol and triglycerides while increasing the levels of HDL cholesterol. This effect appears to be caused by increasing synthesis of bile by the liver and increasing the breakdown of cholesterol into other compounds. Finally in rats coriander was also shown to reduce the amount of damaged fats in their cell membranes.
Interestingly in parts of Europe coriander has been traditionally referred to as an ‘anti-diabetic’ herb, and has been documented as a traditional treatment for Type 2 Diabetes.
A study published in the June 2004 issue of the Journal of Agriculture and Food Chemistry suggests that coriander could be a natural way to fight Salmonella - which is a frequently and sometimes deadly cause of foodborne illness. Together US and Mexican researchers isolated the compound dodecenal, which laboratory tests showed is twice as effective as the commonly used antibiotic drug gentamicin at killing Salmonella.
Coriander - like many spices - also contains antioxidants, which can delay or prevent the spoilage of food seasoned with it. Though antioxidants were found in both the seeds as well as the leaves the antioxidant effect of the leaves proved to be greater.
Coriander has also been used as a folk remedy in Iran to treat anxiety and insomnia. While it’s long been used in Indian Medicine as a diuretic, as well as a carminative and digestive aid.
Lastly the essential oil produced from coriander has shown to have antimicrobial effects.
So it’s antioxidant, antibacterial, anti-diabetic, and antimicrobial - what more could you ask for?
Preparation -
I like cilantro in just about anything but some of my favorite ways to use it are in fresh salsa, guacamole, black bean soup, in grain salads like tabbouleh, in dal’s, in curries - especially spicy curries or coconut based curries - in chili, in cornbread, sprinkled over top of roasted potatoes or carrots, in lentil soup - or any soup - sprinkled over top of salad, in chutney, dressing’s, dip’s, and even on pasta. It’s great with lightly sauteed white beans, and goes pretty well with just about any Mexican, Latin American, Indian, Asian, North African, Mediterranean, or Tex-Mex style cuisine.
You can even make a holistic tea out of it by boiling the seeds - though I’ll be honest and say I have no idea what that might taste like.
There’s really so much you can do with cilantro that as long as you don’t have an aversion to it you should just start liberally using it in everything.
Sunday, September 29, 2013
Vegan Mofo #31 - Donna’s Spicy Hunan Hot Pot...
Vegan Mofo #31 - Donna’s Spicy Hunan Hot Pot
The Region - China
The Book - The Chinese Vegan Kitchen
The Author - Donna Klein
The Recipe - Spicy Hunan Hot Pot
Page #46
Difficulty - Easy
Duration - Roughly 20 minutes
By now it can be no secret that I love soups, so when I saw this recipe in The Chinese Vegan Kitchen for the Spicy Hunan Hot Pot, and saw that it only takes about 20 minutes how could I resist? Hunan Is a region in south central China. The cuisine in this region is known for it’s diversity and it’s liberal use of chili peppers, shallots and garlic. Hot pots are also a popular cooking method there, and seeing as how I’ve never made a Chinese hot pot before now would be a good time to try it out.
This particular hot pot contains ginger, garlic, shiitake mushrooms, vegetable broth, water, soy sauce, brown sugar, chili paste, sesame oil, rice noodles, tofu, bok choy, green onions, cilantro, and more hot chili sauce for garnish. It comes together faster then you can believe, the most laborious time is spent chopping, and once that is done you throw everything in the pot and simmer till done. It makes a perfect quick weeknight or weekend meal, and tastes so darn good.
As I said before I’m not normally a fan of plain tofu diced up in soup but I liked it here as it provided a cool smooth contrast to the spicy flavor. I also loved the use of bok choy and cilantro the colors of which really made the dish pop!
Labels:
Asian,
Asian Fusion,
Bok Choy,
Cilantro,
Cook Book,
Mushrooms,
Rice Noodles,
Soup,
Tofu,
Vegan Mofo
Wednesday, February 20, 2013
Thai Inspired Cabbage Salad with Creamy Tahini Lime Dressing...
This is one of my favorite salads. Seriously. I’ve been making it frequently over the past couple of years and though it’s super simple and easy it never fails to amaze me just how satisfied I am after eating it. This is one of those recipes that came about because a growling hunger was gnawing at my stomach at a time when my refrigerator was looking pretty sparse, so I had to make due with what I had. Sometimes that’s the best way to cook. Though it can be restrictive to cook with an empty fridge and an empty pantry, it can simultaneously be inspiring. It can provide you with the kind of freedom to be creative that you might not have otherwise. There’s always something a little magical in that.
Over the years this recipe has changed and transformed. The basic heart of it however has stayed the same. It was initially inspired by Thai flavors, - Thai cuisine being one of my favorites - and those hot lazy days of mid-summer when you don't want to do a lot of cooking anyway. Though no matter how I choose to make it these days, it always has the same six basic ingredients. Cabbage, cilantro, green onions, tahini, lime juice and soy sauce. Some days I use a little more of this, or a lot more of that. Some days I throw certain ingredients in, and leave others out, it all depends on my mood and what I have on hand, and that’s the beauty of this. It’s versatile! There are no hard and fast rules to making it, as long as you have those six basic ingredients it’s a winner every time.
I really do love the cool crisp cabbage slathered in thick rich, creamy, and nutty tahini. The sourness of the lime, the saltiness of the soy sauce, the bite of the onion, and the earthiness of the cilantro. It’s such a satisfying combination, made even better by various additions. A little sweetness from agave, or bell pepper, extra crunch from bean sprouts, a little spice from the radish. Cool and creamy avocado, or sweet mango, a hint of ginger or a hint of garlic. This version that I present to you is definitely a more jazzed up version of that original salad that I first made years ago, but it is extremely delicious. Of course it’s meant to be simple, so if you don’t have everything on the list don’t fret. In keeping with the spirit of the original work with what you have, and enjoy!
Thai Inspired Cabbage Salad with Creamy Tahini Lime Dressing
1 Small Nappa Cabbage sliced thin
½ Head Red Cabbage sliced thin
1 Large handful bean sprouts
2 Large Carrots shredded
1 bunch green onions Sliced
1 bunch cilantro Minced
6 Red Radishes Sliced Thin
1 Cucumber Sliced thin
1 Red Bell Pepper Sliced thin
Handful of Raw or Roasted Unsalted Peanuts
Half a Mango sliced thin (Optional)
Half an Avocado sliced thin (Optional)
Creamy Tahini Lime Dressing
4 TBSP Tahini
4 Tbsp Lime Juice
2 Tbsp Tamari
2 Tbsp Water (as needed)
1 Tbsp Agave
1 small piece Ginger Grated finely
1 Clove Garlic Minced
1/8 tsp Cayenne
- To make the salad slice, chop or mince all ingredients as directed and place into a large mixing bowl.
- Whisk together all the dressing ingredients in a small bowl and taste for flavor. Adjust seasonings as needed if you want more lime, more tamari, more garlic etc.. or if you need to thin it more with a little water.
- When the dressing is to your taste pour it over the salad in the mixing bowl. Mix the salad thoroughly to combine and serve!
- Enjoy garnished with extra cilantro and peanuts if desired. Or with sliced avocado and/or sliced mango.
PS: I chose to use Tahini here in the dressing because I love it, and it's what I had on hand. However if you were interested in a more traditional Thai taste, you could easily substitute almond butter or peanut butter for the Tahini. Though it's not something I do myself i'm sure it would be just as lovely.
Labels:
Agave,
Asian Fusion,
Bell Pepper,
Carrots,
Cilantro,
Cucumber,
Garlic,
Ginger,
Gluten-Free,
Green Onions,
Nappa Cabbage,
Oil-Free,
Peanuts,
Radish,
Red Cabbage,
Salad,
Soy Sauce,
Sugar-Free,
Tahini
Thursday, October 25, 2012
Vegan Mofo #22 - Celine & Tamasin’s Navajo Tacos...
Vegan Mofo #22 - Celine & Tamasin’s Navajo Tacos
The Book - Vegan Sandwiches Save the Day!
The Author - Celine Steen & Tamasin Noyes
The Recipe - Navajo Tacos
Page # 47
Difficulty - Easy
Duration - Roughly 30 minutes
I was intrigued by this recipe from the first moment I opened this book. The picture is scrumptious looking and the recipe sounded easy and delicious. I couldn’t wait to give it a try though I’ll admit I was initially daunted at the prospect of making my own bread. Not that I’m not capable of making my own bread but whenever I do it always seems to be such a long process. Not so in this case. This entire recipe is super simple to throw together even with the bread. The dough is simple, only has to rest for fifteen minutes and then it cooks up quickly fried in a pan of hot oil. The dough recipe is suppose to be enough for 4 pieces of bread but I found it was really only enough for two, two plate sized pieces.
As for the other ingredient’s it’s somewhat traditional taco fare all piled onto a piece of fried bread. Perhaps it’s not technically a sandwich but as it is on bread, and as I do believe I mentioned including taco’s in my Mofo theme, and as the recipe does appears in a book of vegan sandwiches I feel it was appropriate.
So what goes onto the bread? Shredded lettuce, corn salsa, tomato salsa lime wedges, avocado, cilantro and chorizo chickpeas. However I changed this around since I didn’t have any limes I just squirted some bottled lime juice over top. I also didn’t have any corn salsa and couldn’t find any organic corn salsa at the store so I just used organic frozen corn - thawed of course - and extra tomato salsa instead. The chickpeas however are the real star of the show, and I have to say - chorizo chickpeas are probably my new favorite thing ever!!
They’re quick and simple to prepare. They’re spicy and sweet. Basically you pan-fry canned chickpeas in a medley of spices - paprika, cayenne, sea salt, onion powder, minced garlic, olive oil, ketchup, apple cider vinegar, lime juice, and cumin. Until the liquid has been absorbed then you pile them on your taco and voila! Delicious! It’s nice to have both a soy and gluten-free option for a vegan chorizo that is nice and wholesome like that.
By far one of my newest favorite meals, you must try it!
Thursday, October 18, 2012
Vegan Mofo #18 - Chloe’s Falafel Sliders with Avocado Hummus
The Book - Chloe’s Kitchen
The Author - Chloe Coscarelli
The Recipe - Falafel Sliders with Avocado Hummus
Page # 107
Difficulty - Easy
Duration - 30-40 minutes
I love a good falafel, and I enjoy them pretty regularly but I never thought of turning one into a burger. I also never thought of making hummus with avocados, what a brilliant idea! Two of my favorite things hummus and avocados in one dish? Amazing!
These sliders are actually really quick to throw together. The burgers come together quickly and once they’re formed into patties they only need a few minutes of frying on both sides. You can bake them if you prefer, which will take a little longer, but still it’s relatively quick. Again I like that these were made with wholesome pantry-staple ingredients. Chickpeas, red onion, garlic, sun-dried tomatoes, parsley, cumin, coriander, sea salt, garbanzo flour, and olive oil. The only change I made here was I used cilantro instead of parsley because I didn’t have any.
Next the avocado hummus is just as simple. You whip a quarter cup of chickpeas together with an avocado, some parsley - cilantro again in my case - olive oil, garlic, lemon juice, sea salt and cayenne, and you’ve got some of the most delicious hummus I’ve ever eaten. Being the garlic lover that I am of course I added more garlic then she suggests.
Lastly you make a creamy tahini sauce that is also super easy. Blend some tahini with water, garlic, lemon juice, and salt and bam, super creamy goodness. Served on a slider bun with sliced red onion, and tomato it’s a quick, and delicious dinner. I used Pretzel slider buns because who doesn’t love a good pretzel but you could use any kind, just don’t skimp on the hummus.
Thursday, October 4, 2012
Vegan Mofo #6 -Alicia’s Avocado Melt Panini...
Vegan Mofo #6 -Alicia’s Avocado Melt Panini
The Book - Vegan Comfort Food
The Author - Alicia C. Simpson
The Recipe - Avocado Melt Panini
Page #120
Difficulty - Easy
Duration - 10 minutes
This sandwich is so simple you’ll laugh and wonder why you never thought of it. Or at least that’s how I felt. I know when I first got this cook book, and I saw the recipe I thought “Why is this even in here?” It’s too simple, too easy, it never occurred to me to actually make it until I set myself the goal of making sandwiches for Mofo.
Yesterday afternoon I needed something quick and easy to whip myself up for lunch because I was busy writing essays for school and couldn’t be distracted by any long cooking times. This was the perfect thing, and it’s made even better by the fact that I love me some avocado. Besides who doesn’t love a really good oozy-gooey, melted sandwich? I know I do. What I really love about this simple sandwich is that the avocado makes it so gooey that it feels really decadent and bad, when really it’s actually not. Avocado’s are a healthy fat, so as long as you use a minimal amount of oil and cheese this sandwich is actually pretty healthful.
I know it’s hard to tell what all’s going on in this picture because it just looks like one big gooey green monster of a mess but besides avocado the sandwich also has vegan mozzarella - I used Daiya - cilantro, red onion, and tomato. It’s suppose to be served on sourdough bread brushed with olive oil and grilled in a Panini press, but I don’t have one of those. I also didn’t have sourdough - which I’m sure that would be delicious too. Instead I used regular thinly sliced Italian bread, brushed lightly with olive oil and I seared it in my cast iron skillet. Worked beautifully. I love how the heat not only melted the cheese but even melted the avocado for a little that extra ooze.
1 avocado is suppose to be enough for 2 sandwiches, but since my husband was at work and I didn’t want to waste half an avocado I just used the whole thing. I did add a little less then 4oz of shredded Daiya Mozzarella though to even it out. Also I added in a little salt, pepper, smoked paprika and garlic powder when I mashed up my avocado, that’s how I usually like my guac and so I thought it would be just as good that way on a sandwich and I was right.
The perfect mid-afternoon lunch.
Wednesday, September 12, 2012
Grilled Corn and Avocado Salsa...
This salsa is amazing! Or as some of my younger friends might say it’s Fire! And I don’t say that lightly. I’m a big fan of salsa’s and pico’s, especially strange ones, and I’ve certainly sampled my fare share of them, but this is hands down one of my favorites.
I made it for the first time a couple of months ago, right before my husband and I went on vacation. I don’t remember what possessed me to make it, but I think it had something to do with having an abundance of Fresh corn on the cob and avocados that needed to be used before we went away. Grilled corn is a favorite dish of mine particularly in the summer and so I thought why not use my favorite method for cooking corn and combine it with one of my favorite summer time accompaniments? Thus grilled corn and avocado salsa was born. Not that I’m claiming it’s a totally original concept - I’m sure someone, somewhere has thought of it before - but it is nonetheless delicious.
I know that we’re near the end of summer now and you’re probably thinking to yourself why didn’t I post a summer recipe during the heart of summer? Well, as it happens I forgot to take a picture the night I first made this delicious salsa, then I forgot to write the recipe down too! With no recipe and no picture there wasn’t much to post about, and there weren’t even any leftovers to take a picture of the next day because we gobbled the whole thing up.
Luckily my Mother-In-Law was having a get together with some of her girlfriends today and she requested that I make the Grilled Corn Salsa for her little party. I said sure, and then worked from my memory of what I did the last time to make it all over again. It came out exactly like I remember, a beautiful blend of bold flavors, with lots of potent garlic, tangy lime, and creamy avocado, not to mention that fantastic ‘just off the grill’ flavor from the corn.
This time around I made sure to take a photo, and write the recipe down. Oh and the best part? This Grilled Corn Salsa is totally omnivore approved! It was a big hit at my mother-in-law’s party and there wasn’t a vegetarian to be found amongst them - let alone a vegan - so make it for your next gathering or party and be prepared to wow your friends/family.
Grilled Corn and Avocado Salsa
4 Ears of Corn with Husk on
4 Large Garden Tomatoes diced
8 Cloves Garlic minced (or more to taste)
1 Red Onion finely diced
1/4 C Olive Oil
1/4 C + 2 Tbsp Lime Juice
½ tsp Ground Cayenne Pepper (more if you like more heat)
1 ½ tsp Sea Salt (or more or less depending on your taste)
Black Pepper to taste
3/4 - 1 tsp Smoked Paprika (to taste)
1 Large bunch Cilantro minced
4 Large Avocados Diced
- Soak corn in a large pot of salted water for 1-2 hours.
- Remove corn from the soaking pot and shake off excess water. Using a medium heat grill corn until husks are blackened and corn kernels are bright yellow. Depending on your grill and your heat setting this can take as little as 8 minutes or as long as 20 keep an eye on it!!!
- Remove corn from grill and place onto a plate to cool. Once sufficiently cool to the touch remove the husks and any silk. Cut all the corn away from the cob and place it into a large bowl. Discard any kernels that may have burned during grilling.
- Add all the remaining ingredients except cilantro and Avocado to the salsa. Mix until thoroughly combined.
- Add in the Cilantro and Avocado mix gently until just combined. Taste for seasonings and flavor and adjust as needed. Serve with your favorite tortilla chips and for a lovely presentation garnish with thin slices of avocado and big leaves of cilantro. Enjoy!
*** Note - This recipe makes A LOT! So if you’re just making it for a couple of people, or just yourself, then half the recipe. However if you’re making it for a party or gathering this is a perfect amount. It will get eaten I assure you! Also this is super easy to make in advance. Prep everything in the morning or even the night before, then add the cilantro and avocado in at the last minute right before serving.***
Labels:
Appetizer,
Avocados,
Cayenne Pepper,
Cilantro,
Corn,
Dip,
Ethnic,
Garlic,
Gluten-Free,
Latin Fusion,
Limes,
Olive Oil,
Onions,
Quick and Easy,
Smoked Paprika,
Soy-Free,
Sugar-Free,
Tomato
Monday, July 30, 2012
Baked Sunchoke Sandwiches with Five Spice Slaw...
I’ve been rather neglectful of the blog of late I know, and for that I’m sorry. It’s just that a multitude of other things have accumulated and I’m finding it very difficult at the moment to divide my time. I know I last left off with updating about my vacation to Germany but I thought since it’s been such an awful long time since I posted a recipe I should take a few moments to do that instead.
In truth I haven’t been cooking much, or rather I have been but I’ve been making very simple food, nothing worthy of blogging about. This dish however I made just before going on vacation and it was simply superb! Really it’s perfect for a hearty lunch or a light dinner, because really, who doesn’t love a big ‘ole sloppy sandwich every once and a while? And, how often do you get to use sunchokes? Not often enough in my opinion, so I hope you enjoy, and I promise to get back to posting regularly again.
What I like best about this sandwich is the subtle hint of anise from the five spice powder. You get this great punch of Asian flavor combined with the unique taste of sunchokes, fantastic combination, trust me!
Baked Sunchoke Sandwiches with Five Spice Slaw
1 lb Sunchokes,
Sea salt and Black Pepper to taste
1 French Baguette
Sliced Tomato to serve
Thai chili sauce to serve (optional)
Five Spice Slaw
2 Carrots Grated
2 Celery Ribs diced
1 Red Bell Pepper diced
4 Garlic Cloves minced
Green Onions to taste
1 ½ C Red Cabbage finely shredded
½ C Non-dairy Mayo (I like Earth Balance)
1 ½ tsp Sesame Oil
1 tsp Coconut Amino’s or Soy Sauce
1 ½ tsp Chinese 5 Spice Powder or to taste
Sea salt Black pepper
1 Packet Stevia or to taste (Optional)
2 tsp Apple Cider Vinegar
½ Bunch Cilantro Minced
- Pre-heat oven to 400'F
- To make the Sunchokes make sure you rinse and clean them very well. They tend to be quite gritty. What I like to do is soak them in a big bowl of warm water for a few minutes. Then I scrub them good and give them a rinse.
- After they’ve been washed you want to slice them relatively thin. You can do it with a mandolin or a knife, whichever you prefer. No need to peel the chokes as long as you wash them well.
- Next spray a baking sheet with non-stick spray. Then spread the sunchoke slices out in a single layer. Depending on the size of your pan you might need to do this on two pans. Sprinkle with sea salt and black pepper to taste then place in the oven.
- Bake at 400'F for 10 minutes a side, or until the sunchokes have turned a nice golden color. Be careful not to burn or crisp them. You still want them a bit soft.
- Once done remove from the oven and set aside to cool.
- To make the Five Spice Slaw mix together carrots, red pepper, red cabbage, celery, cilantro, garlic and green onions in a big mixing bowl.
- In a small bowl whisk together the Mayo, sesame oil, coconut amino’s or soy sauce, Chinese 5 spice powder, apple cider vinegar, salt, pepper, and stevia to taste. Taste for flavor and adjust seasonings as needed.
- Pour the dressing over the Slaw and mix to thoroughly combine. Taste and adjust flavor as needed.
- To assemble your sandwich slice the Baguette in half crosswise, then make a slit lengthwise down each half. Layer in the baked sunchokes, top with a few slices of tomato, and a heaping amount of slaw. Then drizzle a little Thai Chili Sauce over top if desired, and enjoy!
PS: Gluten-Free if using Coconut Amino's or GF Tamari. Soy-Free if using Soy-Free non-dairy Mayo
Thursday, June 7, 2012
Curry Kapitan with Coconut and Chili Relish...
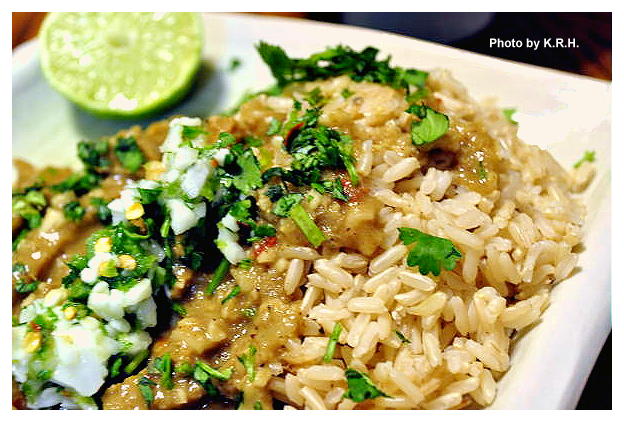
My latest foray into Malaysian Cooking. Curry Kapitan is traditionally made with chicken, and it’s said that the dish recalls the traditional role of the Chinese Kapitan, who was a man of considerable social standing amongst the Malay and Chinese people in old Melaka. Possibly invented by the Peranakans - the Malay-Chinese - to present to the Kapitan or to celebrate his role. It owes it’s flavor to the cultural melting pot of Old Melaka, and to the traditions of Chinese, Malay, Portugese, and Indian cuisine. Of course for my version I used homemade seitan instead of chicken, and decided to use soy sauce for a salty taste instead of dried shrimp paste.
This dish is nothing if not flavorful. The aroma alone is mouth-watering, but the taste... incredible! Though the ingredient list may seem long, this dish actually comes together rather quickly and it is worth every ounce of effort. When I first set out to make this dish I had no idea what to expect, and there were a few moments at least where I thought the whole thing would end in disaster. However when it came time to eat, and I took my first bite of curry Kapitan I was in love. The flavor is so complex that it’s hard to describe, but it has every flavor note you could possibly want in a dish. You can adjust the seasonings to make it as hot or mild as you like, but a little bit of kick is part of what makes this dish so fantastic. Use the chilies as a garnish, with a squeeze of lime and you won’t be disappointed. It tastes even better the next day!
Curry Kapitan with Coconut and Chili Relish
For the Rempah
½-1 tsp red pepper flakes
1 large red onion
10 cloves garlic
thumb sized piece of ginger
1 tbsp soy sauce
½ tsp ground turmeric
2 tsp Chinese five spice powder
1/4-1/2 tsp ground cinnamon
For the Curry
2 Tbsp tamarind paste
Flesh from half of 1 Fresh Thai Coconut (roasted)
2 tbsp peanut oil
1 15oz can coconut milk + 1/3 c water
1-2 Pack Stevia
1 ½ lb Seitan (Homemade or Store bought)
For the Chili Relish
½ - 1 Jalapeno Minced (Depending on how spicy you want it)
½-1 Red Chili Minced or ½-1 tsp red pepper flakes
½ Bunch Cilantro Minced
Flesh from half of 1 Fresh Thai Coconut
Juice of 1 Lime
To Serve
1 Lime
Extra Cilantro minced
Cooked Brown Rice
- First you must open your coconut. To do this the easiest way is to get a cleaver. It doesn’t have to be a good cleaver, it doesn’t have to be a $500 one, a $50 one will work just as good. Use the cleaver to whack your coconut a couple of times to break through. Drain the liquid out into a bowl or measuring cup and refrigerate to dink later, it’s not needed for the recipe.
- Once the liquid has been drained from the coconut you can split it in half. Use your cleaver and give the coconut a great whack in the middle. If like me you’re not strong enough to get the cleaver all the way through the coconut in one whack, and not skilled enough to keep hitting it in the exact same spot, use a rubber mallet to hammer the cleaver down through the coconut. This works really great, and fast.
- Once your coconut is in half use a spoon to scoop out the delicious white flesh. Once all the flesh has been removed rinse it under cold water and rub any filament away. Pat the coconut dry, and then slice it thin. Reserve half the amount of coconut in a bowl, to use as part of the relish and dry roast the other half in a pan over medium heat until it’s golden brown. Be careful not to burn it. The coconut should emit a slight nutty aroma.
- Once the coconut is a nice golden brown remove it and grind it either in a food processor or mortar and pestle until it resembles corse sugar grinds. Place in a bowl and set aside.
- Now to make the Rempah. In a food processor blend together the garlic, ginger and onion. Add in the soy sauce and pulse to combine. Stir in the turmeric, cinnamon and five spice powder.
- Heat the oil in a large pan over medium-high heat and stir in the rempah. Fry for five to eight minutes until the mixture becomes fragrant.
- Add the seitan to the pan and fry another 3-5 minutes, to let the seitan brown a little.
- Add in the coconut milk, water, Tamarind, stevia and season with sea salt and black pepper. Bring the mixture to a boil, then reduce heat and let simmer for 10-20 minutes. Add in the reserved roasted coconut.
- In the meantime combine all the relish ingredients in a bowl.
- Serve the Curry Kapitan over a bed of brown rice, garnished with extra cilantro, some squeezed lime, and the chili relish.
*** Note - To make this dish Gluten-Free use Wheat Free Tamari and a soy-based ‘meat’ or tofu. To make this dish Soy-Free use Coconut Amino’s instead of soy sauce.***
Labels:
Chinese 5 Spice,
Cilantro,
Cinnamon,
Coconut,
Coconut Milk,
Curry,
Garlic,
Ginger,
Gluten-Free,
Jalapeno,
Limes,
Onions,
Red Pepper Flakes,
Seitan,
Soy Sauce,
Soy-Free,
Sugar-Free,
Tamarind,
Turmeric,
Veganize-It
Subscribe to:
Posts (Atom)