Monday, December 31, 2012

Christmas Eggnog Cheesecake in a Cinnamon Graham Cracker Crust...


I think it’s absolutely shameful that I haven’t posted since the 20th, but you know how crazy it gets with the holidays. Between Christmas Eve, Christmas Day, Boxing Day, My Husband’s Birthday and now New Years I haven’t had much time - nor quite frankly much energy - to get my shit together and do a big holiday recap post. One is coming I promise, just not tonight, and maybe not even tomorrow night, but it’s on it’s way.

We had a lovely holiday, and I hope you did as well. I cooked like a demon for days, making entirely too much food, and eating way more then I should have. However as I told my husband, my twin brother E and my good friend N that the mark of a successful holiday is that you eat and drink as much as you like, and as long as you fit into your pants the next day you’ve won. Which I definitely did, though honestly next year I think I’m doing Christmas low-key and simple. Some sort of crock pot dish and a salad, that’s it.


But now onto what this post is really about. Before going vegan I used to love egg nog. Some of you might remember my Vegan Nog review from last year? Anyway, I bought a carton at the end of November and thoroughly enjoyed it, and one day while drinking it I decided that I absolutely needed to make a nog cheesecake for Christmas. Somehow I convinced myself that Christmas just wouldn’t be Christmas without one and so I tried to find a good recipe. Can you believe that out of the nearly 100 cook books I own not a single one of them had a nog cheesecake recipe? What a disappointment, but instead of getting upset about it I hit up Google looking for a recipe. However I struck out again when Google only popped up like 4 Nog Cheesecake recipes that were vegan. Every other recipe that popped up was some re-posted and tweaked version of one of the original four recipes. The reason I didn’t like any of those recipes was because they were either too complicated or either two simple. I know, you’re probably thinking I’m complicated but I really wanted a good nog cheesecake that was sweet, rich, and tasted like nog, and many of the recipes only had you using ½ cup of Nog. Not nearly enough in my opinion. So after some careful consideration I decided to throw caution to the wind and try and come up with my own delicious nog cheesecake recipe.

I think I hit it bag on. This is exactly what I wanted, and tasted so good. Exactly how I had it pictured in my mind. Now fair word of warning, there is absolutely nothing healthy or low fat about this cheesecake but it is fantastic! And for one or two days a year you can certainly indulge a little. The cake is definitely omnivore approved, and even my husband who never used to like cheesecake and never liked nog - doesn’t even particularly care for Vegan nog - thought it was phenomenal. So make it and enjoy!

Now I hope you all have a Happy New Year, and I’ll see you back here in 2013. I hope to be a little more active on the blog next year.


Christmas Eggnog Cheesecake in a Cinnamon Graham Cracker Crust 

16oz Silken Tofu
2 8oz Containers Vegan Cream Cheese
1 C Sugar
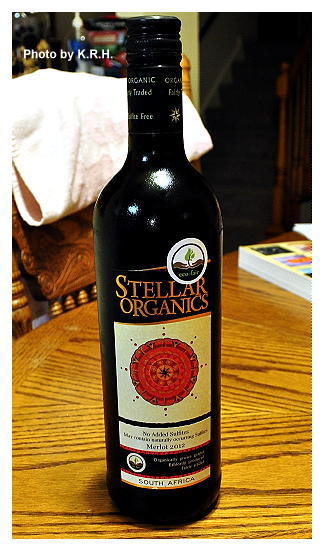
1 C So Delicious Coconut Milk Nog (or Favorite non-dairy eggnog)
2 Tbsp Lemon Juice
6 Tbsp Dark Rum
1 tsp Vanilla Extract
3/4 tsp Ground Nutmeg
1/2 tsp Ground Cinnamon
6 Tbsp Cornstarch
Pinch of Sea Salt

Crust 

!0-14oz Cinnamon Flavored Graham Crackers
1-2 Tbsp Vanilla Almond Milk
1-2 Tbsp Melted Coconut Oil
Pinch of Sea Salt
Extra cinnamon if desired.

Preheat Oven to 350'F

- Pulse Graham crackers to a fine meal in a food processor. Then add in the wet ingredients  salt and extra cinnamon and pulse a few times until the mixture is moist and cohesive.

- Grease a 9 inch round cake pan and press crust into the bottom.

- Bake at 350'F for 10 minutes and remove from the oven to cool.

- To make the filling combine all ingredients into a food processor and process until completely smooth. Taste for flavor and adjust ingredients to taste as needed.

- Pour mixture into the cooled Graham crust and place into the oven. Bake at 350'F for 55-75 minutes. Checking often after the 50 minute mark to make sure the cake doesn’t burn or brown. You want it to cook, but stay as close to white as possible. When you pull the cake out it will still be wobbly in the middle that’s okay.

- Leave the cake out and let cool at room temperature for 1 hour. Then place in the fridge uncovered and let cool completely 2-3 hours. Then cover and keep in the fridge until ready to serve.

- Enjoy topped with a caramel rum sauce, or vegan whipped cream!

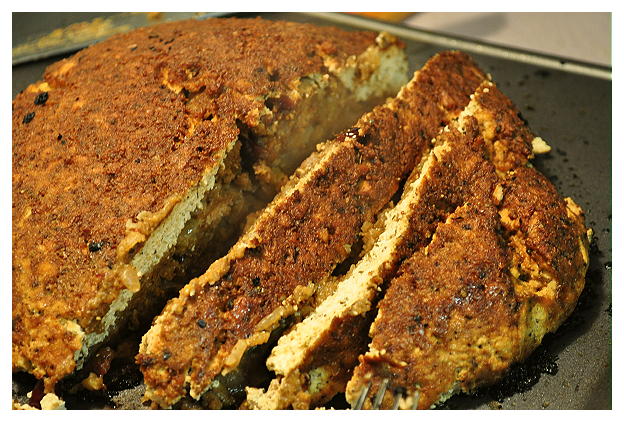
PS: Sorry for the lack of pictures but I had something of a mishap Christmas Eve night. I brought this cheesecake to my Husband’s aunts house, and like usual my arms were full of different dishes. As I tried to balance the dishes in my arms while reaching out to open the door to let myself into the house I dropped the cake! Lucky for me it landed right side up and so the only damage was a big ripple through the surface that occurred when the cake hit the pavement. To make the prettiest picture I could I sliced a piece of relatively unharmed cake out and took a picture of it alone on a plate. Voila! Still tasted great, even if it ended up looking a bit ugly.

Thursday, December 20, 2012

Simple Socca with Fava Bean Spread and Sauteed Kale...


I know I haven’t been keeping up with this as well as I should have been, but with the holiday season I’ve been a little pressed for time. School has been brutal the past couple of weeks as I struggled to finish all of my assignments in time to take my final - which I did today, and aced! - And any time I’ve had not devoted to school has been divided between work, holiday planning/Christmas shopping and watching documentaries on Netflix until my one month free-trial runs out on the 24th. Suffice to say I haven’t been doing a lot of cooking, or rather I have been, but I haven’t really been ‘creating. ‘ Mostly I’ve been relying on my good and trusty cook books to see me through, particularly those cook books devoted to healthful recipes that can be made in under 30 minutes. As unlike everyone else - or so it seems - I’m actually trying to keep with my routine this holiday season rather then use the holiday as an excuse to excessively binge on high fat junk foods. So I’ve been eating a lot of salad - which I’ve been craving lately anyway - and a lot of soup because the days are growing colder, a lot of things you probably wouldn’t find to enticing except for maybe the Socca.


Socca you see is my new favorite thing. - That and firtatta but more on that another time! Now Socca is a specialty in Southeastern French cuisine particularly in and around Nice. However it apparently originates in Genoa, Italy, and over time spread to Nice where it became popular throughout the region of the Ligurian Sea.  There are apparently similar dishes in countries such as Algeria, Argentina and Uruguay but I digress. The Socca I’m talking about is of the French variety. For those of you still unsure of what a Socca is, it’s a crispy thin pancake cooked in a cast iron skillet and eaten as a finger food while piping hot. It’s seasoned with fresh herbs, and generous amounts of black pepper and is typically eaten on it’s own. However I’m quite fond of turning my socca into a kind of pizza topped with a bean dip instead of a marinara sauce, and a lightly dressed salad. Making your meal an all in one sure makes cleanup a breeze! Over the past few weeks I’ve made quite a few socca’s, I’m typically making it twice a week now, and so I’ve tried a lot of different things, but this was one of my favorite combinations, and my husbands too. It’s sort of a cross between Provincial and Italian with a little red hot jalapeno thrown in for good measure, but what it really is, is delicious so I hope you try it out.


Simple Socca with Fava Bean Spread and Sauteed Kale

Socca 

1 ½ C Chickpea Flour
½ tsp Sea Salt
1/4 - ½ tsp Freshly Ground Black Pepper
3-4 Nice Sprigs Fresh Rosemary minced
1 tsp Dried Basil
1 tsp Dried Oregano
½ tsp Garlic Powder
1 ½ C Water
2 Tbsp Olive Oil
1/4 C Minced Kalamata Olives
1/4 C Minced Sun-dried Tomatoes
1/4 C Minced Green Onion
Minced Pickled Jalapeno to taste - try between 2-4 Tbsp.

Fava Bean and Sun-dried Tomato Spread

1 15oz Can Fava Beans drained and rinsed
2 Garlic Cloves - or to taste
6 Oil-Packed Sun-Dried Tomatoes
1 tsp Dried Basil
Sea Salt and Black Pepper to Taste
2 Tbsp Olive Oil - optional
1 Tbsp Lemon Juice
2 Tbsp Water to thin as needed

Topping 

1-2 Tbsp Olive Oil
1 Large Red Onion sliced thin
1 Large Bunch Kale cut into bite sized pieces.
10 Cherry Tomatoes halved
2 Tbsp Hemp or Sesame Seeds
Sea Salt and Pepper to taste
Ume Vinegar to taste


- Preheat oven to 425'F

- To make Socca whisk flour, salt, pepper, rosemary, basil, oregano, garlic powder, water and olive oil together in a bowl and set aside for 30 minutes.  - While Socca is resting you can make the Fava Spread and the topping.

- After thirty minutes whisk in all remaining ingridients.

- Heat a cast iron skillet over high heat on top of the stove. Spray with a little non-stick cooking spray. Once hot enough that water sizzles pour the Socca batter into the pan. Let the socca cook on high in the pan for 1 minute until the edges turn golden brown.

- Turn off the burner, and remove the cast iron pan, placing it into the heated oven. Bake for 15-20 minutes until light golden brown.

- To make the Fava Bean Spread combine all ingredients in a food processor and process until completely smooth and spreadable. Adding more water or oil to thin as needed. Taste for seasonings and adjust as necessary.

- To make topping. Heat olive oil in a pan over medium heat. Add onion and saute until translucent about 5-7 minutes.

- Add Kale and saute for another 5-8 minutes until kale is wilted and tender. Add in cherry tomatoes and saute for 2-3 minutes. Season with salt, pepper, ume vinegar and hemp seeds. When the mixture has reached it’s desired tenderness and flavor remove from heat.

- To assemble, cut the socca into four equal pieces and divide amongst 2-4 people. Spread each wedge of socca with a generous amount of the fava spread and top with a generous helping of the sauteed kale mixture.

- Enjoy! Seriously i'm so in love with socca you may see more recipes for it and variations of it from me in the future!


PS: Socca’s seem to be becoming a little more popular in North America. Over the past few weeks I’ve been making them I’ve seen them mentioned a few times in magazines, blog posts, and even in newly released cook books! Also another great fact about Socca is that they’re naturally gluten-free, and vegan! 

Thursday, December 13, 2012

Coconut Curry Miso Soup...


I can’t believe I forgot to post about this recipe, or maybe I can believe it. Things have been so busy around here lately that it’s easy to loose track. Well, the day I received my first CSA box I was so excited to use that Tat Soi that I decided to make it for lunch. It was a Friday afternoon and I needed something filling, hearty and warming before heading to work for the night shift. Originally I thought about making Miso soup, that seems to be my most common go to meal when I need something delicious and filling on short notice, but as much as I love Miso soup I was looking for something more. The more I thought about it the more I realized I was also in the mood for curry, and coconut. Now I know from past experiments that miso and curry actually go pretty well together but I wasn’t sure on the coconut. I envisioned like a Thai coconut curry of sorts but with the addition of Miso to give it that bold, well rounded, and savory flavor I love so much from miso soup.


I didn’t know if it would workout but in the end I thought I couldn’t do that much harm. I guess I needn’t have worried too much, because the soup turned out so good that my husband and I gobbled up the whole pot. That’s two huge heaping bowls a piece. Now as much as you may want to eat this whole pot yourself once you make it, I highly suggest you share it with a loved one instead and serve a salad alongside it to complete the meal.


Coconut Curry Miso Soup

2 ½ C Water
2/3 C Coconut Cream***
1/4 C Red Miso
4 Garlic Cloves Minced
Thumb Sized piece of Ginger minced
2 tsp Red Curry Paste
1/4 C Frozen Green Peas
1/4 C Green Onion sliced
½ Head of Tat Soi Sliced
1 Carrot Grated
1/3 C Black Soybeans
½ C Sliced Shiitake Mushrooms
1/4 tsp Ground Turmeric
2 ½ tsp Sliced Lemon Grass
Black Pepper to taste

- Combine Water, coconut cream, and red miso in a medium sized pot. Place over medium heat and stir until all the miso and coconut cream is dissolved and the mixture is smooth.

- Add in the garlic, ginger, lemon grass, curry paste, and turmeric. Mix to incorporate, until curry paste is dissolved.

- Add mushrooms, tat soi, and simmer for 10-15 minutes over medium or medium low heat until vegetables are soft.

- Add all other ingredients and simmer for 5-8 more minutes until warmed through.

-Serve hot and enjoy!


*** Note - Coconut Cream is the thick cream that normally rises to the top of a can of coconut milk. Scrape the cream out of the can and use, do not use the liquid for this recipe. Reserve it for another use. Also in some Asian groceries and markets canned coconut cream is available.

PS: If you don't have Tat Soi you can use another Asian Green, though I highly recommend searching for the tat soi.

Sunday, December 9, 2012

DIY: Perfume...


I have a confession to make. I used to be a fragrance junkie. Yeah, that’s right I was a perfume addict. I used to have a shelf full of bottles of the stuff, all different brands, and scents, the majority of them expensive. I wore it everyday and I loved it. Then I woke up to the fact that I was paying for a lot more then a pretty scent in all those pretty little glass bottles. Virtually all perfumes contain synthetic compounds and toxic chemicals. We’re talking endocrine disrupters, phthalates, parabens, hormone disrupters. These toxins in your favorite designer fragrances can cause anything from migraines and headaches to allergic reaction, allergy development, asthma, cancer and more. Once I got wise to this, the perfumes I once loved so dearly began smelling a little less sweet. Though it did take me a little time to kick the habit completely. You know how it is, some things you can quite cold potato while others take a bit more effort. For me, junking the perfume habit was all about trial and error. Meaning - if I wasn’t going to use perfume to smell good anymore what was I going to do? And how was it going to work? Figuring that kind of stuff out takes time, and can only be done by experimentation, so that’s what I did.

Last Christmas I was given Kim Barnouin’s book “Skinny Bitch: Home Beauty and Style” by my good friend J, which I promptly began reading after the festivities were over. There is a section in the book about perfume which was my first awakening to the dangers of store-bought fragrance. Of course, for some people when it comes to certain things more then one awakening is needed, so I didn’t give up perfume right away. I kept on with it, but the seed had been planted, and eventually I began doing my own research into why perfume was so bad. By the time I was finished I realized that if I truly cared about my body, my health, the environment, and the animals I couldn’t in good conscience continue to wear perfume. So I pledged right then and there not to buy any new perfume, and I began my search for safe, healthful, cruelty-free, and sustainable alternatives. Unfortunately as I came to realize very quickly not too many of those exist in the world, and of the few companies out there who are producing safe, cruelty-free, environmentally friendly fragrances I realized by looking at the ingredients that I could easily do the same thing at home for a fraction of the cost. It would just take a little bit of study, some creativity, and good old trial and error.

As far as I’m concerned good quality essential oils are the way to go. They may seem expensive at first when you see that most of them only come in a quantity of one or two ounces, but these oils are super concentrated and highly potent so a little really does go a long way. It’s been maybe ten months since I bought my very first bottle of essential oil and I haven’t had to replace a single one yet. When you take into consideration that I use these oils for more then just my own homemade perfume, you see that you actually get a lot of bang for your buck. However just because you start buying essential oils instead of commercial fragrances doesn't mean you can stop being a savvy consumer. You still need to read the labels to ensure that the essential oils you're buying are the real deal. Too many cheap oils are out there for sale, full of synthetic chemicals. What you want to look for is oils that are organic, 100% pure essential oil, have no synthetics, and also ones that are ethically wildcrafted. Don't automatically go for the cheapest oils you can find, but keep in mind that you don't have to break the bank for good quality either. Shop smart, keep savvy.

Now I’ll admit that in the beginning it took a little getting used to. Since homemade perfumes using essential oils are made by blending essential oils with a carrier oil - such as jojoba, almond, avocado, borage, primrose, apricot kernel etc.. - it can leave you feeling a little greasy or oily afterwards. Whereas perfume sprays on, dries and you forget it’s even there. So at first I wasn’t used to that sensation of ‘feeling’ the perfume on my skin, it was a bit odd, and annoying, and I felt slick. So I began using a little less, and making sure I rubbed it in well, and over time - not very long really - I stopped noticing it. I adapted, and I love the scents that I create so much that I would never even consider going back to toxin laden perfume. It’s great to have absolute control over what you’re putting into and onto your body, and with the wealth of beautiful essential oils out there your scent combinations and fragrance options are virtually endless. Plus I feel much cleaner using homemade perfume, I don’t sneeze after I apply it, or get random headaches, and I can breath easier. In fact breathing easier is the most amazing thing. You know that old saying that some people don’t know their sick until they’re actually healthy? Well it’s kind of like that. I didn’t know I had a sensitivity to artificial scents until I stopped using them. Now I can barely stand to be around people who are wearing perfume, they could be standing five to ten feet away from me and I start feeling a headache come on, my nose tickles, and my throat constricts. Walking through a department store these days is absolute murder, lucky for me I rarely find myself in department stores.

When it comes to DIY perfume my favorite carrier oil to use is Almond Oil, which is good for sensitive skin like mine. Though you can use any good carrier oil that suits your fancy and your skin type. While my favorite essential oils to use for fragrance include - but are not limited to - peppermint, eucalyptus, lavender, rosemary, white thyme, lemongrass, citronella, and ylang ylang, depending on my mood. Since pledging at the beginning of the year not to buy any new perfume my supply of commercial store-bought fragrance has diminished to one half-full bottle of Calvin Klein’s Euphoria. This was previously my favorite fragrance in the world, and now all I see when I look at it is toxic waste. Still I can’t bring myself to throw away a perfectly ‘good’ half bottle of perfume, and yet I can’t bring myself to put it onto my skin either. Perhaps I’ll keep it as a reminder of why I don’t want that sort of thing in my life anymore.

One other interesting thing I’ve realized in this trial and error of making my own perfume is that perfume truly serves no purpose. It’s entirely unnecessary. As much as I love my own homemade stuff I don’t wear it everyday. I typically only wear it to work, or if my husband and I are going out somewhere nice, or if I’m in need of a little mood elevation - because essential oils are great for this too! The rest of the time I don’t wear any fragrance, and I’m perfectly okay with that. Our society has conditioned us into believing that to be desirable we need to constantly smell of something other then ourselves, and this is utter nonsense. We have some how been bamboozled into thinking that our own natural scents are offensive or unflattering and this is simply not the case. The moment you truly realize this you will be set free, and you will never again seek out the wisdom of corporations to try and determine how you should and shouldn’t smell.

So give essential oils a try and see how you like them, but of course don’t take only my word for it. Do the research yourself and see. If you’re interested in more information the Environmental Working Group did a study testing 17 top name brand perfumes. In the end they found that each product had at least 14 secret chemicals that weren’t listed on the packaging because of the ‘trade secret’ laws. A total of 38 secret chemicals were found among all seventeen brands.  A dozen of these chemicals were hormone disrupters, with an average of four hormone disrupting chemicals per product. Ten of the ingredient in each product could cause allergies to develop or cause allergic reaction. But the worst part is that the EWG found that roughly 91% of the ingredients in each producing including those on the label and those not included in the label had not been tested for human safety. You see like various other industries The International Fragrance Association (IFRA) is self-regulating, which means they can test their own products for safety and then hand over their reports, but no governing agency double checks the proclaimed safety of the products tested they just take the IFRA’s word for it. How messed up is that?

So if you’re interested in looking into this more in depth, or you want to find out what’s in the products you have sitting in your makeup bag or on your shelf check out the Environmental Working Group’s Skin Deep Cosmetics Database.

EWG's Skin Deep Cosmetic's Database

You might also like to browse through a copy of

Kim Barnouin’s book “Skinny Bitch: Home Beauty and Style”

PS: This DIY Perfume post is part of a new series of posts I have planned about making green products yourself at home. It's a way to avoid chemical contamination, stop supporting corporations who only care about their profit margins not your health, lessen our carbon footprint on the planet, and save a few bucks in the process. As I become more and more aware of the realities of the common everyday products we buy without giving it a second though I realize there has to be a better way, and as I discover these better ways I hope to share them with you too! 

Thursday, December 6, 2012

Swiss Chard Salad with Sauteed Stems in A Dijon Vinaigrette...


Last night I felt like making a salad to go with our dinner, but I didn’t have any lettuce and I didn’t have any kale. I had cabbage but we’d just eaten a cabbage salad with dinner the night before and so I wanted something different. The only other green I had available was a huge bunch of Rainbow Swiss Chard that I bought on Sunday simply because it looked beautiful and because it was on sale. I took a good look at those big beautiful leaves and thought ‘why not? You can make a salad out of this can’t you?’ In fact I knew it was possible to make a salad out of Chard because I’d made a Romaine and Chard salad more then a year ago, but chard is just one of those greens that while I love it, I never really use it. Plus I was worried that without the subtle sweetness of romaine the chard would be too bitter. Of course since I didn’t have anything else to offset the flavor I had to do my best and make it work somehow.


In the end this salad exceeded all expectations, and for whatever reason it really felt like a winter salad. Maybe because of the dark leafy leaves, or maybe because Chard is more associated with winter, I don’t know but it felt appropriate and it tasted fantastic. Since I didn’t want to waste the stems and because I didn’t want to eat the stems raw I decided to saute them, I like sauteed chard stems, they taste vaguely of beets and I think it was a perfect topper for this salad. They were tasty, tender-crisp, made a beautiful presentation and throwing them into the salad is a great way to utilize the whole plant.


Though it may sound strange to you at first trust me when I say this salad is fan-freaking-tastic. My husband and I loved it so much we gobbled up massive bowls of it, and barely had room left for the soup I’d made as our main course. It’s got a great combination of flavors and textures, and each one really lingers on the tongue. Try it!


Swiss Chard Salad with Sauteed Stems in A Dijon Vinaigrette

1 Large bunch Rainbow Swiss Chard
1 Red Onion sliced thin
2 carrots grated
½ C dried Blueberries
1/4 C Toasted Pecans (optional)
2 Tbsp Hemp Seeds or more to taste
1 tsp olive oil

Dijon Vinaigrette 

3 Tbsp Hemp Seed Oil
2 Tbsp Apple Cider Vinegar
1 ½ Tbsp Dijon Mustard
4 Medjool Dates
1/4-1/3 C Walnuts
1-2 Garlic Cloves to taste
½-1 Tsp Onion Powder
Sea Salt and Black Pepper to taste
Dash of White Pepper
1/4 C Purified Water to thin or more/less as needed.

- Remove Chard leaves from stems. Set stems aside and cut leaves into bite sized pieces. Toss the Chard leaves into a big bowl and add grated carrots, dried blueberries, pecans, and hemp seeds. Set aside.

- Mince the reserved Swiss Chard stems then add them to a medium sized pan with the tsp of olive oil and sliced red onions. Saute over medium-high heat for 5-8 minutes until stems are tender-crisp and onions are translucent. Remove from heat and add them to the salad.

Note - It’s okay if the pan that you’re cooking the stems and onions in gets a bit dry, you don’t want the mixture to be liquidly so you may even want to use less then 1 tsp of oil. Just enough really so that they cook nicely, get a bit of flavor and don’t stick to the pan. 

- To make vinaigrette place all ingredients in a food processor or high speed blender and blend until completely smooth. Taste for flavor, and consistency and thin the dressing as needed and adjust flavor to taste.

- Poor the vinaigrette over the salad and using two wooden spoons gently massage the dressing into the salad making sure all chard leaves get covered. Massage the salad for roughly 5 minutes until the chard leaves wilt slightly and soften.

- Divide amongst bowls and enjoy!


PS: In summer when fresh blueberries are in season you can make this salad with those instead of dry. You could also probably substitute the nuts for a nut that's a little more summery, like a Macadamia. Yum! 

Wednesday, December 5, 2012

Superfood Lassi....


You all know by now - I’m sure - how much I love my morning smoothie, but the past few months I’ve been lazy. I’ve been relying on protein powders like Vega and now Hemp Protein to make a quick and easy meal in a glass each morning. It’s delicious, it’s convenient, I don’t have to think about what to put in it - almond milk, banana, almond butter, flax seeds and protein powder, done! The added bonus is that those powders make the smoothie filling, filling enough that it usually keeps me satisfied until lunch when I’m at work. The drawback to it is that over time it gets boring to drink the same smoothie each day, plus drinking a protein powder smoothie is significantly decreasing the amount of nutrition I’m getting from whole fresh organic fruits and vegetables.

The other drawback is that I don’t feel very energized. Not like you think I would considering the claims of a lot of these protein powders. The past few months I’ve felt lazy, lethargic, and tired. I’ve been going to bed early - for me - waking up late - for me - sleeping poorly, napping every afternoon for longer then I should be, and I seem to generally get less done each day. For a while I didn’t even notice this was going on. It was just one of those things that got lost in the shuffle of the day. A few weeks ago something finally clicked and I realized that there was no logical or reasonable explanation for why I was feeling so tired and lazy when I was getting far more sleep then is typical for me.

Now, I can’t solely blame the protein powder smoothies. If you buy organic brands with no or low sugar content and good vitamin and mineral content they’re fantastic in a pinch. However for me at least they were becoming part of a bigger problem, an overall lack of adequate nutritional intake.  I was still eat reasonably healthfully, - it's not as if i'd been gorging on vegan mac and cheese, vegan pizza, and vegan cupcakes - I was still taking my vitamins and eating plenty of veggies, but the kinds of foods I was eating on a day to day basis were different. I was eating a lot of cooked foods, a lot of one pot meals - and other meals - that were high in starch, grains and carbohydrates. There was a lot of tofu, seitan and tempeh, too much sugar, and not enough fresh fruits and vegetables. I wasn't eating enough dark leafy greens, I was eating virtually no salads, and hardly any pure raw food at all. For breakfast i'd I have the protein smoothie, for lunch it would typically be leftovers from the night before, then dinner would be a new dish of one of the above mentioned items i'd been relying to heavily on. How did this happen? I have no idea, it probably started when I got back from vacation, and grew gradually worse as late summer turned into autumn and heavy, hearty winter fare began making it's way into my kitchen again. As i'm sure everyone knows, once you get into a slump you kind of just stick there for a while until something finally snaps you out of it.

For me, this revelation that I was in a food slump began to enter my conscious when I joined the CSA last month, which coincided with my Husband and I's efforts to begin eating only organic foods - at least as much as possible, i'd say we're doing this about 90-95% at the moment. Joining the CSA basically forces you to use what you have on hand unless you want to go shopping which kind of defeats the purpose of the CSA. It also forces you to eat what's in season, which is something I really like. Buying only organic food sort of forces you to do the same thing. The CSA doesn't provide us with everything we need and so I have to pick up a produce item here or there, and if one wants to eat all organic it is far cheaper to buy those foods that are in season. Both the CSA and buying only Organic also sort of force you to do more with less, they force you to be creative and find new ways of cooking foods. I've really enjoyed this little experiment over the past few weeks, and I've noticed the change it's brought about in me. However the final break in the slump came with my undertaking of a knew culinary challenge.

During the month of October there was a big movement for people to commit to a diet free of processed foods, for just the month of October. The goal was to eat only whole, fresh fruits and vegetables, and simple seeds, nuts, legumes, beans and grains. You weren't suppose to use any processed ingredients  and if you did buy something processed it had to fall within two specific rules. 1) The item has to be something you could conceivably make at home with common pantry ingredients  and 2) It had to have minimal ingredients and be as minimally processed as possible. I really wanted to embark on this challenge but since October was also Vegan Mofo and I'd already committed to my sandwich project I couldn't. Well, there's nothing to stop me from taking the challenge now is there? So I've been trying to eat this way for the past couple of weeks, slowly weaning myself off of sugar and processed foods, buying only processed foods that fall under those two guidelines. Buying things like Soy Sauce, Miso, Non-dairy milk, vegetable broth, a few non-dairy yogurts here and there, a little tofu and tempeh, and canned beans. All things I could make at home but don't for convenience sake, because really, who's going to sit around and spend several weeks fermenting soybeans to make miso? Even i'm not that hard-core - not yet anyway. Although I have slowly been phasing out canned beans in favor of dried, and I actually really like it. Canned beans are fantastic for quick and easy meals but making beans from scratch isn't as hard as I initially thought it was.

Anyway, I've really been enjoying this little adventure, and I've been doing great with it, but it wasn't until Friday that I finally kicked the protein powder smoothies in favor of that delicious almond banana oatmeal I made, then Monday I began a new smoothie regiment. I also started a new exercise routine Monday, as well as starting a new holistic body care regiment. These past three days I’ve felt better then ever. I’ve had way more energy, I’ve been staying up later, waking up earlier, and not taking naps in the day. I’ve been getting more done, I’ve been less tired overall, and most importantly I just feel really, really good. I feel fantastic really, and so I wanted to share one of the new smoothie creations I’ve been enjoying this week.

Now I apologize for the less then exciting picture, it is winter here after all so there isn’t much in the way of scenery, and the smoothie itself is a less then brilliant color. It’s a bit of a mauve-brown color thanks to the combination of yellow, green and purple foods but oh well. It’s the taste that matters and this smoothie is fantastic. It tastes like an Indian Lassi, but magical, and full of superfood nutrition. Seriously this smoothie has six superfoods in it, SIX! Goji and Acai berry, Hemp and Flax seeds, Spirulina, and wheatgrass, what more could you ask for? It's the perfect way to amp you up and start the day!


Superfood Lassi

6oz Plain Unsweetened Almond Milk Yogurt
1 Banana
1 Cup Chopped Frozen Mango Chunks
2 Tbsp Goji Berries
1 Pack Frozen Acai Berry Puree (3.5oz)
1 tsp Spirulina
2 tsp Flax Seeds
2 tsp Hemp Seeds
1 Cube Frozen Wheatgrass or 1 Tbsp Powder
½ C Purified Water

- Place all ingredients in a high-speed blender and blend on high until completely smooth. 1-2 minutes. Pour into a glass and enjoy!

Note: While you can make your own almond milk yogurt at home, I chose to buy a store bought brand with an extremely low sugar content, and minimal ingredients. If you prefer you could also replace the almond milk yogurt with a soy, or coconut yogurt.

PS: Stay tuned because I have a lot more healthful recipes, and information to share!

Sunday, December 2, 2012

Memories of Ireland, Potato and Leek Soup


When my husband and I were in Ireland in 2009 we ate a ton of Potato and Leek soup, we probably ate it once everyday, served with a few slices of thick dark bread. It was the main staple of our diet on that particular trip, and not because we were vegetarian - at the time neither of us were - but because it was cheap, abundant, delicious and filling. My husband and I have never been the kind of people that travel for the food. We don’t seek out exotic culinary delights, or spend copious amounts of money on fine dining. When we travel we spend our money on seeing and doing amazing things, because if you’re not going to get the most out of your trip then what’s the point in going right? Which explains the potato and leek soup. You see, it’s a pretty standard offering in most pubs and restaurants in Ireland, and when we were there you could get a nice hearty bowl of it with bread for between four to six euro, four to six pounds if we’re talking about Northern Ireland. That makes for a pretty cheap lunch or dinner for two people while traveling and because potatoes are so heavy one bowl really is sufficient. If you’re extra hungry you might want to throw a three euro side salad into the mix, but it still keeps the cost pretty low.


We traveled to fourteen different cities in Ireland, and we ate Potato and Leek soup all the way from Dublin to Belfast, to Derry, to Galway, to Killkenny, to Cork, to Waterford, back to Dublin. No matter where we went the soup was always phenomenal, and I just fell in love with it - as I did so many other things about Ireland. After we returned home, despite having eaten it every day for the duration of our trip I wanted more potato leek soup. So began my mission to make a potato leek soup from scratch that was just as good as those I’d sampled in Ireland. For the past 2 and a half years I’ve failed at every turn and I have tried so, so many recipes. Whether the recipes be vegetarian or vegan I was never able to find a good recipe, not online and not in any cook book. Every recipe I’ve tried the soup was too bland, too thick, too much potato, too much thyme. The consistency was never right, the flavor was never spot on, it was never quite rich enough or creamy enough, and for a while I thought all was lost.


Then Friday I woke up to cold weather as one so often does in Chicago at the end of November, and I found myself with a hankering for potato and leek soup! I looked through a handful of my cook books trying to find recipes for said soup that I hadn’t yet tried, but to no avail. Nothing was catching my eye. After some moments of impatient contemplation I realized I didn’t really need a recipe at all. All I needed was my own creativity and knowhow, and so I went to the kitchen and set myself to work, with nothing to guide my endeavor except countless memories of Irish pubs and magical landscapes.


After having tried so many recipes - some from very renown people in the culinary profession - I had no hope that my little effort would yield anything palatable, but I had to try, and in the end, when I tasted what I had created I knew I had come as close to the perfect Irish bowl of potato and leek soup that I ever would. This soup turned out so rich and creamy, and bursting with flavor. It is everything a good potato and leek soup should be, and it’s fairly quick and easy to prepare. If you’re a potato leek soup fan I urge you to try it, and serve it a long a nice thick slice of pumpernickel bread.


Memories of Ireland, Potato and Leek Soup

2 Tbsp Earth Balance or other Vegan non-dairy Butter
1 Very large leek, washed and sliced.
3 medium sized Yukon Gold Potatoes skin on chopped
2-3 Celery Ribs chopped
4 Garlic Cloves Minced
2 Bay Leaves
1 tsp Thyme
½ tsp Sage
½ tsp White Pepper
1/4 tsp Smoked Paprika
Sea salt and Black Pepper to taste
1 ½ C Vegetable Broth
1 ½ C Water + 1 Vegan ‘Chicken’ Bouillon Cube
1 Bunch Parsley Minced
2/3 C Cashews + additional 1/3 C Cashews as needed
1 C Water
1 Tbsp Lemon Juice
1 Tbsp White Miso

- Melt Earth Balance in a pot on the stove over medium heat. Add in the leek and celery. Saute for 4 minutes then add in the garlic, bay leaves, thyme and sage and saute another 4-5 minutes until leeks are tender and bright green.

- Add in the potatoes, the vegetable broth and the water with the bouillon cube. Bring to a boil then reduce heat to a good simmer. Allow to simmer for 15-20 minutes or until potatoes are tender when pierced with a fork.  Around the last five minutes of simmering add in the white pepper, smoked paprika, black pepper and salt. Stir to combine.

- While the soup is simmering combine the cashews, the water, the lemon juice and the white miso in a high speed blender and process on high until completely smooth. About 1 minute. If the mixture looks a little to watery you can add in up to another 1/3 cup of cashews for a thicker cream.

- Remove the cashew cream to a measuring cup and set aside. It should have yielded roughly one and a half cups of cream.

- No need to clean the blender out, instead remove the bay leaves from the soup and discard then transfer the hot soup to the blender being careful not to spill any or burn yourself. Once all of the soup is in the blender blend on high until completely smooth and creamy. Return the soup to the pot.

- Stir in 1 cup of the cashew cream. Stir in minced parsley, and season with any additional salt and pepper.

- Ladle the soup into bowls and serve with an additional swirl of the cashew cream, and a few twists of a black pepper mill. Enjoy!

PS: You can make this soup oil-free by using water to saute instead of earth balance. You can make the soup soy-free by using a chickpea or barley based miso instead of a soy one, or just leave the miso out altogether.

PPS: If you’ve never been to Ireland you really must go. It is one of the most spectacular places I have ever been! 

Friday, November 30, 2012

Almond Banana Oatmeal...


How many of you eat oatmeal everyday? Or even a few times a week? I know I don’t, and it’s not because I don’t like oatmeal, it’s just that... well I’ve never really been a breakfast eater. That’s not to say I don’t like a good breakfast now and again but typically when I wake up early I don’t eat much for an hour or two and then I end up grabbing an apple and making a smoothie. It’s quick, it’s easy, and by that time I’m ravenous so it works. Some fruit and a smoothie for breakfast certainly isn’t a bad way to start the day but there are some days where you just want more, and I feel that oatmeal is one of those unutilized breakfast foods. It definitely is in my house anyway. It also comes with the unfortunate stigma of being bland, flavorless and boring.


But oatmeal Is so good for us. It’s filling, it provides sustainable energy throughout the morning, it gives us beneficial nutrients, and best of all it helps to stabilize blood sugar and lower cholesterol which keeps our hearts and arteries happy. As for the taste, well, the oatmeal I made this morning knocks the socks off of any other oatmeal I’ve ever eaten. It’s super flavorful, extremely delicious and pretty quick.


I guess because the weather is getting colder now, I’ve started to crave more hearty winter fare, oatmeal definitely falls into that category and since I was still a bit hungry after my morning apple bu not quite ravenous I decided to take the time and make myself a bowl. For lack of ingredient variety and for the comfort of having something familiar I chose to incorporate ingredients into my oatmeal that I generally through into my morning smoothie. Such as banana, almond butter, flax, and hemp. What’s really great about this oatmeal is rather then add sliced bananas on top after it’s cooked, I cook the bananas right in the oatmeal itself. When bananas cook down they develop a truly amazing sweet, full bodied flavor that’s addictive. It made for a super satisfying morning meal that’s kept me full all day. You have to try it, even if you think you don’t like oatmeal!


Almond Banana Oatmeal 

½ C Steel Cut Oats
2 C Water
1 Large Banana
1 ½ - 2 heaping TBSP Almond Butter
½ - 3/4 tsp Ground Cinnamon
1 tsp Vanilla Extract
1 Tbsp Maple Syrup
1 tsp Hemp Seeds
1 tsp Ground Flax Seeds
2 Dried Apricots Sliced
2 Dried Plums Sliced
Splash of your Favorite Almond Milk (Optional - I used Vanilla)

- In a medium sized saucepan combine the steel cut oats and the water. Bring to a boil, boil for ten minutes then reduce the heat to a simmer and simmer for an additional 20-30 minutes until the water has been absorbed to your liking and the oats are soft and creamy.

- During the last 8 minutes of cooking slice the banana into the pot and stir to combine. Also add in the almond butter and stir to combine. By the time the oats are done cooking the banana slices should have cooked down into the oatmeal leaving no chunks. Though a few bits are okay.

- Once oats are done remove the pot from the heat and stir in the cinnamon, maple syrup and vanilla extract.

- Scrape oatmeal into a large bowl if you’re very hungry or divide into two bowls for two smaller portions.

- Top with hemp seeds, flax seeds, and chopped fruit - though you may need more of each of these if your making two portions. Then add your favorite almond milk if you like a wet oatmeal and enjoy!


PS: If you prefer a dry oatmeal this taste amazing just as is, the milk isn’t really necessary. I mostly used it for consistency and for a bit of extra vanilla flavor. Also feel free to experiment with different types of dried fruits. I used Apricots and Plums because that’s what I had, plus I’m quite partial to dried plums in things. Though you could use any dried fruit you like.

PPS: Oatmeal can be made Gluten-Free if you are using Gluten-Free Oats


Thursday, November 29, 2012

Heidi's Seed Crusted Amaranth Biscuits...


More and more lately I find myself interested in cooking and baking more with whole grain flour types that aren’t wheat. I don’t have a problem with wheat, or a gluten-intolerance but I like the idea of expanding my palate, and there is such a wealth of different kinds of flour out there that it seems almost criminal not to try them out. Not to mention that switching up your flours keeps things interesting.

My pantry is well stocked with a variety of flours, all of them organic. I have unbleached all-purpose, whole wheat, whole wheat pastry, white rice flour, soy flour, almond flour, buckwheat flour, amaranth flour, and several starches like potato, tapioca and corn. Despite having these things I rarely use the non-wheat flours, and so I didn’t really know what to use nor what to make. Then one afternoon I was sitting at my desk flipping through Heidi Swanson’s cook book “Super Natural Cooking” which is a book I never use and found total inspiration in her recipe for Seed Crusted Amaranth Biscuits. The recipe isn’t gluten-free - which is fine for me but not for those who may have a gluten-intolerance, - but it does utilize amaranth flour which I was really interested in trying out. I also really liked the idea of a seedy biscuit. I love seeds, and anyway I can include more of them into my cooking is a good enough reason for me to try. I particularly love seeds in bread, which probably stems from my childhood. As my mom always makes homemade bread - and it’s the best - and her bread recipes usually include seeds of some kind.


So anyway I decided to give these biscuits a go. It’s an easy enough recipe to veganize just swap butter for Earth Balance, Milk for your favorite non-dairy milk, and leave out the egg-white. The egg is really not necessary anyway as it’s used for a wash to coat the tops of the biscuits before sprinkling on the seeds. You can achieve the same effect by brushing them with a little melted Earth Balance which is what I did. For the seed mixture I used a combination of poppy, brown sesame, black sesame, and nigella seeds. Nigella seeds are another thing I’ve had in my pantry for a long time and never used, but I’m so glad I took Heidi’s suggestion and tried them in this recipe because they give the biscuits a nice subtle onion flavor which I loved. Also because I only had about 3/4 C left of unsweetened almond milk, I also ended up using about a 1/2 C of Vanilla Almond milk and making up the remaining difference with water. I thought this might make the biscuits sweet, or have them taste like vanilla but it didn't do either. At least not that we could tell. They certainly didn't taste like vanilla, and neither of us found them to be sweet. They were very savory, but because vanilla almond milk is richer then unsweetened almond milk perhaps it did something subtle to the overall flavor or the texture.

Though these biscuits smelt like heaven when they were baking, my husband was rather skeptical about them when he saw them. My husband loves his biscuits, and has always been a ‘traditional biscuit’ kind of guy, not to mention the fact that he’s not as over the moon about seeds as I am. Yet he sat down with a plate of three earth balanced smeared biscuits and began to eat. I waited with baited breath as he took his first bite, and then his second. I watched his facial features change and contort and was ready to call the experiment a fail when he suddenly declared that “These are the best biscuits I’ve ever eaten!” Wow! High praise from him indeed. I took a bite of my own biscuit and had to agree. That’s not to say that we’ll never return to eating the regular kind of biscuit again, but it does inspire my tastebuds to make these more and more often, they are just to good to pass up, and way to good not to at least try.


This recipe used whole what flour and whole wheat pastry flour in addition to the amaranth flour and at first you might think that would make these pretty dense but they are surprisingly light and fluffy, even flaky. They are super moist which I love and have a really great well rounded flavor, thanks both to the flour and the seeds. These biscuits really are a joy to eat, and when you eat them you really feel as though you’re putting something good into your body, like you’re fueling it properly for the day. They’re also very filling thanks to their whole-grainyness. If you have this book you should definitely try these out, and if you don’t have the book it may be worth checking out just for these biscuits alone. I’m certainly glad I gave this cook book a second look, because it’s reminded me that just because a book is vegetarian instead of vegan doesn’t mean it doesn’t have some recipes worth trying.

Tuesday, November 27, 2012

Kyleigh’s All-Time Favorite Salad Dressing...


Some days all I want is a big green salad. It doesn’t have to be fancy, it doesn’t have to be elaborate. Some lettuce, onion, and maybe a bit of tomato or some dried cranberries will do, with a light sweet garlicky vinaigrette. Now, don’t get me wrong, I love all those big honkin’ salads that are complete meals in themselves and contain upwards of fifty ingredients, but when I’m really craving greens, I go for simple more often then not, and while I love all those rich, elaborate, and creamy salad dressings too a lot of times I just want a dressing that tastes ‘clean’ without having to sacrifice on flavor.

This is the perfect summer salad in my opinion, clean and simple, but it’s also the perfect winter salad. It’s great for serving alongside heavier meals like Spaghetti and bean balls, in rich tomato sauce, or for serving next to a big ‘ole bowl of chili, or as a component to a large holiday dinner such as Thanksgiving. It’s a great starter salad, because it’s so delicious, yet it’s flavor won’t overwhelm the main course.

When I first ditched bottled salad dressing’s - years ago, before I ever went vegan or vegetarian - this was the first homemade dressing I came up with, and it was a hit with everyone. Since the day I first served a salad with this dressing to someone other then my husband I have been frequently told by people that they ‘love my salads’ and that I ‘make the best salads’ I don’t know about that, but it’s nice knowing that I’m at least capable of making something satisfying that a wide range of people can enjoy and appreciate. I hope you enjoy this simple dressing too.


Kyleigh’s All-Time Favorite Salad Dressing

4-6 Garlic Cloves
7 Tbsp Olive Oil
2 Tbsp Red Raspberry Vinegar
1-2 Tbsp Water - to thin and dilute as needed.
1 tsp Sugar - more or less to taste
A pinch of Black Pepper, Dried Basil, and Dried Oregano to taste

- Heat a dry skillet over medium heat until hot. Add the garlic cloves and toast until golden brown on both sides, stirring frequently to prevent the garlic from burning or sticking.

- Remove the garlic from the pan and place in a food processor. Add Oil, Vinegar, sugar, and spices. Blend until completely smooth. Taste for flavor and then add water as needed, adjusting oil, vinegar and spices as you see fit.

- Pour over a a big ‘ole green salad and enjoy!

PS: You could use this dressing on virtually any kind of salad but my favorite types of greens to use with this dressing are Bibb, Green Leaf, Romaine, Iceberg and Spinach. Typically I use Romaine more often then not. You also have an endless amount of ‘add-in’ options such as tomato, red onion, green onion, nuts, seeds, dried fruits, olives,  bell pepper, red cabbage, chopped veggies, apples, pears etc.. though I like to keep it simple leaving it around 3-4 ingredients at most.

PPS: If you like you can make this sugar-free by leaving out the sugar, or by adding in another mild flavored sweetener of your choice. 

Sunday, November 25, 2012

American Thanksgiving For Two...


Well, I hope everyone had a wonderful American Thanksgiving on Thursday. Mine was quiet, but lovely. Traditionally we go to my husband’s aunt’s house for American Thanksgiving but thanks to a grueling work schedule that had my husband working on Thanksgiving morning and then again on Thanksgiving night he opted to stay home instead. Not an easy decisions for him because my husband loves nothing more then family gatherings, but this year for the sake of sanity and sleep he decided it would be better to stay home.  Of course I was a bit saddened by this decisions at first too, because I love holiday celebrations, but as it turned out it was actually quite nice to just have the two of us together relaxing. I made a lovely dinner, and didn’t have to worry about how long it would take or what time everything had to go into the oven. There was no fuss, no worry, no prep, no concerns about if there would be enough food or if everyone would like everything I was making. I didn’t have to worry about it being ready by the time people arrived, for once I could just relax and take it easy. Truth be told it was also nice not having to be around a big huge Turkey Corpse and listen to people chitter on about how delicious it was. I find that the longer I’m vegan the more this bothers me. In the beginning seeing people eat meat and relish in it didn’t bother me in the slightest, but the longer I’m vegan the more offensive I find it. Perhaps this is a little of my 'twin brother' E’s influence as he is what I call an ‘aggressive vegan’ meaning he’s very ‘in your face’ about his beliefs and has a rather low tolerance for omnivores especially those who are unhealthy. Whereas I have always taken the more compassionate non-confrontational route in my day to day real life interactions with people. Anyway, all that aside , it was definitely nice to have and be part of a purely compassionate and pure Thanksgiving celebration. It made me feel good, and despite the cloud of work hanging over my husband’s head, we were happy.

Home Made Thanksgiving Tofu Roast


Since it was just the two of us I decided to make a simple dinner. I didn’t want to make anything difficult or fussy, or lavish, but something that would be special enough to make it feel like a holiday. So I chose to make Alicia Silverstone’s Thanksgiving Tofu from her book “The Kind Diet.” the Thanksgiving Tofu is a tofu roast, which is essentially like a home-made Tofurkey. I had originally considered buying a Tofurkey or Field Roast instead but since I’m trying to avoid all processed foods at the moment - more to come about this in another post - I opted to try my hand at making my own. The idea of making one from scratch was really appealing to me, and I liked how simple the recipe was.

Roasted Roots


I did do a few things differently, for instance instead of just having plain tofu I added some poultry seasoning and oregano and basil to the mashed tofu before placing it in the cheesecloth lined colander to drain. Then instead of just basting it with soy sauce and sesame oil I also added in a bit of liquid smoke and maple syrup. Just a Tbsp of Syrup and a tsp or 2 of smoke. It turned out very good, and the only thing I would do differently is to bake it uncovered for longer then the recipe specifies. I want quite a firm roast next time with a really crispy crust. This was only moderately firm. I think next time I would also drain my tofu in my tofu press first and then place it into the colander.

Pan Gravy 


Per Alicia’s suggestion I also stuffed the tofu roast with her cornbread stuffing. Which was excellent. I didn’t have Sorghum and because I didn’t want to use a full cup of Maple Syrup I used half Maple, and half Molasses and it worked out fantastic. I will definitely make this stuffing again, and the only other thing I did differently was replace the nuts with cranberries because my husband doesn’t like nuts.

Green Salad with Awesome Dressing


To go along with all of this I very simply roasted some root vegetables - carrots, parsnips, scarlet turnips, celery root and onion - in some oil, salt, pepper, garlic and lemon. Then I made Robin Robinson’s Pan Gravy and Cranberry Apple Relish from her cook book “Party Vegan” both of which turned out fantastic. The cranberry apple relish was particularly good. I made only 2 changes to it, I used a ½ cup of brown sugar instead of a full cup, and I used pomegranate juice instead of water. Amazing! It was the perfect combination of tart and sweet so I’ll definitely be making this again. Also the gravy both smelled and tasted so similar to my Grandma’s pan gravy, so much so in fact that it’s hard to believe this gravy didn’t actually have pan drippings in it!

Cranberry Apple Relish


I also made a simple green salad of Bibb lettuce, red cabbage, and green onion, topped with my all-time favorite home-made salad dressing - I’ll provide the recipe in a follow up post tomorrow.

Cappuccino Mousse Pie


Then of course you can’t have a celebration without dessert. I chose to make Isa Chandra Moskowitz and Terry Hope Romero’s Cappuccino Mousse Pie from their book “Vegan Pie in the Sky” and it was incredible. The pie is mostly almond milk with some sugar, 4 tbsp espresso powder and 1/4 cup of chocolate chips but it tastes so rich and decadent you’d think there was cream cheese and tons of chocolate and all sorts of bad nasty stuff in it. This is a pie so rich you can hardly eat more then one slice, and it is fantastic. It’s also one of the easiest pies in the book to make, and comes together super fast. So if you have this book you should definitely make it!


The rest of the day was spent simply. We slept in, we enjoyed each other’s company. We took our dog for a couple of walks. The weather was a bit strange, it started off sunny and became increasingly gloomy as the day progressed. Eventually it became very rainy and windy while we were out walking and so dark that it almost seemed like it was midnight when it was only four o’clock. Though it was rather warm most of the day and evening. I quite enjoy that kind of weather, coming from Vancouver I am no stranger to rain, or high winds, nor am I a stranger to gloomy weather or dark afternoons. So these things often remind me of home, especially considering Canadian Thanksgivings have a tendency to be rainy. Though I also thought the weather was appropriate considering the violence of the occasion. As if the gods were crying for all the slaughtered turkey’s.

A shot of the roast sliced open, you can kind of see the stuffing
peeking out, sorry I forgot to take a picture of it on it's own.


While I was cooking I enjoyed the inactive time by reading “Cloud Atlas” and then after my husband left for work I spent the night watching movies, which is not something I normally do but since it was a holiday I thought ‘to hell with school.’ So I watched almost the entire audio-commentary for David Fincher’s remake of “The Girl With The Dragon Tattoo” and then I watched “The Hunger Games.”

A close up of my delicious plate! 


All in all a good holiday, I hope you enjoyed yours too!

PS: We also indulged in this delicious bottle of Organic, Vegan, Red Wine from South Africa, YUM!