Monday, February 27, 2012

Caramelized Fennel and Kale Soup...


Fennel I think is one of those things that people either love or hate, and for the longest time I hated it. I had eaten fennel in all sorts of ways trying to condition myself to enjoy it’s potent and aromatic flavor. I’d eaten it roasted, raw, sauteed, as a seasoning, as a spice as a seed but to no avail. There was absolutely nothing about fennel that ever succeeded in charming me, in fact I found it to taste quite a bit like licorice which I also dislike.


Then about a month or so ago I came across a recipe that required caramelized Fennel. Desperate to make the recipe I decided this would be my last dance with the culturally and historically rich foodstuff and if again I disliked it then I would never again attempt to enjoy it. To say that recipe was a success would be an understatement, and in fact the caramelized fennel was one of the best things about it. I dreamed of fennel afterwards it was that good! Newly won over to this intricate little bulb I’ve been playing around a bit with fennel in my cooking lately. I’ve made a few soups and stir-fries all of which were tasty but because I’m so ignorant as to what flavor combinations go well with fennel I’m still going through the learning curve stage.


However last week I did develop the most delicious soup recipe. It wildly exceeded my expectations and was the perfect accompaniment to a cold night. My husband and I huddled around the kitchen table with the wind howling outside and gulped down two huge steaming bowls of soup each. So delicious is the combination of fennel and kale that we could barely stop eating long enough to get a conversation in.


Aside from the great flavor of this soup there is the added benefit of it being relatively low fat and super packed with all sorts of antioxidant goodness thanks for the fennel, kale and garlic. I highly recommend it, and if you’re a fennel hater like I was I implore you to eat it caramelized with a bit of Agave, I swear you’ll never think of it in the same way again.


Caramelized Fennel and Kale Soup

2 tsp Olive Oil
18 Cloves Garlic minced
2 Bunches Kale
2 Fennel Bulbs sliced thin
1 Red Onion sliced thin
4 C Vegetable Broth
3 C Water
3-4 Tbsp Agave Nectar
2-3 tsp Gram Masala
2 Tbsp Fennel Leaves minced
Sea Salt and Black Pepper to taste

- First start by caramelizing your fennel and onion. Slice them very thin either using a knife or a mandolin as I did. Heat 1 tsp of the olive oil in a large pan over medium then add the sliced fennel and onion. Saute for about 10-20 minutes stirring briefly every 5 minutes or so to make sure the fennel doesn’t burn. If oil evaporates you can add in a bit more or use water instead as I did. Keep sauteeing until the fennel and onion turn a nice golden color. 5 or so minutes before the fennel is done add in 2 tbsp of the agave and stir until well combined. When finished caramelizing remove from the heat and set aside.

- Meanwhile heat remaining tsp of olive oil in a soup pot over medium heat and add minced garlic. Saute for 5-7 minutes until softened, fragrant and starting to turn golden.

- Add vegetable broth into the pot with the garlic and add the caramelized fennel and onion mixture. Stir to combine then bring to a boil.

- Tear or cut your kale into bite sized pieces removing the stems. Add the kale to the pot with the broth and reduce heat to let simmer. Stir in the kale. There will be a lot of kale so it’ll probably take some stirring to incorporate it all into the pot, but don’t worry it’ll get there. If soup is becoming too thick add in water 1 cup at a time. Depending on how large your fennel and kale are you may not need all the water or you may need a bit more.

- Once all kale and water has been incorporated add in the gram masala, salt, pepper and remaining tbsp of agave (optional) stir to combine and let the soup simmer for about 10 minutes until kale is wilted and bright green. You don’t want to over cook it, you want the kale to retain a little bit of texture.

- Serve with some crusty bread to dip into the broth and enjoy!


Friday, February 24, 2012

Roasted Vegetable Mango Salsa...


Now I am of the opinion that you can’t have a good taco without good salsa. I am a big fan of salsa’s and Pico de gallo, any kinds and all kinds, the more unusual the better. Though I am particularly fond of salsa’s or pico’s that include fruits such as mango, pineapple, peach etc.. There’s just something so divine about that combination of tart tomatoes and spicy chili blended with the sweetness of fruit and the pungency of garlic. A winner in my book every time.

Since I was feeling in a very tropical mood the other night, and since the tacos I was making included coconut, avocado, and plantains I thought it only fitting that I make a fruity salsa to accompany them. As luck would have it I had mangoes on hand and pineapple juice in the fridge, so I set to work. Since I’ve always been rather fond of roasted and fire roasted salsa’s I decided to use that method and in the end It worked out brilliantly.


Fair warning this recipe does make quite a bit of salsa, but it’s so delicious you’re going to be glad that it does. Even when all your taco’s are eaten and you have no more leftovers to compile into a tortilla you can use this salsa on chips or wherever else you might typically use salsa. It’s really fantastic, especially for all the mango lovers - like me - out there.


Roasted Vegetable Mango Salsa

2 Large Tomatoes
1 Red Onion
1 Red Pepper
5 Cloves Garlic
1 Bunch Cilantro minced
2 Ripe Mangos
Sea Salt and Black Pepper to taste
Crushed Red Chili or Cayenne Pepper to taste (Start with 1/4 tsp and work your way up)
3-5 tbsp Pineapple Juice
3-5 tbsp Lime Juice
Garlic Powder to taste if needed

- Preheat your oven to 400'F (200"C) and lightly spray a baking sheet with non-stick spray.

- Slice each tomato into 6-8 pieces, quarter your onion and pepper. Separate onion layers. Lay all the veggies and garlic cloves out onto the baking sheet and place in the oven. Roast for 15-20 minutes until
veggies begin to get soft and fragrant.

- Peel and chop mangoes, place into a food processor. When veggies are done remove them from the oven and let cool for 5-10 minutes. Place them into the food processor with the mango and pulse until everything is finely diced but not pureed.

- Remove contents of food processor to a bowl. Mince cilantro with a chef knife then add it to the bowl, along with the pineapple juice, lime juice, sea salt, pepper and chili or cayenne. Stir until thoroughly combined. Taste and adjust seasoning as needed. If you don’t feel that the 5 cloves give enough garlic flavor to your salsa once they’ve been roasted you can add in some garlic powder to taste or 1-2 cloves raw minced garlic if you like.

- Enjoy served with my Coconut ‘Shrimp’ Tacos or any of your favorite taco, burrito, fajita’s or just with chips.


*** Note - How much pineapple and lime juice you’ll need are going to be dependant on how much your fruit and vegetables yield. Your tomatoes, mangoes etc... may be larger or smaller then mine, so adjust the liquid as needed. You don’t want it soupy. ***

Thursday, February 23, 2012

Coconut ‘Shrimp’ Tacos with Fried Plantains and Collard Greens...


Ah - I’ve been trying to post for the past two days and was unable to due to some sort of technical difficulty that appears to now be sorted out. This is the recipe I’d planned to post Tuesday, and since I haven’t been able to post in a couple I’ve got a nice backlog of posts waiting to be published. So stay tuned for all the delicious treats I have in store!


As winter is slowly coming to it’s end for another year I find I too am gradually moving away from the cozy, comforting meals associated with the colder months. It seems to always happen this way, about a month or so before the true end to a season my body is already geared up to enter the next phase. While I’m still enjoying soups, and other wintery treats, for the most part my heart and tastebuds are set on spring and summer.


Now before I was a vegetarian, shrimp was always a food I associated with spring, and especially summer. Coconut shrimp in particular, and over the course of the weekend I found myself longing for that sweet, crisp, coconut flavor. Of course I had no desire to eat actual shrimp, and no intention of doing so, but I wanted to find a way to recreate that flavor and texture, and I wanted to enjoy it wrapped in a summery Caribbean inspired kind of taco.


I have to say that despite some of my reservations while cooking, this dish turned out phenomenally and totally satisfied that tropical flair I was craving. Of course these little tempeh bites taste nothing like what I remember of shrimp but that’s not the point, the point is the fried coconut! Combined with the plantains, the collards, the coconut milk drizzle and the mango salsa this dish was heaven on a plate!


Now to put this whole thing together it does require a bit of work. There are several steps you have to go through to make the different taco components but it is so worth it, and if you prepare ahead of time it actually doesn’t take that long. So give it a go, really in the grand scheme of things it’s not a lot to ask for some good homemade coconut ‘shrimp’ tacos! Enjoy, and stay tuned for the salsa recipe which I plan on posting tomorrow.


Coconut ‘Shrimp’ Tacos with Fried Plantains and Collard Greens

Coconut ‘Shrimp’

1 lb Tempeh cut in cubes
1 15 oz can coconut milk
½ tsp garlic powder
½ tsp dried dill
1 tsp hot sauce
1 tsp kelp granules
½ C Panko Breadcrumbs (or gluten-free breadcrumbs if you're GF)
3/4 C Coconut Flakes (I used unsweetened)
1 tsp Cajun Seasoning Blend (or to taste)

Taco Fixin’s

1 Bunch Collard Greens chopped in bite sized pieces.
Whole Wheat or Corn Tortillas
1 Recipe Sweet Shredded Fried Plantains (Recipe Follows)
Roasted Vegetable Mango Salsa (Recipe to come)
Diced Avocado
Diced Green Onion
Coconut Milk Drizzle (Optional)

Sweet Shredded Fried Plantains

3 Plantains
2 Tbsp Coconut Oil
½ tsp Cinnamon
½ tsp Cajun spice blend
1 tbsp Brown Sugar
Water if needed

- First prepare your tempeh. If you’re working with two 8oz blocks of tempeh as I was cut each block horizontally into 6-8 slices. Then slice vertically in half or in thirds depending on how big you want your cubes. Place tempeh into an airtight container when cubed.

- Mix together the coconut milk, garlic powder, dill, kelp, and hot sauce. Pour over the tempeh. Close the container give it a good shake until all the tempeh is covered and then place in the fridge and let marinate for 1-2 hours.

- After the tempeh has marinated mix breadcrumbs, coconut flakes and Cajun seasoning in a shallow bowl. Grab a tempeh cube from the marinating dish give it a shake to remove any excess coconut milk then roll it in the breadcrumb mixture until it’s breaded on all sides. Set aside and repeat until all cubes have been breaded. Reserve the marinade mixture if you want to make a coconut drizzle.

- Once all of your tempeh has been breaded you can cook it 1 of 2 ways. The first way being to fry them. If you have a deep fryer just pop them in there for a few minutes until they’re golden brown. Then remove them and drain on a plate lined with paper towels. If you don’t have a deep fryer you can fry them in about a ½ cup of coconut oil or nuteral vegetable oil in a large frying pan, until golden brown. If however you’re like me and like to try and keep on the healthier side of things you can bake your coconut tempeh in the oven.

- Preheat your oven to 400'F (200'C) lightly grease a baking sheet then place your tempeh cubes on it. Spray the top of each cube with a tiny bit of non-stick spray then place in the oven and bake for 15 minutes. Remove from the oven turn each cube over and return to the oven to cook for another 10-15 minutes. Make sure to keep an eye on them so they don’t burn. Smaller cubes will cook faster and larger cubes will take longer so times may vary.

- While your tempeh is cooking you can work on your plantains. Grab 3 large, green plantains. Cut off the ends and peel. I find the easiest way to be running the tip of a knife down two sides then just dig in with my nail and roll the peel off.

- Once the peel has been removed take a vegetable peeler and run it along the plantains like you would to peel a carrot. You’ll get nice long thin strips of plantain, continue until all plantains have been turned into strips. You’ll probably be left with a core of plantain that your peeler can’t turn into strips, and that’s okay just cut it into thin rounds and toss it in with the strips. Waste not want not right?

- Heat the coconut oil in a large frying pan over high heat. Once melted add the plantains and stir until all strips are coated. Add in the cinnamon, sugar and Cajun Seasoning. Stir again until thoroughly coated and then cook on medium heat until plantains are golden brown and soft. About 8-10 minutes. Make sure to stir frequently so no plantains stick to the bottom, and you may need to add more oil, or water. I added in about a 1/4 of water because I didn’t want to use more oil, and it worked brilliantly. When plantains are finished remove them from the heat and if you like you can drain them on a paper towel. I personally didn’t bother draining them.

- To make your collards just add an inch of water into a pot fitted with a steamer basket. Add your chopped up collards and steam for 3-5 minutes until they’re bright green and wilted. They shouldn’t be mushy but soft, with still a bit of texture. Remove them immediately from the steamer basket and place onto a plate or in a bowl.

- To make the coconut drizzle all you have to do is stir 1-2 packets of stevia into the reserved coconut marinade along with 1-2 tbsp flaked coconut. Set aside, until ready to use.

- To assemble your taco place one tortilla on a plate. Layer on some collard greens and then a generous spoonful of shredded plantains. Top with 4-5 cubes of coconut tempeh, and a bit of coconut milk drizzle. Top with diced green onion, avocado, and a generous spoonful or two of roasted vegetable mango salsa. Wrap up tight and enjoy!


*** Note - This dish can be made Gluten-Free if using Corn Tortilla's and GF Breadcrumbs***

Monday, February 20, 2012

Product Review - Good Belly Probiotic Juice Drink...


Good Belly, I’m totally addicted!

I’d seen Good Belly around plenty before, however why I never tried it until two weeks ago I don’t know. After all I’m a total fruit juice junkie! I absolutely love the stuff, particularly orange juice, and while I try not to buy it too often - because of the high calorie/high sugar content of most commercial fruit juices, - there are definitely times where I just can’t say no.

A couple of weeks ago I was at grocery, shopping and the juice wall inevitably caught my eye. I opened the refrigerated door to grab my usual carton of O.J. when the bright flashy carton’s of Good Belly caught my eye. I grabbed one and began reading the side, which gave me a lot of information about probiotics and healthy digestion. Which I’ve read plenty about already but it’s always nice to have a refresher. Besides up until that point I hadn’t really known much about Good Belly, and didn’t know that it contained 20 billion live and active cultures. 20 billion! That’s a lot. After reading all the fun-filled facts on the side of the carton and determining that Good Belly was not only Organic but also vegan and soy-free I thought why not give it a try? My digestion’s been kind of all over the place again since I got off my cleanse at the beginning of this month and reverted back to eating extremely rich foods once more. I figured if Good Belly was half as good as the carton claimed it was, having a glass a day could only be of benefit, so I grabbed a carton.


I was hooked from my first sip. No lie this stuff is like crack. It is so delicious! The flavor combinations are incredible and while the juice is sweet, I don’t find it to be overly so. The calorie count isn’t bad either and is actually less then my usual orange juice, which doesn’t have the added benefit of all those amazing probiotics. Even my husband who was far more skeptical about it then I, fell in love at first sip. We’ve gone through 4 cartons in 16 days! And I have to say, honestly I feel fantastic!

Now when it comes to Good Belly there are a few different flavors and a few different kinds of products. We’ve been enjoying the Family-Sized Quart containers, and so far we’ve tried the Cranberry Watermelon, Blueberry Acai Berry, Pomegranate Blackberry, Mango, and Tropical Green flavors. All of which have been absolutely fantastic but so far I’d have to say Cranberry Watermelon is my hands down favorite. There’s just something about it that’s so mouth-watering. For my second pick I’d say Blueberry Acai and Pomegranate Blackberry are tied, they are both amazing, delicious and so addictive.


Of course if you’re not into the family sized cartons you can always pick up a four pack of Good Belly Plus, which is basically the same thing but smaller and it also comes in a strawberry flavor. Or you could try a pack of Good Belly Straight shots which are actually a non-dairy oat milk with no added sugar. Neither of which I’ve tried yet but am really looking forward to eventually grabbing up some straight shots. Then of course if you need a major digestive overhaul you can grab the Good Belly Big Shots which have 50 billion live and active cultures but is still gentle enough on your system to drink everyday. Good Belly also makes a gentle probiotic drink especially for children called Good Belly Kids which contains 10 billion live active cultures. So you’ve got a few options.

What I love most about Good Belly - besides it’s awesome taste - is that it has a very smooth texture, and it tastes like a truly decadent fruit smoothie yet doesn’t have all the heft and sugar that you get at the typical smoothie joint. All the fun flavor none of the drawback. Love it! So whichever route you choose to take I highly suggest you try out the cranberry watermelon flavor, I don’t think you’ll be sorry.


And if you’re still skeptical after reading this you should know that right now Good Belly is conducing a 12 day challenge. Basically they want you to drink Good Belly for 12 days and see how you feel afterwards. If you go to their website and sign up you get coupons for Good Belly Products via email to get you started. Not only that but Good Belly believes so strongly and whole heartedly in their product that if you aren’t satisfied after 12 days, or haven’t seen any digestive change they’re willing to refund any money you’ve spent on Good Belly products for the challenge. Just make sure to keep your receipt. How awesome is that? So skip on over to their website and sign up, what have you got to loose?

Probiotics are definitely the way to go, especially if you suffer any digestive or gastric stress, stomach aches or constipation. Drinking Good Belly’ll fix you right up, or at least it’s certainly helped me out lately.

Good Belly’s website - check out the 12 day challenge today, your digestive tract will thank you!

http://www.goodbelly.com/

Friday, February 17, 2012

Japanese 7 Spice Rice Bowl with Greens...


Yesterday I was really craving greens, all kinds of greens! Anything from broccoli to kale to collards to cabbage. Originally I had planed to make some sauteed Swiss Chard with Baked Tempeh but as the day drew nearer it’s close I started longing for something a little less involved. I started thinking about rice, which got me thinking about Japanese food, which in turn got me thinking about sushi. Sushi, now there was an idea! Except it was eight o’clock at night and after a couple hours of hard study I wasn’t really in the mood to break out the bamboo mat and start rolling Maki.


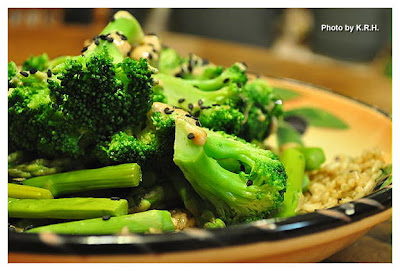
Instead I decided to make a Japanese inspired rice bowl. One that would combine the flavors I love about sushi, with simplicity and my desire for a plate loaded up with greens. Though you can really use any green veggie you like I strongly suggest the broccoli asparagus combination. Not only do they taste good together but they always taste great with rice. Initially I chose them out of convenience, as I always have bags of frozen broccoli on hand and I had just bought a pound of asparagus the day before yesterday. Convenience or not though it turned out to be a stellar choice.


This bowl is so full of flavor, and I particularly like the application of Japanese 7 Spice here - also known as Shichimi Togarashi - for the subtle heat and refreshing citrus flavor it lends to the dish. This meal is both satisfying and filling yet light. Which is exactly what you want if you’re forced to have a late dinner. You don’t want to be bogged down with digestive distress and gastric upset right before you slip into bed right?


Japanese 7 Spice Rice Bowl with Greens

Rice

2 C Brown Rice
2 1/4 C Water
2 tsp Kelp Granules
2 Tbsp Brown Rice Vinegar
1 Tbsp Sugar
½-1 Tbsp Grated Ginger
6 Garlic Cloves Minced
1 tsp Sesame Oil

Sauce

2 Tbsp non-dairy Mayo
2 tsp Liquid Smoke
1 tsp Umeboshi Plum Pate
½ tsp Agave Nectar
1 1/4 tsp Japanese 7 Spice Seasoning (or to taste)

1lb Asparagus trimmed
½-1 lb Broccoli Florets
1 tsp Sesame Oil (or to taste. Optional)
2-4 tsp Sesame Seeds (to taste)

- To make the rice combine rice, water, vinegar, kelp, and sugar in a rice cooker and cook as directed by manufacturer. Or combine in a pot and cook the old fashioned way. (Bring to a boil, then reduce heat to simmer and let cook for 30-45 minutes making sure to check and stir occasionally so the rice doesn’t burn.)

- While rice is cooking heat the tsp of sesame oil in a small pan over medium heat. Add the grated ginger and minced garlic. Saute for a few minutes until fragrant and golden. About five minutes. Remove from heat and set aside.

- Trim asparagus of tough ends and place into a steamer basket along with the broccoli. Or if your steamer basket is small work in batches. Asparagus first then broccoli. Steam the vegetables until they are tender but still a bit crisp, about 5-8 minutes. They should be bright green and vibrant!

- To make sauce combine Mayo, liquid smoke, umeboshi paste, agave and 7 spice seasoning. Taste for flavor and adjust as needed. A word of caution though, both umeboshi and 7 spice seasoning are strong, so a little goes along way. It’s important that you taste the sauce before deciding to add more and If you do add more add it in small increments. Once sauce is combined set aside.

- Once the rice has finished cooking add the sauteed ginger and garlic mixture to the pot. Stir until combined.

- Divide the rice mixture amongst two bowls. Into each bowl place 1-2 Tbsp of the sauce and mix it into the rice until well combined. Top each bowl with an equal amount of asparagus and broccoli.

- Drizzle any remaining sauce over top of the veggies. Divide the remaining 1 tsp of sesame oil and drizzle a half tsp over each bowl. (Optional but recommended) Then sprinkle 1-2 tsp of sesame seeds over top of each bowl. I used black sesame seeds because it was all that I had but feel free to use brown.

- Serve and enjoy!

Thursday, February 16, 2012

Valentine’s Day Rotini with Roasted Beets, Spinach, Red Onion and Sun-Dried Tomatoes...


As promised my Valentine’s Day Rotini recipe. As I mentioned yesterday this came about after a lot of stress, searching and frustration. I wanted to make a dish that was both simple yet elegant. I wanted to make a dish that embodied the spirit of love and romance associated with Valentine’s Day, and I wanted to utilize the beets I had sitting in my crisper drawer. Unfortunately despite all my frantic searching I couldn’t find any creative or inspiring beet recipes, or V-day recipes in general - well not ones that fit my criteria anyway.


Everything was strawberry dessert this, chocolate raspberry dessert that. Pages upon pages of recipes for roasted beets and borscht served as a side dish or afterthought rather then a show stopping main, assaulted me as I scanned the internet. Not to mention virtually every "Valentine’s Day" recipe I came across seemed utterly lacking in romance. I’m sorry but Seitan Parmesan doesn’t scream love to me, it just doesn’t. Spaghetti and marinara isn’t romantic it’s economical! Not to bash these dishes, which are delicious if it’s what you’re in the mood for, but come on! Valentine’s only comes once a year, and even though it’s a stilly, bull-shit, Hallmark holiday, that doesn’t mean you and your loved ones can’t make it your own and make it something special. That’s what I do. In honesty there isn’t a single holiday - Thanksgiving, Christmas, Easter, St. Patrick’s Day, Victoria Day, Canada Day, Hanukkah, Halloween, Labor Day etc.... - that hold any real deep sentimental or significant meaning for me. Not culturally, not religiously. I love holidays, but not because society tells me I should, and not because someone somewhere hundreds or thousands of years ago supposedly did something significant. I love them because they give you an excuse to really go all out and do something extra special. Sometimes I do this anyway, but it’s always nice to have a ‘special occasion’ to back it up with. Holidays whether big or small are a great time to spend with the ones you love, and to shower them with a little extra love. You don’t have to buy the hype, but you don’t have to be a miserable old cynic either. So it’s that desire that was driving me to want to do something lovely for my beloved.


Though pasta doesn’t normally scream romance to me, I figured since I finally settled on an Italian appetizer I may as well make an Italian inspired main dish to go along with it. After all it would be pretty silly if I made caponata to start and say a red coconut curry to follow, or a red lentil dahl. It made the most sense to stay within one culinary tradition, so pasta it was. The beauty of pasta - besides the economical factor - is that it really is versatile. It’s like a good pair of jeans you can dress them down with a t-shirt or dress them up with a blouse. With pasta you can ‘dress it down’ with marinara or olive oil, or make it fancy with just a little thought and effort. With this dish I tried to stay within the color tradition of Valentine’s day by trying to use pink, purple and red foods but I threw a little spinach in, both for a colorful pop and a bit of added nutrition. This dish worked out so well, and it far exceeded my expectations. My guests were just as impressed as myself, and everyone went back for seconds which I consider to be the highest compliment.

However the thing I love most about this dish, - which was entirely unintentional - the thing that really tickles me about it and puts a little smile on my face is that the beets turned the pasta a lovely shade of pink! How perfect is that for Valentine’s Day? Perhaps Aphrodite the dear goddess of love was smiling down on my kitchen on Tuesday.


Valentine’s Day Rotini with Roasted Beets, Spinach, Red Onion and Sun-Dried Tomatoes

Roast Beets

3 Beets peeled and cubed
2 Tbsp Olive Oil
2 Tbsp Balsamic Vinegar
½ tsp Crushed Rosemary
½ tsp Dried Dill
1 tsp Dried Basil
Sea Salt and Black Pepper to Taste
1 Packet Stevia (Optional)

Pasta

2 lb Whole Wheat Rotini (or Gluten-Free)
2 Bunches Spinach, trimmed, washed and patted dry
1 Large Red Onion sliced in half moons
10-12 Garlic Cloves minced
10 Oil-Packed Sun-dried Tomatoes chopped or sliced
1/4 C Olive Oil
1/4 C Vegetable Broth
2 Tbsp Tomato Paste
3-4 Tbsp Balsamic Vinegar
1-2 Packets Stevia (Optional)
Sea Salt and Black Pepper to taste
Garlic Powder to taste (Optional if you want an extra garlicky kick)

- Preheat oven to 400'F (200'C) To make the beets peel and cube them into roughly ½ inch cubes. Place in a baking dish. Combine oil, vinegar, stevia and spices in a bowl and stir until well combined. Pour over beets and toss to coat. Cover with aluminum foil and place in the oven and roast for 45-60 minutes until beets are nice and tender and most of the liquid has absorbed.

- Cook pasta according to package directions. Drain when finished and then return to pot and cover until ready to use.

- Heat a tsp of olive oil in a large pan over medium heat and add the sliced onion and minced garlic. Saute for 5-7 minutes until fragrant and onion becomes translucent. Add sun-dried tomatoes and stir to combine. Saute another 3-4 minutes.

- Add the spinach to the pan, cover and let steam a couple of minutes. Remove the lid then gently stir to combine the spinach. Careful so that nothing topples over the rim of the pan continue to stir the spinach into the onion-garlic-tomato mixture until the spinach has wilted and cooked down. Be careful not to overcook it though. You don’t want spinach mush! Add the roasted beets which should be down at this point, with any pan juices and stir until just incorporated.

- Next, in a bowl combine the 1/4 C Olive oil with the 1/4 Vegetable broth, tomato paste, vinegar, salt and pepper and garlic powder and stevia if using. Whisk together until well blended.

- Carefully add the sauteed vegetables into the pot with your reserved pasta, and pour in half of the sauce mixture. Stir until thoroughly combined. If the pasta looks a little dry add the remainder of the sauce and stir until well combined. Taste and adjust seasoning as needed.


*** Note - You can make the beets hours in advance if you like then just cover and refrigerate them until ready to use. This makes throwing dinner together later a lot quicker. Also as far as the sauce goes I only ended up using maybe ½-3/4 of it because I didn’t want the pasta to be overly saucy. However everyone’s tastes are different so feel free to use as much or as little as you like. Also it must be said that this dish was developed to feed about 5 people. If you don’t need to feed that many people feel free to decrease the ingredients by half or however best suits your family.***

*** Note - Gluten-Free if using GF Rotini***

Wednesday, February 15, 2012

The Valentine’s Day Post...

The Lovely Valentine's Day Flowers My Mom Sent Us


I hope everyone had a lovely Valentine’s Day yesterday, I know I did despite a little pre-V-day stress and a last minute change of plans. The original idea you see, was to go out and have a romantic dinner just the two of us, but a culmination of things turned that into a less then stellar plan. So instead I decided to invite some close friends over for a Valentine’s Day Dinner Celebration which turned out to be a very successful good time, despite the before mentioned stress.

Banana Split Waffles


The stress as it were, was all due to the fact that I wanted to make the perfect Valentine’s Day dinner, and I wanted it to reflect the colors most commonly associated with Valentines, as well as the spirit of love. I searched and searched and searched through all my cook books and the web for recipes I had not yet made that would fit both my criteria and my budget. What I found was an endless supply of dessert recipes and nearly as many cocktail and appetizer recipes but hardly anything suitable for a main meal. It must also be said that there are WAY too many people out there who consider marinara sauce to be an appropriate expression of love. Spaghetti and marinara for Valentine’s? No thanks.

Banana Split Waffles


What I really wanted to do was utilize the beets that were in my fridge. I bought a bunch that I’d planned to use this week and I thought what better time to use them then V-day? Except virtually every beet recipe I came across was for roasted beets. Let it also be said that apparently when it comes to the beetroot most people are seriously lacking in imagination! Roast beets are great, I adore them, but there isn’t anything fancy, romantic or even particularly thoughtful about them served alongside something else.

Banana Split Waffles


The other challenge was the fact that I was cooking for others. Whenever you cook dinner for other people you always have to be mindful of their taste preferences. If someone doesn’t like spicy, or a certain vegetable or this or that it can set the whole thing off. You have to be conscious, and also when cooking for others you want to enjoy their company not spend the whole night in the kitchen. Which means you have to pick a dish, or dishes that are both simple yet elegant. Not the easiest task in the world. Finally I decided to stop worrying, forget looking for the recipe of another and just go with my gut and do what I felt was right. In the end it worked out beautifully, much to my own surprise and amazement, but before I get to the main course lets start with breakfast shall we?

Caponata


For breakfast I made the Banana Split Waffles from "Hearty Vegan Meals for Monster Appetites" by Celine Steen & Joni Marie Newman. Served with Chocolate Sauce, Rice Whip, Maraschino Cherries, and Soy Delicious Purely Decadent Cookie Avalanche Ice Cream. The authors recommend you serve these waffles with their recipe for Cake Batter Ice Cream, and as much as I would have loved that I honestly wasn’t about to dig out my ice cream maker just to make a batch for breakfast. Not to mention the fact that there isn’t room in my freezer for the ice cream maker anyway. We searched high and low for vegan cake batter ice cream at the store, but not finding any my husband picked out this flavor for the waffles. It was definitely tasty! A good choice. As for the waffles they were delicious! Full of flavor and filling and they tasted amazing with ice cream and whip. Never in my life have I had such a combination, and certainly not for breakfast but it was a nice treat. Except I’m the sort of person that while I have a serious sweet tooth I can only take so much sweet and so much chocolate in one sitting before I want to puke. By the time I got to the last of my waffles I was in that mode, and couldn’t finish off the last couple of bites. Sugar overload.

Caponata


With a breakfast like that under our belts there was absolutely no room for lunch. I did however make a lovely appetizer to proceed dinner. The Caponata from "The Mediterranean Vegan Kitchen" by Donna Klein. Garlic, onion, tomatoes, celery, capers, olives and eggplant are cooked down with water, tomato paste, sugar, red wine vinegar, and basil to make a delicious sweet/tart antipasto for toasted bread rounds. Absolutely incredible mix of flavor and the four of us went through 2 loaves of French bread in an attempt to finish off ever last morsel.

Caponata


After that, dinner. Seeing as how I’d made the caponata to start I figured I might as well keep with the Italian theme and so I decided on pasta. I made a lovely Rotini dish with roasted beets, spinach, sun-dried tomatoes and red onions. Keeping with the color theme of Valentine’s I really wanted to use pink, purple or red foods, but decided at the last minute to throw in the spinach for some added "POP" and nutrition. Thanks to the beets the pasta was stained a lovely shade of pink, which really made it feel romantic and fitting for the day. As for the recipe I promise to post it later.

Rotini With Roasted Beets, Red Onion, Spinach & Sun-Dried Tomatoes


After a long period of digestion it was time for dessert for which I’d made the Chocolate Cherry Cheesecake from "Party Vegan" by Robin Robertson. This cheesecake was delicious, very rich and very creamy, but - at least for me - it’s not the kind of thing you want to over-indulge in. The cake was very sweet, and very chocolaty so much so that by the last few bites I was beginning to feel a little ill. Chocolate coma for sure. Everyone loved the cake though, and seconds were had. My only complaint about the cake is that I thought it should have more cherry considering it’s called a Chocolate Cherry Cheesecake. Cherry Jam is spread in a thin layer overtop of a chocolate cake and then the cake is dotted with fresh cherries - or in my case maraschino since I didn’t have fresh - but I thought it would have been better to also blend some of the cherry jam into the batter, or even a few whole cherries. That’s just me though, everyone else seemed to love it as it was.

Chocolate Cherry Cheesecake


To drink we stuck to water and Republic of Tea, though I’d originally planned to make cocktails I’m glad that in the end I didn’t. The Plum Berry White tea and Rose White Tea were the perfect accompaniment to dinner and a great way to end a good evening.


Chocolate Cherry Cheesecake


After our guests left there was some very lovely cuddle time and then a viewing of the film "I Love You Phillip Morris" starring Jim Carry and my all-time favorite actor Ewan McGregor. It’s a film we’ve seen before, and while it is a rather unconventional romance it is still a romance nonetheless. If you haven’t seen it you should! The perfect end to a perfect day, I hope you all had a lovely time as well, and stay tuned for that Rotini recipe!

Monday, February 13, 2012

Wine Roasted Portobello Mushrooms with Mesquite Wild Rice and Kale Stuffing...


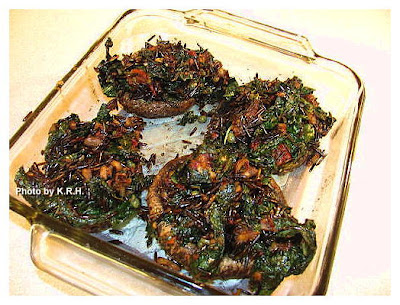
Never judge a book by it’s cover, or a meal by it’s subsequent picture, looks can very often be deceiving. As is the case with my latest recipe creation. The picture is a bit horrendous I know, apologies! But it wasn’t the most photogenic dish to begin with, and my camera was very uncooperative yesterday. Though I took over a dozen pictures all but these two came out utterly blurry and totally useless. I’ve never before had such a bad shoot, but the shitty little cam I use most often for food photography really has been through the ringer. It’s been dropped countless times, bashed, smashed, fallen into sand and had beer spilled inside the battery slot. Some of the buttons have ceased to function and I’m beginning to think the focus is on the fritz now too. I think from now on I just might have to use my good high-tech cam for food photography, but since it’s so bulky I usually forget to bring it to the kitchen with me. I’ll have to start making a greater effort to remember it, I suppose.

Anyway, now that I’ve explained myself lets move onto the food shall we? Yesterday I was hit by a bundle of food cravings all at once. Generally when I get a craving for something it’s one dish in particular or one food in particular, not so yesterday. All of a sudden I was craving mushrooms, red wine sauce, Italian herbs, kale, sun-dried tomatoes and the smokey goodness of mesquite. I was practically salivating at the thought of sauteed kale, and mushrooms roasted in red wine, but how I wondered could I combine all these very specific ingredients into one tasty dish?

Stuffed mushrooms was the answer that came sounding back to me and from there all I had to do was figure out the cooking methods and the proportions. I had no idea whether or not this crazy culinary adventure would yield an edible result but I was determined to embark on it nonetheless. What finally emerged from my oven about an hour later stunned both my husband and I. The flavor of these mushrooms exceeded even my wildest expectations. A truly phenomenal blend of flavors from earthy mushrooms and robust wine, to tart vinegar and capers to sweet sun-dried toms and stevia. Enhanced with Italian herbs and smokey mesquite rice. A beautiful partnership, and absolutely mouth-wateringly delicious. We could barely stop ourselves eating long enough to actually look up at one another and engage in conversation. We cleaned our plates in a frenzy, then sat back satiated and smiling.

So disregard the picture that leaves a lot to be desired, and take my word for it when I tell you these mushrooms are to die for! Really, it’s one of the best things I’ve made - scratch that - eaten in a long time! So what are you waiting for? Get thee to thee kitchen, and enjoy!


Wine Roasted Portobello Mushrooms with Mesquite Wild Rice and Kale Stuffing

Rice -

1 1/4 C Wild Rice
2 1/4 C Vegetable Broth
1 1/4 - 2 tsp Sweet Mesquite Seasoning

Mushrooms -

4 Large Portobello Mushroom Caps
2/3 C Red Wine
1-2 Tbsp Brown Sugar
½ tsp Crushed Rosemary,
½ tsp Garlic Powder
1 tsp Dried Basil

Kale Stuffing -

2 tsp Olive Oil
10-12 Garlic Cloves finely minced
The mushroom stems diced fine
8-10 Oil-packed sun-dried tomatoes diced fine
2-3 Tbsp Capers with a bit of juice
1 Large Bunch Dinosaur Kale chopped into bite sized pieces
1-2 Tbsp Balsamic Vinegar
1 Packet Stevia (optional)
Sea Salt and Black Pepper to taste

- First get your rice going. Wild Rice takes a bit longer then Brown so you want to start it first. If you have a rice cooker just combine all the ingredients together in it and turn it on. Otherwise combine all ingredients in a pot and bring to a boil then reduce to simmer for about 45-60 minutes until rice is tender and all liquid is absorbed. If making the rice in a pot be sure to check on it now and again so it doesn’t burn and stick to the bottom.

- Set your oven to 350'F (175'C) Remove stems from your mushrooms and clean. Combine Wine, sugar and herbs in a bowl or measuring cup. Place mushrooms in a baking dish, then pour the wine mixture over top. Make sure some of the wine stays inside the caps while the rest covers the bottom of the dish.

- Place mushrooms in the oven and roast for 20-30 minutes until tender, and slightly smaller.

- Take the mushrooms out of the oven and using a slotted spoon remove the mushrooms from the dish and place into a colander over the sink to drain. Pour wine mixture into a bowl and reserve.

- Meanwhile, as your mushrooms are roasting and your rice is cooking put the olive oil into a large pan. Heat over medium then add the garlic. Saute for 2-3 minutes until fragrant and slightly golden. Add the mushroom and cook another 4-5 minutes until mushrooms begin to brown and become tender. Add sun-dried tomatoes and capers and cook another 2 minutes. Add kale, and the vinegar. If the mix is looking a little too dry you can also add in another tsp of olive oil if you like. Stir to combine then cover and let cook 2-3 minutes. Stir again and cook another 2-4 minutes until kale has wilted. Season to taste with salt and pepper, and add stevia if you like to balance out the tartness of the capers and vinegar.

- Your rice should be done by now. Remove it from the pot and pour it into the pan with the kale mixture. Stir until well combined.

- Place mushroom caps back into the baking dish, and carefully fill them with stuffing. Depending on the size of your caps you may have a little extra filling. That’s okay, it tastes amazing on it’s own so you can save it and eat it the next day or you can serve it alongside the mushrooms (as we did). Once the caps are stuffed as full as they can be, return the baking dish to the oven and bake about 5-10 minutes, just until everything is heated through.

- Plate the mushrooms and if you like drizzle a little bit of the reserved sauce over them. These mushrooms are so delicious and flavorful that you don’t need the extra sauce if you don’t want it, but a little drizzle is nice.

*** Note - If you don’t have wild rice you can use black or brown rice instead, though I really like the texture of wild rice and I think it’s crunchy/chewy consistency and nutty flavor work really well here. If you don’t have dinosaur kale also known as Lacinato kale you can use regular.***

Wednesday, February 8, 2012

Green Thirst Quencher...


Admittedly these are not the best pictures I’ve ever taken. Being winter my yard is desolate, mud splattered and leaf strewn, but it was a sunny day and rather warm so I thought I’d take advantage. Unfortunately after clicking only two pictures my battery unexpectedly died out. With no back up battery charged and at the ready, and being in something of a ‘time crunch’ I decided the hell with it and just hoped the two pictures I was able to take weren’t blurry. I have the very bad habit of turning my camera on before I’m quite ready, and leaving it on while I set up shots and move things around. I’m working on rectifying that, but sometimes old habits die hard you know?

But enough about my camera work and onto the smoothie. I’ve been neglecting my green smoothies over the past week, don’t know what happened really, guess I just fell off the wagon. After not having one for about a week I was really craving one today, and boy was it satisfying. It was super green and super delicious. All the flavors blended so well together and not one was more overpowering then the rest. The perfect way to start my morning.


Green Thirst Quencher

1-2 Clementine Oranges
1 Granny Smith Apple
1 Large Banana
2 Handfuls Spinach
1 Handful Snap Peas (about 15-20 pods)
2 C Water
1 ½ tsp Spirulina Powder (Optional but highly recommended)***
1-2 Tbsp lemon juice
1-2 Packets Stevia (Optional)

- Place all ingredients except stevia into a high-speed blender and blend for 30-60 seconds until completely smooth. Taste for sweetness and add stevia if desired. Blend another couple seconds to incorporate and serve.

*** Note - While the Spirulina is optional I highly recommend it. It’s so nutritious and good for you, and it lends a really unique flavor to whatever you put it into. I love the stuff personally, but if you don’t have it on hand don’t sweat it, the smoothie will be just as tasty without it, you just won’t get that added nutritional benefit from the blue-green algae.***

Tuesday, February 7, 2012

Celine and Joni’s Orange Chipotle Wings, and Twice-Baked Potatoes + An Announcement...


Before I get started gushing about last night’s dinner, I have an announcement. After a lot of careful thought I decided a few months back that I would be going back to school this year to study holistic health. Health and wellness is a subject I’m very passionate about, and over the past year it’s a subject that’s taken up a considerable amount of my time. Whether I’ve been reading books out of personal interest or for personal growth, writing this blog, or guiding the people in my life to a more healthful way of living, the path of health seems to be one I’m currently traveling along. The decision to go back to school came about mostly out of my own desire to further my knowledge on the subject, but it was also born out of an interest to help others. In going back to school I hope to acquire and further develop the tools I need to help others help themselves. I’m very excited about the prospect, and a little nervous also which I think comes with the territory. After all, virtually everything new Is scary right? It’s been a long time since I’ve been in school, and the subject matter is quite a bit different then anything I’ve studied in a school setting in the past, so I don’t know quite what to expect.

However I’m hoping that the addition of school to my already relatively full plate won’t have a negative impact on my writing this blog. I don’t plan to go MIA, and I really want to keep up the level of posting that you’ve all become accustom to, however I can’t promise that there won’t be stretches of inactivity. I don’t think it’ll be the case, but I thought fair warning was in order, as I don’t know yet what burden the school work will place on my time. So if you find my posting becomes erratic, or that I haven’t been quite as creative lately - for example relying on cook books more then imagination - I hope you’ll bare with me, and realize that it won’t be forever. This blog means a lot to me, and so do you, so hopefully I’ll be able to continue to juggle all aspects of my life with relative ease, and now lets move onto the food.


This past week I’ve been spending more time cooking from cook books then I have from my own imagination. It’s been fun, and delicious as always. The past couple of days I’ve been relying on "Hearty Vegan Meals for Monster Appetites" by Celine Steen and Joni Marie Newman which I received for Christmas, and it’s been wonderful. Perhaps not the healthiest that vegan food has to offer, but certainly delicious, decadent and comforting, and sometimes that’s exactly what the doctor ordered.

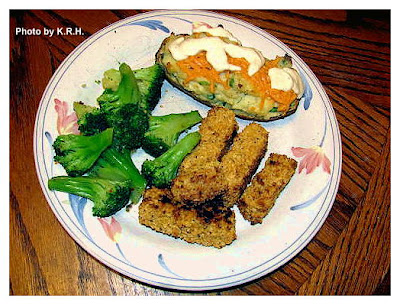
Last night I made the Orange Chipotle Wings, and the Twice Baked Potatoes from the book, and both were exquisite, and mouth wateringly amazing! Seriously, I’ve never been a big fan of Tempeh but I swear I’m in love now. Battering then baking tempeh - what a brilliant idea! First the ‘wings’ are marinated in a mixture of orange juice, zest, chipotle in adobo sauce, garlic and onion. They’re then ‘floured’ in cornstarch, dipped back into the marinade then rolled in Panko breadcrumbs after which they’re lightly sprayed with oil and baked until crisp in a super hot oven. You save the leftover marinade, mix in a bit of brown sugar and cilantro and use it as a dipping or glazing sauce afterwards. Incredible! The potatoes are baked, then scooped out of their skins and mashed with a creamy sauce that’s made with soy milk, garlic, vinegar, Earth Balance and cornstarch. This sauce actually reminds me quite a lot of Ranch dressing, delish! Then you scoop the potatoes back into their skins and bake for 20 minutes until golden brown on top. I ended up taking a couple of the suggestions in the notes section and added green onion into the potato mixture, I also added Daiya cheddar cheese to the tops of my potatoes, then drizzled some extra sauce over top. Fantastic! I served the ‘wings’ and potatoes with a simple dish of roast broccoli with olive oil and garlic to make it a well rounded and winning meal. It was the ultimate comfort meal, seriously and it tasted so good, restaurant quality for sure.


So far I’ve been nothing but pleased with this book, and I highly recommend it. I haven’t made too many dishes from it yet but everything I have made has been mind-blowing. In fact I plan to make the five cheese baked macaroni and cheese tonight and I can hardly wait! So without any further hesitation run to your local library, bookstore or log onto your Amazon account and purchase a copy of this book, you will not be disappointed.