Showing posts with label Cumin. Show all posts
Sunday, September 13, 2015
Vegan Mofo #14: Peruvian Corn Puree with Fried Tofu...
Corn is a staple food in Peru, it’s been around since the time of the Inca’s. There are two main varieties, one that grows near the coast that has a slightly bland flavor, and one that grows in the mountains that has a sweeter flavor. Though I don’t typically eat much corn when I’m at home, we did eat quite a bit of it while we were there. It’s cheap, filling and plentiful which makes it such a relied upon crop. Fish too is a staple food in Peru, what with Peru having such a long coastline fish and seafood are abundant. Peruvian cuisine is an interesting blend of South American tradition, Inca influence, Spanish influence, with some Indian and Asian influences due to various waves of immigration over the years.
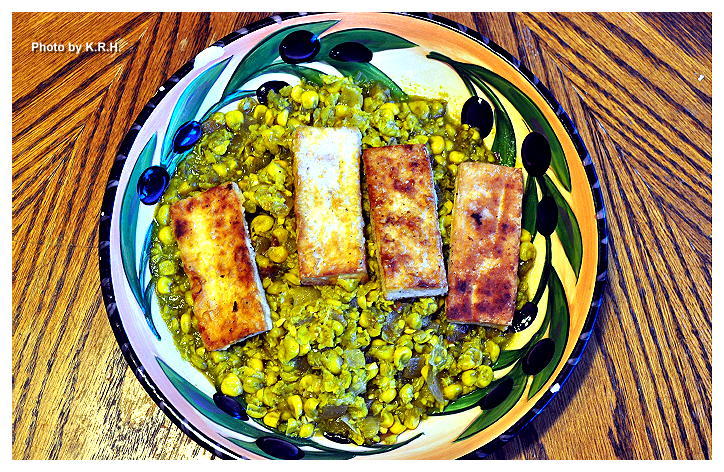
For this recipe I used tofu in place of fish, and though it doesn’t have an overly fishy taste I think ti works really well here. I kept the tofu a little on the bland side because the corn puree has so much flavor. The planks of tofu make the perfect little scoops for eating up the corn. Though this is a relatively simple dish you’ll be immediately impressed by the powerful flavor punch!
Peruvian Corn Puree with Fried Tofu
2 tsp Olive Oil (or more as needed)
1 16oz Bag Frozen Yellow Corn thawed
2 ½ Cups Water (or more if needed)
½ Bunch Cilantro
1 Red Onion Diced
2 Vegan Chicken Bouillon Cubes
½ tsp Ground Cumin
½ tsp Smoked Salt
1-2 tsp Sriracha
1 lb Extra Firm Tofu drained and pressed for 1 hour.
1/4 Cup All Purpose Flour
Sea Salt and Black Pepper to taste
Kelp or Dulse flakes if desired
Lime Juice and extra Sriracha to serve
- Place the thawed corn in a high-speed blender with 1 cup of water and blend on medium for a few seconds until you have a chunky puree.
- Heat 1 tsp of olive oil in a large pan over medium high heat. Add the onion and saute until nice and golden. Add the cumin, smoked salt, bouillon cubes, sriracha and a ½ cup of water. Whisk together and simmer for 2 minutes or until bouillon cubes have dissolved.
- Add the corn puree to the pan with the onions and spices and stir to combine.
- Blend the cilantro and the remaining 1 cup of water together on high, until completely smooth. Add the cilantro mixture to the pan and stir to combine with the corn. Simmer for 10 minutes. Taste for salt and heat and adjust seasoning as needed.
- Divide the corn puree among serving bowls, wipe out the pan and fry your tofu.
- Heat the remaining oil in your pan over medium high heat.
- Slice your slab of Tofu into 3 pieces. Slice each piece into 3 more pieces so you have 9 planks of tofu.
- Place the flour in a shallow bowl and season with sea salt, pepper and either kelp or dulse.
- Dredge each plank of tofu through the flour until it’s coated on all sides.
- Carefully place each plank of tofu into the hot pan and fry until golden brown on each side. About 5-6 minutes a side. Make sure to flip at least once, to prevent burning or sticking.
- Serve each bowl of Corn Puree topped with a few planks of tofu, a drizzle of lime juice, and a bit of extra sriracha if you like things spicy. Enjoy!
Labels:
Cilantro,
Corn,
Cumin,
Limes,
Onions,
Quick and Easy,
Sriracha,
Tofu,
Vegan Mofo,
Veganize-It
Tuesday, August 12, 2014
Scrambled Pintos...
This morning I was feeling a ravenous hunger. I knew my typical breakfast of a bowl of fruit or a smoothie just wasn’t going to cut it, and besides I was really craving something savory. Tofu scramble was sounding really good to me, the only problem was that I didn’t have any tofu. I briefly considered making a tempeh scramble until I realized I was all out of tempeh too! I flipped through my wealth of cook books in desperate search of another breakfast option but everything I saw was sweet, or bready and I didn’t want that. Then I remembered Isa Chandra Moskowitz’s Mad-Genius invention of Chickpea Scramble from her latest book “Isa Does It” and I knew that was what I wanted.
I went eagerly to the kitchen, opened up the pantry and would you believe I didn’t have a single can of chickpeas. The girl who loves chickpeas, who eats them all the time, had somehow unknowingly ran out! Now I was beginning to get frustrated. I took a look around the kitchen and saw a few things I had a lot of were potatoes, spinach, and onions, but how to make a breakfast out of that. I took another look in the pantry, took inventory of the beans I did have, and thought to myself “Hey, if a scramble can work with chickpeas, why not another bean?” and that, is how the Pinto Scramble was born.
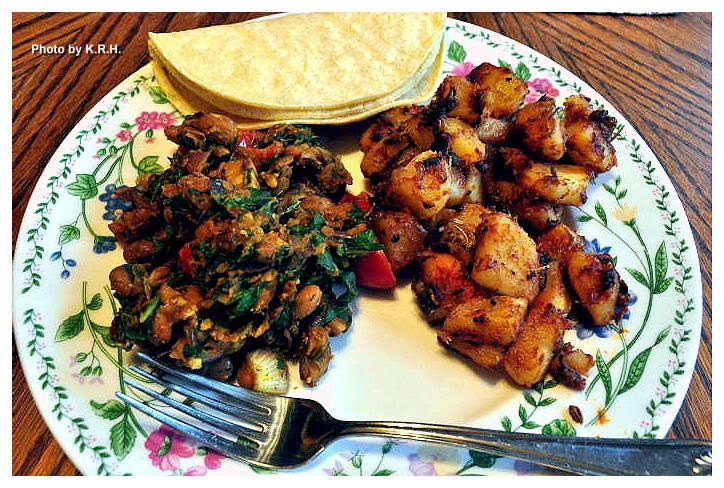
Man, this exceeded all expectations, and even my husband - who’s a notorious bean-hater, but getting better on that front - loved it. Now I want to try making different kinds of scrambles with all sorts of beans to see what kind of awesome combinations I can come up with. In the meantime I hope you try this one out, it’s super delicious, healthy, hearty and comes together in a flash. Serve it however you like - on a piece of lightly buttered toast with some fresh sliced tomatoes, on it’s own, or as I did with some fried potatoes, corn tortillas and extra hot sauce!
Scrambled Pintos
1 Tbsp Olive Oil
4 Garlic Cloves Minced
½ Red Onion Minced
1 15 oz Can Pinto Beans rinsed and drained
½ tsp Chili Powder
½ tsp Ground Cumin
½ tsp Ground Turmeric
½ tsp Sea Salt
Black Pepper to taste
1-2 tsp Hot Sauce (or to taste)
1-2 Tbsp Fresh Dill Minced
8 Cherry Tomatoes Halved
1 Large Handful Baby Spinach Chopped
- Heat the olive oil in a pan over medium heat.
- Add the garlic, and onion and saute for 5-6 minutes until softened.
- Add in the pinto beans, chili powder, cumin, turmeric, salt, pepper, and hot sauce. Mix to combine and saute for 3 minutes until the beans are warmed through.
- Using a potato masher mash the beans right in the pan, so that they turn into a thick chunky paste. You do not need to get all the beans, leave some whole. Mash about two-thirds of the mixture.
- Add in the dill, tomatoes and spinach and saute for about 2 minutes or until the spinach has wilted.
- Taste for seasonings and add additional hot sauce if desired.
*** Note - If you want a more 'Mexican' feel you can omit the dill and add in an equal amount of minced cilantro instead. Though I quite like the unique flavor that dill brings to the overall dish.***
Labels:
Breakfast,
Chili Powder,
Cumin,
Dill,
Garlic,
Gluten-Free,
Onions,
Pinto Beans,
Soy-Free,
Spinach,
Sugar-Free,
Tomato,
Turmeric
Thursday, January 30, 2014
Cumin Is The Spice of Life...
Long time readers of this blog may remember that there was a time when I did a series entitled “The Spice of Life” in which I featured a different spice and told you about it’s cultural history, as well as it’s healing properties or potential. It’s been a few years since I did the last one, I got side-tracked with other things and school took up so much of my time that I didn’t have any time leftover to really do personal - non-school-related - research, but I really miss doing those posts, and I think it’s great information to share and so my goal for the year is to start doing them again. Starting today, with one of my favorite spices of all time - Cumin! I absolutely love cumin, I adore it, I use it liberally in a lot of my cooking, it is fantastic and wonderful, and makes food taste great, but that’s not even the best part.
Cumin -
History/Cultivation
Cumin is a flowering plant in the Apiaceae family, native from the East Mediterranean all the way to India. For millennia it has been used as both a spice and as a medicine. In fact there’s evidence of cumins use in Indian archaeological sites that date back to the second millennium BC and some New Kingdom Archaeological sites in Egypt that date as far back as the 11th century BC, where it was used - at least in part - in the mummification process of the Pharaohs. Cumin is even mentioned in the Bible, both as a culinary spice, as well as a form of currency! All this is to say that Cumin has been around for a very long time, and was once highly prized.
It’s hard to say exactly where it was originally cultivated, some say Iran, some say Egypt, some say the Mediterranean. The ancient Greeks and Romans used cumin widely in their cooking, and the Greeks actually kept jars of it on their kitchen tables as we would do with pepper today. During the Middle Ages cumin was one of the most common spices used in Europe, where somehow it became a symbol of love and fidelity. It was carried in the pockets of wedding attendees, and women would commonly bake it into bread to give to their soldier husbands as they left for war. Certain Arabic traditions also consider cumin a symbol of love and fidelity and even consider it to have aphrodisiac properties.
From Europe Cumin was introduced to the Americas by Spanish and Portuguese colonists. Though popularity of the spice dropped off in Europe after the Middle Ages it still remains an widely used and extremely important spice in the Middle East, and India. Interestingly today India produced 70% of the world cumin supply, and consumed 90% of it’s own supply! (63% of the world production) Other producers of Cumin are Syria, Turkey, Iran, Egypt, Morocco, China, and Chile.
Health Benefits
Cumin has long been used in Ayurvedic medicine as a digestive aid. In fact in Sanskrit Cumin is known as Jiraka, Jira meaning “That which helps digestion.”Ayurvedic medicine also uses Cumin as a way to enhance appetite, taste perception, vision, strength, and lactation. It’s also used to treat ailments such as fever, loss of appetite, diarrhea, vomiting, abdominal distension, and edema. Though it has been used for centuries as a digestive aid medical science is just starting to prove it. Recent research has shown that cumin may stimulate the secretion of pancreatic enzymes which are compounds necessary for proper digestion and nutrient assimilation.
Recent research has also suggested that Cumin may have anti-carcinogenic properties. In animal studies cumin was shown to protect laboratory animals from developing stomach or liver tumors. It’s thought that this is due to cumins potent free-radical scavenging abilities as well as the ability it has shown to enhance the liver’s detoxification enzymes. Since free radical scavenging and detoxification are important for the general maintenance of wellness, cumin’s contribution to our overall health may reach even further then that, only time will tell.
Cumin is also a significant source of iron which helps to boost our energy and is integral to enhancing our immune system. Iron is particularly important to children and menstruating women. 2tsp of Cumin contains 15% iron, 7% manganese, 4% copper, 3% Calcium, 3% magnesium, 2% Phosphorus, and 2% B1.
Preparation
There are many ways to enjoy cumin. It’s typically used most in North African, Middle Eastern, Spanish, and Indian cuisine. So use it in curries, korma’s, and dal’s. You can use it to flavor chili, stews, and soups. It’s often used in hummus, and chili as well as other Spanish or Tex-Mex dishes. You can add cumin to a black bean salad or a black bean dip or even a black bean salsa. Add cumin seeds to bread, or flatbread, or incorporate them into homemade pizza dough. You can rub vegetables with a little olive oil and sprinkle cumin over them and roast them for a delicious side dish. It makes a great compliment to any hearty bean or lentil dish, and adding cumin seeds into brown rice gives the rice a really nice aromatic flavor, add some dried apricots and almonds for extra pizzazz. You can even saute vegetables in a little oil and cumin along with other spices you might like and serve it atop a plate of rice or cous cous for a North African flavor.
If you’re interested in a more medicinal use you can make cumin tea by boiling cumin seeds in water and then letting them steep for 10 minutes. This concoction is reported to be both warming and soothing.
Lastly the combination of black pepper, cumin and honey is considered an aphrodisiac in certain Middle Eastern countries, whether or not it actually works is anyone’s guess , but it is a tasty way to dress vegetables, tofu or tempeh. Only I’d urge you to replace the honey with agave instead, for a cruelty-free option.
May your life be rich in spice! And as always happy and health eating to you!
If you enjoyed this post check out -
Close Is The Spice of Life
Sage Is The Spice of Life
Thyme Is The Spice of Life
Dill Is The Spice of Life
Black Pepper Is The Spice of Life
Cumin -
History/Cultivation
Cumin is a flowering plant in the Apiaceae family, native from the East Mediterranean all the way to India. For millennia it has been used as both a spice and as a medicine. In fact there’s evidence of cumins use in Indian archaeological sites that date back to the second millennium BC and some New Kingdom Archaeological sites in Egypt that date as far back as the 11th century BC, where it was used - at least in part - in the mummification process of the Pharaohs. Cumin is even mentioned in the Bible, both as a culinary spice, as well as a form of currency! All this is to say that Cumin has been around for a very long time, and was once highly prized.
It’s hard to say exactly where it was originally cultivated, some say Iran, some say Egypt, some say the Mediterranean. The ancient Greeks and Romans used cumin widely in their cooking, and the Greeks actually kept jars of it on their kitchen tables as we would do with pepper today. During the Middle Ages cumin was one of the most common spices used in Europe, where somehow it became a symbol of love and fidelity. It was carried in the pockets of wedding attendees, and women would commonly bake it into bread to give to their soldier husbands as they left for war. Certain Arabic traditions also consider cumin a symbol of love and fidelity and even consider it to have aphrodisiac properties.
From Europe Cumin was introduced to the Americas by Spanish and Portuguese colonists. Though popularity of the spice dropped off in Europe after the Middle Ages it still remains an widely used and extremely important spice in the Middle East, and India. Interestingly today India produced 70% of the world cumin supply, and consumed 90% of it’s own supply! (63% of the world production) Other producers of Cumin are Syria, Turkey, Iran, Egypt, Morocco, China, and Chile.
Health Benefits
Cumin has long been used in Ayurvedic medicine as a digestive aid. In fact in Sanskrit Cumin is known as Jiraka, Jira meaning “That which helps digestion.”Ayurvedic medicine also uses Cumin as a way to enhance appetite, taste perception, vision, strength, and lactation. It’s also used to treat ailments such as fever, loss of appetite, diarrhea, vomiting, abdominal distension, and edema. Though it has been used for centuries as a digestive aid medical science is just starting to prove it. Recent research has shown that cumin may stimulate the secretion of pancreatic enzymes which are compounds necessary for proper digestion and nutrient assimilation.
Recent research has also suggested that Cumin may have anti-carcinogenic properties. In animal studies cumin was shown to protect laboratory animals from developing stomach or liver tumors. It’s thought that this is due to cumins potent free-radical scavenging abilities as well as the ability it has shown to enhance the liver’s detoxification enzymes. Since free radical scavenging and detoxification are important for the general maintenance of wellness, cumin’s contribution to our overall health may reach even further then that, only time will tell.
Cumin is also a significant source of iron which helps to boost our energy and is integral to enhancing our immune system. Iron is particularly important to children and menstruating women. 2tsp of Cumin contains 15% iron, 7% manganese, 4% copper, 3% Calcium, 3% magnesium, 2% Phosphorus, and 2% B1.
Preparation
There are many ways to enjoy cumin. It’s typically used most in North African, Middle Eastern, Spanish, and Indian cuisine. So use it in curries, korma’s, and dal’s. You can use it to flavor chili, stews, and soups. It’s often used in hummus, and chili as well as other Spanish or Tex-Mex dishes. You can add cumin to a black bean salad or a black bean dip or even a black bean salsa. Add cumin seeds to bread, or flatbread, or incorporate them into homemade pizza dough. You can rub vegetables with a little olive oil and sprinkle cumin over them and roast them for a delicious side dish. It makes a great compliment to any hearty bean or lentil dish, and adding cumin seeds into brown rice gives the rice a really nice aromatic flavor, add some dried apricots and almonds for extra pizzazz. You can even saute vegetables in a little oil and cumin along with other spices you might like and serve it atop a plate of rice or cous cous for a North African flavor.
If you’re interested in a more medicinal use you can make cumin tea by boiling cumin seeds in water and then letting them steep for 10 minutes. This concoction is reported to be both warming and soothing.
Lastly the combination of black pepper, cumin and honey is considered an aphrodisiac in certain Middle Eastern countries, whether or not it actually works is anyone’s guess , but it is a tasty way to dress vegetables, tofu or tempeh. Only I’d urge you to replace the honey with agave instead, for a cruelty-free option.
May your life be rich in spice! And as always happy and health eating to you!
If you enjoyed this post check out -
Close Is The Spice of Life
Sage Is The Spice of Life
Thyme Is The Spice of Life
Dill Is The Spice of Life
Black Pepper Is The Spice of Life
Thursday, June 27, 2013
Classic Hummus...
I love hummus - who doesn’t - I love it, and I make it often. It’s one of my favorite foods, and it’s often a saving grace when it comes to eating healthfully - and sometimes just plain eating - as a vegan traveler. No matter where you go, no matter how small the town, or how vegan-unfriendly the city, someone, somewhere has hummus. It seems to be universally loved, and it seems that everyone and their mother has a personal hummus recipe that they like best.
When it comes to hummus I don’t care if it’s thick, thin, creamy, extra-creamy, or a little textured. I love them all just so long as the flavor is good. That’s that’s really the key, because hummus just ain’t no good if it’s bland or boring. I don’t mean that you have to dress it up and make if fancy - although I love that too - I just mean that when it comes to a good hummus you should be able to taste the nutty tahini, the tart lemon, the bitter cumin, and the garlic, oh gods the garlic! Hummus without garlic is like a hand without fingers. You definitely, definitely need the garlic!
For years and years I used to make hummus with canned chickpeas and the result was always good it comes out smooth and creamy like I like, and the flavor is wonderful. Until this year I had never made hummus with dried beans before, and this is because my old stove just wasn’t up to the challenge of cooking a bean as hard as the garbanzo. I don’t know why this is, but no matter how long I cooked them on the stove they never got soft. Now my new stove cooks these things like a champ in about an hour, and I have to say the flavor of hummus with home-cooked beans is really out of this world.
Another thing I love about hummus is that it’s so versatile. Really as long as you have chickpeas you can do basically anything else you like. You can season it with whatever you have on hand, and often times while I’ve been on vacations where I’ve had access to a kitchen - or at least a food processor - I’ve been able to whip up hummus using almond butter instead of tahini, lime juice instead of lemon, garlic powder instead of fresh garlic. Hell I’ve even used basil, oregano, curry, and other random seasonings to flavor it when I didn’t have enough cumin. It’s easy, simple, filling and oh so satisfying!
For the sake of your convenience you can use either canned or home-cooked in this recipe, but I highly recommend you trying the home-cooked method, because it really is amazing. So here I go tossing my hat into the ring and adding another hummus recipe into the
Classic Hummus
2 ½ C Home-Cooked Chickpeas (about 1 heaping cup dried)
4-6 Garlic cloves
3 tsp Ground Cumin
2 tsp Ground Coriander
3/4 tsp Smoked Paprika
½ tsp Onion Powder
5 Tbsp Lemon Juice
3 Tbsp Olive Oil
6 Tbsp Tahini
Sea Salt and Black Pepper to taste
1/3C -2/3C water - (Or enough to reach your desired consistency, the more you use the creamier and thinner the hummus)
- Combine the chickpeas and the garlic in a food processor and process until you have corse crumbs.
- Add in the spices, salt, pepper, tahini, lemon juice, and olive oil. Process until you have a thick paste. Scrape down the sides of the bowl.
- Add in the water and process until you have a smooth creamy dip. Add enough water to reach your desired consistency. This may take a few minutes depending on your processor and you may need to scrape down the sides of the bowl a couple of times.
- Scrape the hummus out into a serving dish and garnish with a drizzle of olive oil, some smoked paprika or a dash of cayenne pepper, and a little minced cilantro. Enjoy as a dip for veggies or toasted pita or forget the serving dish and use the hummus in a wrap, on a sandwich, scooped onto a salad, spread out onto some falafels, or spread across some socca. Enjoy!
Friday, March 8, 2013
Franco-Moroccan Inspired Eggplant, Squash and Tempeh Crumble...
Who doesn’t love a good crumble? On a crisp fall evening there are few better ways to end the night then with a warm homemade apple or plum crumble. Am I right? But, have you ever had a savory crumble before? Have you ever eaten crumble for dinner? Yeah neither had I, until I came across a savory crumble recipe in Beatrice Peltre’s ‘La Tartine Gourmande’ that caught my interest. I was so intrigued by the idea that I did a little internet research and as it turns out crumbles in general are thought to be of British or Irish origin, and have always been made in both sweet and savory varieties, although the sweet versions are far more common. Interestingly crumbles didn’t become a popular or widespread menu item until the second world war, when strict rationing of flour, sugar and butter made it nearly impossible for people to make pies since pie crusts require so much of the three rationed ingredients. Instead some ingenious people decided to make the pie filling and throw a crust-like mixture on top, and since it was so easy, and cheap to make it really caught fire. Cool right?
Anyway, crumble for dinner? I’d never considered such a thing before, but all this information really got me interested in trying one out for myself, the only thing I had to figure out was what kind of crumble to make. Peltre’s recipe used eggplant and squash and had a gluten-free crust and I liked the idea of those things. Eggplant and squash I both had on hand and they fueled my daydreams of warmer more hospitable climates such as those in the Mediterranean, the South of France, Africa and The Middle East. So I took that inspiration and ran with it, combining a mixture of Middle Eastern and French elements to form this super savory, slightly tangy, a tad sweet, flavor packed and decadent crumble. I kept the idea fo a gluten-free crumble topping because, well why the hell not? But I added cooked amaranth and nutritional yeast to make it a bit more substantial and to give it that creamy cheesy flavor that savory crumbles are suppose to boast.
I had no idea how this experiment was going to work out, but in the end I was more then surprised. This was definitely one of the most surprisingly delicious meals I’d made in some time. No matter how odd you might think the idea of a savory crumble is, the bottom line is that this worked. Plain and simple, it was so delicious that there’s no doubt you’ll go back for seconds! I know this recipe has a few steps, and it requires you to dirty a few different dishes but trust me when I say every ounce of effort is so worth it! So expand your horizons and give it a try.
Franco-Moroccan Inspired Eggplant, Squash and Tempeh Crumble
For the Tempeh
1lb Tempeh
1 Tbsp Fennel Seed
1 tsp Dried Basil
1 tsp Dried Oregano
1 tsp Onion Powder
1 tsp Garlic Powder
1 tsp Red Pepper Flakes
1/4 tsp Ground Mace
1 ½ C Water + 1 Beef Bouillon Cube
3/4 C Red Wine
For The Crumble Topping
2/3 C Finely Chopped Walnuts
1/3 C Millet Flour
1/4 C Brown Rice Flour
4 Tbsp Nutritional Yeast
1/4 C Amaranth Cooked in 3/4 C Water
1 tsp Ground Cumin
Sea Salt and Black Pepper to taste
4 Tbsp Earth Balance
½ Bunch Parsley Minced
For The Crumble Filling
1 Medium Butternut Squash, peeled, seeded and chopped. Roughly 4 C
1 Medium Eggplant chopped. Roughly 4 C
4 Tomatoes Blanched, peeled and chopped
1 Large Yellow Onion Chopped
2 Stalks Celery Chopped
2 Tbsp Olive Oil
8 Garlic Cloves Minced
1 tsp Ground Cumin
1 tsp Ground Coriander
8oz Tomato Sauce
1 tsp Dried Rubbed Sage
½ tsp Ground Cinnamon
Sea Salt and Black Pepper to taste
1/3 C Chopped Sun-dried tomatoes
6 Tbsp Capers with liquid
To Make the Tempeh -
- Mix 1 Beef Bouillon cube with 1 C of water.
- Crumble the Tempeh into a large pan, and add all the spices. Cover with the water/Bouillon mixture and the red wine. There should be enough liquid to cover the tempeh but it depends on the size of your pan. If it doesn’t quite cover add up to ½ C more.
- Bring the mixture to a boil, then reduce the heat and simmer on medium or medium-low until all or most of the liquid has been absorbed by the tempeh. Roughly 20-25 minutes. Remove from the pan and set aside.
To Make the Filling -
- Heat the olive oil in the same pan you used to make your tempeh mixture. Add the onion, celery and garlic and saute for roughly five minutes. Add the cumin, coriander, cinnamon, black pepper and salt and cook for another two minutes.
- Add the blanched chopped tomatoes, the tomato paste, the chopped eggplant and the cubed squash. Stir to thoroughly combine, then cover. Over medium-high heat let the mixture come to a roaring simmer, let simmer for 5 minutes then stir, and reduce heat to medium-low. Simmer the mixture for another 25 minutes. Make sure to check frequently to make sure the liquid doesn’t evaporate and the filling doesn’t burn. If it is looking too dry add a quarter cup of water.
- After 25 minutes add the tempeh mixture into the pan, along with the sage, capers, and sun-dried tomatoes. Stir well to combine and simmer an additional 10 minutes until squash is nice and tender.
- Remove from heat, and spoon the mixture into a large greased casserole dish.
- To Make the Crumble Topping.
- While your mixture is simmering combine all dry ingredients in a medium sized bowl.
- Melt the Earth Balance in the microwave, and add it into the dry mixture along with the cooked amaranth. Mix until nice and crumbly.
To Assemble and Bake.
- Preheat the oven to 400'F
- Spread the crumble mixture evenly over top of the filling in the greased casserole dish. Then place the casserole dish uncovered into the oven and bake for 25-30 minutes until filling is bubbly and topping is lightly browned.
- Remove from oven and let rest for 10 minutes. Then enjoy with a nice salad and a glass of sangria!
*** Note - If you need this to be soy-free you can replace the tempeh with Seitan. However if you need this to be soy and gluten-free you can try replacing the tempeh with a bean of your choosing. Either chickpeas or something hearty would be my suggestion.***
Labels:
Amaranth,
Butternut Squash,
Capers,
Celery,
Cumin,
Eggplant,
Ethnic,
European Fusion,
French,
Gluten-Free,
Middle Eastern Fusion,
Onions,
Parsley,
Sugar-Free,
Sun Dried Tomatoes,
Tempeh,
Tomato,
Walnuts
Thursday, May 31, 2012
Roasted Chili Lime and Indian Spiced Chickpeas...
Garbanzo Beans or Chickpeas as they’re also called are my hands down favorite bean ever! Well, I love other beans of course, and If I had to pick I’d say black beans, lima beans and edamame are right up there with chickpeas but chickpeas were the first bean I fell in love with so they’d always hold a special place in my heart.
I truly love them in anything. Soup, chili, stew, salad, sauteed with greens and other veggies. In rice, cous cous, or farro dishes, obviously as hummus. I love them in traditional Indian, Middle Eastern and Hispanic dishes, I just love, love, love them. They are probably the bean I buy and eat most frequently but sometimes - if you’re like me - you don’t want to go through the whole rigamarole of making something just to enjoy the one ingredient you love. Am I right? Now, I am no stranger to eating chickpeas right out of the can, I do it often, and it’s delicious, but some days you jsut need a little more than that, but you want something less than a meal. Well roasted snack chickpeas are just the thing!
| Roasted Indian Spiced Chickpeas |
Now roasting chickpeas isn’t exactly a new idea, so I can’t take credit for it. I’d seen mention of it before in magazine’s and online articles that connected to ‘healthy snacking’ though always intrigued by the idea I’d never actually thought to do it until last week. By then the recipes I’d previously seen were distant memories but roasting chickpeas seemed an easy enough task. All I needed to do was decide what flavorings I wanted to use. In the end I decided to go with a Mexican inspired flavor, and an Indian inspired flavor. Since they are two of my favorite types of cuisine and both traditionally use chickpeas it seemed a no-brainer.
| Chili Lime Roasted Chickpeas |
I was so impressed with the finished result. Not only do these things cook up fast, but they’re delicious! Absolutely-freaking delicious. They’re a truly healthy snack, and hearty too. The perfect thing to munch on pre-dinner when you usually reach for the sweets. They’re great served hot out of the oven or at room temperature, and truth be told they’re not half bad cold either. Bring a batch to your next BBQ or pot-luck and stick them on the snack table beside the chips, dips, pretzels, and party mix. They’ll be a sure fire hit.
Roasted Chickpeas 2 ways
(Cooking Instructions are the same for both)
Chili Lime Roast Chickpeas
1 15oz can Chickpeas
1 ½ Tbsp Lime Juice
½ Tbsp Agave Nectar
3/4 tsp Chili Powder
3/4 tsp Ground Cumin
Sea Salt
Indian Spiced Roast Chickpeas
1 15oz Can Chickpeas
1 Tbsp Lemon Juice
½ Tbsp Agave
½ Tbsp Olive Oil
3/4 tsp Curry Powder
3/4 tsp Gram Masala
1/4 tsp Ground Coriander
1/4 tsp Ground Cumin
Sea Salt
- Preheat oven to 400'F
- Drain and Rinse Chickpeas, then pat dry. Try to get them as dry as possible, before transferring them to a bowl.
- In a separate small bowl whisk together all flavor ingredients, both liquids and spices.
- Pour over the chickpeas and stir until thoroughly combined.
- Spread chickpeas in a single layer over a parchment lined baking sheet. Bake for 10-15 minutes then stir and bake another 10-15 minutes until chickpeas are brown and crispy.
- Remove from oven and transfer to a serving bowl, serve hot or refrigerate in an airtight container for later.
*** Note - For an Oil-Free version of the Indian Spiced Chickpeas Omit Olive Oil and use Lemon Juice or Tamarind Paste instead.***
PS: This probably goes without saying but if you decide to make both flavors at once do not put them on the same baking sheet. Use two different sheets!
Wednesday, May 16, 2012
Indo-Malaysian 'Mutton' Soup...
I have never eaten mutton in my life, nor have I had any desire to. However when I came across a recipe for an Indian Mutton Soup in a Malaysian cook book recently, I found myself intrigued. Not in the least by the meat but by the idea of a rich, flavorful, lightly spiced soup with large chunks of tomato. The picture looked very appetizing, and I could feel the creative juices in my brain begin to flow. How could I make this vegan? At first I wasn’t sure how I’d be able to achieve this, because as far as I know there is not currently a vegan lamb, or sheep substitute. There is vegan beef, and vegan chicken, there is vegan tuna, and vegan shrimp, hell there is even vegan calamari and Haggis, but no vegan lamb. I considered using seitan or tempeh because they’re both chewy and easily soak up flavor but I didn’t have any seitan on hand and tempeh I decided might taste too much like tempeh. I wanted this dish to be really rich and decadent so I needed something else.
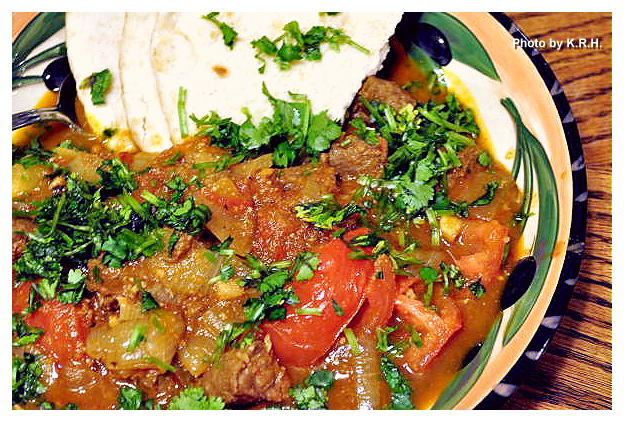
Lucky for me I had a package of Gardein Beefless Tips in my freezer. Even though they’re not in the slightest bit mutton like I figured they’d be a fine substitute. I’ve only eaten lamb a couple of times in my life and it was long ago. I recall it being stronger, gamier, and richer then beef but not necessarily that different, maybe I’m wrong there but I’ll never know. The tips in the end worked magically. They were exactly the right thing for this delicious hearty soup. The mixture of flavors in this soup is incredible, my husband and I couldn’t stop raving about the awesome flavor of the broth. It was perfectly spiced and tasted fantastic with bread. Originally I wanted to use Naan, but the store was out, and I didn’t have the time to make any so we used pita. It worked just as well I think, so when you make this soup you must get bread, any kind! You will not be sorry.
This soup apparently also goes by the name of Sop Kambing and is a particularly popular dish amongst the Muslim and Malay hawker stalls, as well as in the coffee shops. I hear it’s best when served at night as it’s said to have a restorative property. I don’t know about that, but I definitely felt sated after finishing off a large bowl, and now you can enjoy it too!
Indo-Malaysian 'Mutton' Soup
1 thumb size piece of ginger
8 Garlic Cloves
1 Red Chili or ½-1 tsp Red pepper Flakes
1 Large Yellow Onion roughly chopped
2 Tbsp Non-dairy Butter
1 ½ tsp Ground Coriander
1 ½ tsp Ground Cumin
1 ½ tsp Ground Fenugreek
1 ½ tsp Sugar
1/4-1/2 tsp Ground Cinnamon
3-4 tsp Tomato Paste
7 Green Cardamom Pods
Sea Salt and Black Pepper to taste
2 C Water + 1 Vegan ‘Beef’ Bullion Cube
3 Tomatoes, peeled, seeded, and quartered, then the quarters cut in half
10oz -1 lb Gardein Beefless Tips
1 Bunch Cilantro minced
- Spray large pan with non-stick spray and cook beef tips over high heat until browned on all sides. 3-4 minutes. Remove from pan and set aside.
- Place Ginger, Garlic and Red Chili into a food processor and process into a paste
- Heat the non-dairy butter in a large pan over medium-high heat. Add the onions and saute for 4-5 minutes until fragrant. Add the garlic, ginger paste and saute another 2 minutes. Add the coriander, cumin, fenugreek and sugar stir to combine and saute another 2-3 minutes until very fragrant and onions are golden.
- Add the water and bullion cube, along with the tomato paste, cinnamon and cardamom pods. Stir to combine, then bring to a boil.
- Reduce the heat and cover simmer for 20 minutes.
- Add the tomatoes along with sea salt and pepper to taste. Then cover and simmer another 15 minutes.
- Add in the reserved ‘beef’ tips and simmer another 10 minutes.
- Fish out the cardamom pods and discard. Garnish with the cilantro and serve with your favorite crusty bread or Naan.
*** Note - This can be made Gluten-Free if using Tempeh or soy based beef instead. Or it can be made Soy-free if using Seitan or soy-free beef and soy-free non-dairy butter instead. Although I can’t promise it’ll taste the same with either substitution.***
Subscribe to:
Posts (Atom)