Showing posts with label Rice. Show all posts

Tuesday, February 9, 2016

Red Curry Rice Soup...


I made this soup a lot over January. It's so quick and easy which I love, but it's also super warming, comforting and packed full of nutrition and flavor. Unfortunately I didn't really write down a recipe, but this is more or less how it goes.


Red Curry Rice Soup

1Tbsp Olive Oil
1 Small Onion Diced
6-8 Garlic Cloves Minced
1 tsp Ground Ginger
3 Cups Vegan Chicken Broth
1 15oz Can Coconut Milk
2 Tbsp Red Curry Paste
1 tsp Sea Salt
2-3 Tbsp White Jasmine Rice
2-3 Baby Bok Choy
3-4 Green Onions sliced thin
1/4 tsp Gochujang or Red Pepper Flakes

- Heat the Olive Oil in a medium sized pot. Add the onion and cook for 5-6 minutes. Add the garlic and ginger and cook for another 4 minutes.

- Add the Vegan Chicken Broth and Rice. Bring to a boil and then lower to simmer. 10 Minutes.

- Add in the coconut milk, salt, and Red Curry Paste. Simmer another 10-15 minutes or until the rice is tender.

- Add the sliced Bok Choy Leaves, green onions and Gochujang. Stir to combine and cook 1-2 minutes just until the choy has wilted.

- Serve garnished with extra green onions, and Gochujang if desired.

Saturday, February 21, 2015

Celebrating The Lunar New Year 2015...


Thursday was Lunar New Year, if you celebrate it I hope you had a good time. I typically don’t celebrate Lunar New Year, not because I don’t enjoy it, but because since moving to Illinois I often forget when the holiday is upon us. Living in Vancouver it’s hard not to know when the Lunar New Year is beginning. The signs are all over, the minute you enter Chinatown, and I used to spend a lot of time in Chinatown. I’m sure the Lunar New Year is a popular event in Chicago’s Chinatown but outside of that, not too many people around these parts seem to care. Then of course in many years previous I have actually been on vacation during the Lunar New Year, so it’s hard to celebrate when you’re in the jungle, or hiking a mountain. This year however our vacation is coming a month later then usual, and so I was free to celebrate.

Honestly, I was really tired from a long night at work, but I didn’t want to let that stop me from making and then eating something delicious. The meal I ended up whipping together is in no way ‘traditional’ but it’s Asian - or at least Asian fusion - and I think it did a pretty decent job of putting together a rather impromptu feast using mostly what I had on hand already.


One of the first things I decided to make was the Mongolia Beef from Lane Gold’s book “Vegan Junk Food” man this book never lets me down! I chose this because the recipe was simple, fast, I had everything on hand - including a bag of beefless tips in the freezer - and it’s been an oh-so-long time since I had Mongolia beef. I have to say this dish really exceeded my expectations. It was so full of flavor considering it had a short ingredient list. The sauce was rich, sweet and salty and thick. Absolutely perfect, like the kind of dish you’d order in a Chinese restaurant. Without doubt I will make this again and again.


Also from “Vegan Junk Food” I made the Takeout Orange Tofu. Again I chose this because it was simple, relatively quick, and had a relatively short ingredient list. Also I love orange tofu, - used to love Orange Chicken - haven’t had it in ages, and I remember years ago Bianca from “Vegan Crunk” made this and said it was delicious and I’ve always meant to give it a try. Well, I’m pleased to report that she wasn’t wrong, and this dish did not in any way disappoint.  Again it had a thick, rich, sweet sauce, that was reminiscent of every Asian restaurant I’ve ever been too. Perfect, I’ll be making this again and again for sure. The only thing I did differently is I added some diced green bell pepper to the mix only because the sauce made more then I needed for the tofu, and I didn’t want it all to go to waste.


Lastly also from “Vegan Junk Food” I made the Takeout Fried Rice. This was a no brainer. You HAVE to have rice, and I love fried rice, and my husband loves rice in any incarnation, period. So even though I’ve made a million fried rice recipes in my time I chose Lane’s because 1) I already had the book out and 2) It was quick and easy and called for very few ingredients. I thought this version was really good, though I’ll admit I added some green onion to it. I probably would have used a bit more liquid, because the rice came out a bit drier then I like but otherwise this was great.


Now, once I got started on this Lunar New Year’s Feast I Couldn’t stop there, because what’s an Asian celebration without some noodles? I dug out my copy of Donna Klein’s book “The Chinese Vegan Kitchen” flipped to the Noodle chapter and promptly made the Sichuan Style Lo Mein with Sesame and Garlic. Now I love a good Lo Mein, and any noodle dish that includes a peanut or sesame style sauce is okay in my book, but DAMN these were some amazing noodles! No lie, I could have eaten the entire pan myself. This ingredients list is a bit longer then others I’ve seen - mostly stuff needed to make the sauce - but it comes together almost as quickly as it takes you to boil the noodles so no worries.  I did add ½ a red onion, ½ a green bell pepper, and a ½ cup of sliced mushrooms to the dish just because I had these things laying around and I am trying to clean out the fridge as best I can before we leave for Europe. I would probably add that amount of veg again in the future because I think it worked really well, and also next time I think I’ll use the full amount of chili paste. I aired on the side of caution this time around and didn’t go with a full 2 tsp but felt for a dish called Sichuan it could have been spicier. That was my bad.


Now, no feast can be just protein and carbs, you need a little veg in your life, the greener the better. So using “The Chinese Vegan Kitchen” still I made Klein’s Chinese Broccoli with Vegetarian Oyster Sauce. This is a super simple side, you basically just saute Chinese Broccoli - or Gai Lan - then simmer it in a quick sauce of Vegetarian Oyster Sauce, rice wine, ginger, cornstarch, soy sauce and peanut oil. So good! I love Gai Lan!


Lastly I also made Klein’s Spicy Hoisin Glazed Green Beans. I chose this because I love green beans, I love hoisin sauce and this reminded me of a green bean dish I used to order all the time at restaurants around Vancouver. This type of green bean, or Sichuan style green beans have always been one of my favorite side dishes in any Chinese restaurant so I couldn’t pass up the opportunity to make them. Again it’s basically simply sauteed green beans that are simmered in a sauce of hoisin, garlic, peanut oil, soy sauce, chili paste, and sesame oil. So good!


I really wanted to make an appetizer and dessert as well, but I’ll say it, I was lazy. I wanted to make tapioca pudding, and Spring Rolls but I didn’t have the proper ingredients for either. I did however remember that the last time I was at Super H Market - the Korean Market in Niles, IL - I bought a pack of Vegetarian Spring Rolls. So I dug those out of the freezer and baked half the package. Really you’re suppose to fry them but my burners were all being used up at the time. Baking Spring Rolls is definitely healthier but doesn’t get the crispy. Oh well, still delicious for a store-bought roll.

So that was our Lunar New Year. I hope you had a good time celebrating, and I wish you Peace, Love and Prosperity for the New Year!

Tuesday, February 17, 2015

9 Days of Valentine's: Part 8...


And on the eighth day we broke from our French/Italian inspired menu and went Spanish with Paella. I can’t say I ever ate paella before. As I’ve mentioned I wasn’t a big fan of seafood growing up, and my exposure to Spanish food was limited to mostly Tex-Mex creations. Even when I grew up and started cooking for myself I never found the idea of Paella all that exciting. But a vegan paella? Well, why the heck not?


I used the recipe from Annie and Dan Shannon’s book “Betty Goes Vegan” It was simple and thought there were a few separate steps the recipe actually came together relatively quickly and without much fuss. I liked that. I’ve seen other vegan paella recipes that are either ultra simple - to the point of not needing a recipe - or way too complicated. The Shannon’s recipe seemed to have just the right level of down-home comfort, mixed with fancy-complication.


Now, in case you didn’t know outside of Spain paella is considered the national dish of Spain, though most Spaniards consider paella to be a regional Valencia dish. Paella has a long history in the country with ancient roots, and many variations and stories or origin - considered by food historians to be a union of two important cultures Roman, and Arab. There are three common types of paella - and variations on each. One is the traditional Valencia Paella, containing meat, greens, and beans. Seafood Paella which contains seafood, and vegetables. Then Mixed Paella which is more of a ‘free-style’ dish that can include anything from meat and seafood to greens other vegetables and beans.


I would classify the Shannon’s recipe as Paella Mixto, since it used Vegan Shrimp, Vegan Italian Sausage, Rice, Artichoke, Faux Chicken and Wine Broth, Red Bell Pepper, Garlic, Green Beans, tomatoes and spices. One of the classic features of paella is also that when cooked over an open flame the rice on the bottom of the pan gets crispy and this is the most prized part of any good paella. Of course when you bake a paella - as the Shannon’s recipe does’ a crispy rice crust is harder to come by, but the paella was still delicious, and I’m a bit grateful for the non-crispy rice. I have too many old fillings I’d be afraid of cracking on rock-hard kernels of rice.

So, this was my first experience both cooking and eating a paella. I fond the experience of cooking it really enjoyable. I loved every minute in my kitchen preparing the vegetables and vegan meats, layering everything together and smelling it as it baked. There was something really satisfying about creating and eating this ancient dish for the first time, like I was inspiring some Roman-Moorish alchemy in my kitchen. However despite the fun I had cooking, I did not find the dish to be as delicious as I’d hoped. I don’t think this is the fault of paella in particular or the Shannon’s recipe specifically, I think this has more to do with the fact that I don’t think I’m really all that fond of Vegan Shrimp. They’re too realistic for me, they’re too much like actual shrimp that it kind of creeps me out. Since I was never big on seafood to begin with, the fact that they’re so real isn’t really a selling point for me.


That being said I would most definitely make paella again, and I would even use the Shannon’s recipe again but next time I’ll leave out the vegan shrimp and replace it with more sausage or some vegan chicken instead.

Check back tomorrow to see what we had on Day 9 our final day of celebration. I’ll give you a hint, it’s Italian!

Wednesday, August 21, 2013

Super Garlic Stir-fry Bowl...


Lately I’ve just been craving real, simple, whole, foods, and my craving’s have perfect timing because that’s exactly what my body needs right now. I know I promised to post more about my experiments with “Cookin’ Crunk” and about my Artisan Vegan Cheese making but last Monday I started getting a strange cough. By Wednesday it had gotten much worse and I was feeling quite poorly overall. I spent most of the day in bed, and by the weekend the cough had escalated to downright awful. So I broke down and went to the doctor the other day and was diagnosed with Pertussis, that’s Whooping Cough for those of you who don’t know the medical lingo. How I got Whooping Cough and who from I have no idea. I was vaccinated against it as a child, and I’m never around children - sick or otherwise - unless I happen to pass them on the street or in the store, and so far as I know I haven’t been around any sick adults either. I thought whooping cough was a dead disease, something that only surfaced in third world countries, but apparently I was wrong. After doing a bit of research I read that it has been making a fierce comeback in the United States particularly over the past 3 years. In 2012 alone there were three massive outbreaks in Washington, Wisconsin, and Vermont, and the reports of whooping cough in those areas are considered to be at epidemic levels. Personally I blame all these people who refuse to vaccinate their kids for fear of the Autism boogie man, but I wont’ get into that.

So how do you get whooping cough if you’ve been vaccinated? Well according to the doctor vaccines aren’t always 100% effective, sometimes they may prevent you from getting a disease entirely, and sometimes they may only limit the severity of the disease vaccinated against. Also vaccines apparently aren’t designed to last for a person’s entire lifetime. They’re really just meant to get you through childhood, since most of the diseases vaccinated against are more contagious - and dangerous - to children. Unfortunately for me there isn’t much the doctor could do in the way of treatment, the whole point of vaccinating is prevention, because once you get an illness like whooping cough there isn’t a cure or a treatment, you have to just let it run it’s course all on it’s own and that can take as long as a month or more. I was told that because I’m healthy and came in relatively early I might be able to kick it sooner but we’ll see.


Since conventional medicine didn’t have a lot for me I looked to my training as a holistic health practitioner to see if there was anything I could do for myself, still even natural treatment options are limited. Licorice Root, Garlic, Plantain Leaf, Mullen, Anis Seed, Echinacea, and Elderberry, are the main herbs I’ve been using but I started using those way back last Monday when the cough first came on and they’re only providing moderate and brief relief. So in addition to supportive herbs I’ve decided to simplify my diet for the time being. Smaller portions, only whole foods, little to no oil, no sugar, very limited salt. A lot of greens, a lot of fresh veggies, fruit, garlic, ginger, and wheatgrass. I think it’s helping, at least it feels good to nourish myself with whole foods. The following recipe is what I made for dinner last night and I think it turned out extremely well, it’s so packed with flavor you wouldn’t even know it didn’t have any salt, or sugar, and wasn’t cooked in oil. The important thing with this recipe is to cook it at a lower heat to preserve some of the crunch of the vegetables. It's equally important to add the garlic in closer to the end of cooking so that it retains as much nutritional potency as possible while still mellowing out a little. I'll admit this is really garlicky so it's not for the faint of heart, but you can cut back on the garlic a little if you like. Garlic is a great food for illness, and a lot of garlic is always my personal preference. Delicious and filling! I do also add a tsp of sesame oil after cooking to add a bit of sesame flavor but you can leave that out if you wish .

As for the rest of it, hopefully I’ll start feeling better soon, but in the meantime you may have to wait for those other posts I promised because honestly most days I’m not really in the mood to do too much.


Super Garlic Stir-fry Bowl

2 tsp Garlic Chili Sauce
2 Large Carrots peeled and sliced
4 C Bok Choy chopped. Leaves and stems separated.
6 Shiitake Mushrooms sliced
1 C Sliced Red Cabbage
! C Frozen Lima Beans thawed
8 Cloves Garlic sliced thin
3/4 tsp Ground Ginger
2 Tbsp Bragg’s Liquid Amino’s
Water as needed - about ½ C
1 tsp Toasted Sesame Oil per serving (Optional)
Sesame Seeds
1 ½ C Brown Rice

- Cook Brown Rice in a rice cooker according to manufacturer instructions or in a pot according to package instructions.

- Meanwhile add Garlic Chili Sauce and ground ginger to a large saute pan with roughly 1/4 cup of water. Turn on the heat to medium and bring it to a simmer.

- Add in the sliced carrots, and the bok choy stems. Saute on medium for about ten minutes until softened.

- Add in the Shiitake Mushrooms and sliced garlic and saute for another 4-5 minutes. Add in more water if the pan is getting dry.

- Add the Red Cabbage, Bok Choy Leaves, and Lima Beans. Saute until Red Cabbage is wilted but still has some crunch and lima beans are heated through.

- Add in the Bragg’s and toss to coat.

- Distribute the rice evenly amongst bowls, top each bowl of rice with a generous helping of the sauteed veggies, sprinkle with desired amount of sesame seeds, and drizzle 1 tsp of Toasted sesame oil over each bowl.

- Serve and enjoy!

***Note - Remember to leave out the sesame oil to make this oil free, and you can make this soy-free by using a soy-free sauce, in place of Bragg's.***

Saturday, June 8, 2013

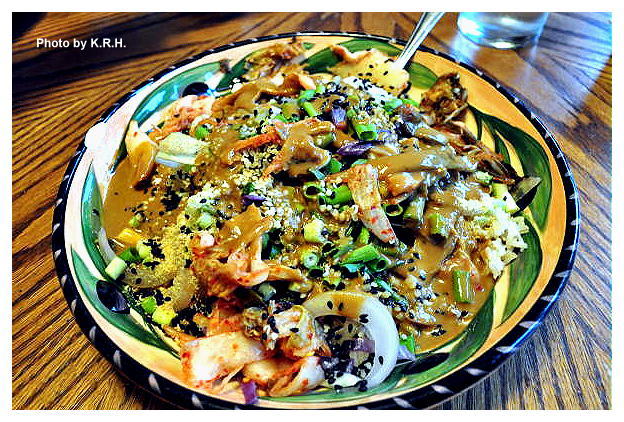
Crispy Cabbage and Rice Bowl with Miso Molasses Dressing...


Lately, when it comes to food I’ve been feeling really uninspired and over-stimulated. What I mean by that, is in my mind I’ve been battling two contrasting desires. On the one hand I want to make everything. I want to make all those delicious, gourmet meals that has my mouth watering when I log into the blogosphere, or crack open a cook book, yet on the other hand everything sounds so good that nothing seems right, does that make sense? Plus I just can’t seem to muster the energy to do any ‘gourmet’ cooking. I want food that quick, simple, and easy, I want food that’s low calorie and high in nutritional density, I want food that’s good for my body, food that is fuel. Yet I want it to taste amazing and I want it to seem decadent.


All these contrasting desires have been leaving me feeling so blah in the kitchen, not to mention that I’ve just been feeling really ‘fooded’ out since being back from Vancouver. In Vancouver we didn’t exactly eat junk, but we did eat a lot, and I mean a lot. There are so many good vegan restaurants in Vancouver that we probably ate double the amount of food we normally do, so that’s where this intense desire for simple, and basic food is coming from.  Since our return I’ve been really into smoothies, juices, beans, salads, bowls and superfoods. We ate a lot of that kind of stuff in Vancouver and now that I’m back I want to really focus on good for you whole foods. Unfortunately there are only so many salads and so many bowls that one can make before you start to get bored. As I already said the 100+ cook books in my collection haven’t been much help as I feel kind of uninspired to actually put in any of the work they require.


So lately my meals have revolved around four basic principals, and I actually find that these four things are actually the best things to consider when making a bowl - or even a salad. Firstly a survey of what you have in the pantry and fridge is an absolute necessity. Second it’s good to look for what you have in abundance or what needs to be used ASAP. Third it’s always important to take into consideration any food craving or interest you may be having that day. Lastly pick one culinary or cultural theme, whatever inspires you the most in that moment. Once you’ve gone through these steps putting together a bowl or salad is pretty effortless work.


At least that’s how it works for me. This is the method I employed to make dinner Thursday and surprisingly it came together rather well. As it happened I had a lot of cabbage, rice and various seeds. The cabbage needed to be used. I wanted something sugar-free and nutritionally dense, and I was interested in an Asian sort of flavor. The miso molasses dressing might sound strange to you, but I assure you it’s quite good. Molasses is great because it’s relatively low in sugar with a low-glycemic load plus it has a bounty of trace minerals like copper, iron, calcium, magnesium, manganese, potassium, B6, and selenium. The cool thing is that you don’t even need to eat that much molasses to get the nutritional benefits, a Tbsp is enough to enjoy the nutrition. It’s also much lower in calories then other liquid sweeteners - such as Agave or Maple Syrup. So when I decided to add a touch of sweetness to my miso dressing that’s why I chose to try Molasses. “What’s the worst that can happen?” I reasoned, and much to my surprise it turned out fantastic.


I also love the combination of slightly wilted cabbage with crispy kimchi, crunchy seeds, a creamy dressing and cooked rice. All these things just seem to go together in perfect textural harmony. Give it a try and you’ll see what I mean!


Crispy Cabbage and Rice Bowl with Miso Molasses Dressing 

1 C Brown Rice
3 C Shredded Green Cabbage
1 C Shredded Red Cabbage
½ Large Yellow Onion
5 Green Onions Sliced
1 Tbsp Hemp Seeds (per serving)
1 Tbsp Black Sesame Seeds (per serving)
1 Tbsp Ground Golden Flaxseed (per serving)
1 tsp Toasted Sesame Oil
1/3 C Kimchi (per serving)


Miso Molasses Dressing 

1/3 C Rice Vinegar
½ C Water
4 Tbsp Mellow White Miso
1 ½ Tbsp Molasses
2 Garlic Cloves
1 Tbsp Nutritional Yeast
1 Tbsp Toasted Sesame Oil

- Cook brown rice according to package instructions.

- Heat sesame oil in a large pan over medium-high heat. When hot add the cabbage and the onion and stir-fry for 6-8 minutes until onion begins to turn soft and cabbage is sightly wilted. Do not overcook, you want the cabbage to still have some texture!

- Combine all dressing ingredients in a blender and blend on high until smooth.

Assembly.

- Divide the rice amongst 2 - large portions - or 3 - smaller portions - bowls. Divide the cabbage mixture evenly between the bowls and sprinkle each bowl with 1 Tbsp hemp seeds, 1 Tbsp black sesame seeds, and 1 Tbsp Ground Golden Flaxseed.

- Garnish with desired amount of sliced green onions, and add 1/3C of kimchi to each bowl. Top with desired amount of dressing and serve!


*** Note - Can be made soy-free if using a soy-free miso like Chickpea Miso.***

Wednesday, March 6, 2013

Arugula Risotto with Leek and Fresh Herbs...


Risotto is one of those pain in the ass Italian dishes that everyone loves and noone likes to make. Well, actually I don’t mind making risotto, yes it’s usually a lot of prep work, and it’s definitely a lot of stirring, but there’s something about it that I kind of love. I love watching the rice go from small hard granules to this very rich, and creamy aromatic concoction. There’s something really satisfying in witnessing this transformation, and risotto is universally perfect for cold winter nights and late summer evenings. It’s the kind of dinner you decide to make when you just want to chill by the oven and daydream. You put on some good music, open a nice bottle of wine to sip, and you daydream about far away places.


Anyway this particular recipe was inspired by a recent trip to the library. I was browsing through the cook books as I so often do when I’m there and book entitled ‘La Tartine Gourmande’ caught my eye. This is by no means a vegan cook book, or even a vegetarian cook book, I wouldn’t say that it’s even particularly vegan friendly but the cover photo was so beautiful and I was intrigued by the French so I picked it up and started flipping through it. Now it’s not very often that I find myself inspired by non-vegan recipes but when I saw the author Beatrice Peltre had made a risotto utilizing Arugula I knew I would have to try the combination. Ever since my trip to Europe I’ve been obsessed with Arugula I use it frequently these days and throw it into all sorts of dishes. I’m always on the lookout for creative ways to use this new favorite green of mine, so when I saw this recipe I knew it was a must.


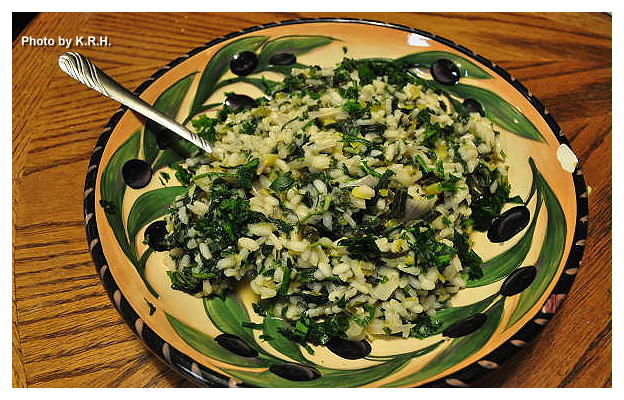
Initially I wasn’t sure how arugula would go In a risotto since it has the tendency to be bitter but it worked out perfectly and wasn’t bitter at all. I love the accent from the lemon and subtle flavor of the wine and the leek. The parsley and basil make it almost reminiscent of a light pesto, and the miso gives it that rich, tart flavor that cheese would traditionally provide. However if you prefer you can leave the miso out and I’m sure it would be just as delicious! So here is my recipe adapted from ‘La Tartine Gourmande’ No matter how you decide to make it, just make it!


Arugula Risotto with Leek and Fresh Herbs

4 C Packed Arugula
1 C Packed Fresh Basil
1 C Packed Fresh Parsley
1-2 Tbsp Fresh Minced Rosemary
2 Tbsp Olive Oil
1 Large Leek Sliced thin
½ Red Onion chopped
Zest of 1 Lemon
1 tsp Garlic Powder
½ tsp Sea salt
1 ½ C of Arbrorio Rice
½ C Dry White Wine
2 C Vegetable Broth + 2 C Vegan Chicken Broth
1 Tbsp Earth Balance
1 ½ Tbsp White Miso mixed with 3 Tbsp water
Black Pepper to taste
Fresh Minced Parsley for garnish

- Bring a medium pot of salted water to a boil over high heat. Once boiling add the Arugula, Basil, and Parsley. Blanch for one minute then drain and run under cold water.

- Once cool enough to handle squeeze all the excess water from the arugula and herbs. Then place on a cutting board and finely chop and set aside.

- In the same pot you used to blanch the arugula heat the vegetable/vegan chicken broth and keep warm.

- Meanwhile heat the olive oil in a large pot over medium-high heat. Add the leek, and red onion. Saute for 4-5 minutes then add the lemon zest and garlic powder. Saute for another 2 minutes then add the rice, and saute for 1 minute, stirring constantly.

- Add the white wine, and cook stirring until the liquid has been absorbed.

- Add the salt and minced Rosemary along with 1 cup of warmed broth and cook stirring occasionally until the liquid has been absorbed. Repeat this process until you have no more broth left and the rice is thoroughly cooked and creamy. This takes roughly 20 minutes or so depending on your oven. Depending on how hot your burners get you may need to readjust the heat to a lower setting. Either medium, or even medium low so that the rice doesn’t cook too quickly.

- With the last cup of broth add in the chopped Arugula and herbs. Stir to thoroughly mix the arugula and herbs in. Once the liquid has been absorbed turn off the heat and stir in the tablespoon of Earth Balance, along with the white miso/water mixture, and black pepper to taste. Stir until fully incorporated.

- Taste for flavor and adjust seasonings as needed. Garnish with fresh minced parsley.

Enjoy on a cold winter night with some crusty bread, a glass of wine and dreams of a warm Mediterranean climate.


*** Note - If you prefer you can use all vegetable broth or all vegan chicken broth. I used half and half because I only had 2 cups of vegetable broth left, so I subbed in 2 cups of water with one vegan chicken bouillon cube. Also if you need to be soy-free you can use a soy-free barley miso or chickpea miso instead, or as I already suggested you can leave it out altogether.***


Monday, May 21, 2012

Lemongrass Tofu Marinated Maki...


For those days when you’re looking for a heartier more protein rich maki may I make a suggestion? Lemongrass tofu! This dish came about simply out of my desire to do something different with my maki. Asparagus, and avocado, sweet potato, and cucumber rolls are brilliant, but sometimes you just want something different. My local health food store sells a really tasty fried tofu maki that I enjoy occasionally, and I happened to have a block of extra firm sitting in my fridge, so I put two and two together. However unlike the tofu maki at my local grocery I wanted to create a sweet, tangy and spicy sauce to marinate the ‘fu in.


Since I’ve been playing around a lot with Asian flavors lately I found myself reminiscing about Vietnamese food. I absolutely love the richness and complexity of Vietnamese fare, one dish can have so many flavor notes. I also love the liberal use of lemongrass stalk in South East Asian cooking, it’s an ingredient that’s completely neglected in every other cuisine. Which in my opinion is unfortunate. The world at large should not be deprived of the awesomeness of a really good lemongrass coconut milk ice cream, but I digress.


The marinade I made for my tofu, is inspired by the countless recipes and menu listings I’ve seen over the years for lemongrass chicken. It seems to be everywhere in Vietnamese restaurants, and though I’ve only eaten it once - years and years ago - I can tell you that lemongrass tofu is infinitely better. However I should say that I’d never go so far as to claim this marinade is in any way authentic - just the happy outcome of me tossing things together, - it is absolutely delicious, and makes for an equally good dipping sauce for the finished maki, instead of or in addition to soy sauce.


Lemongrass Tofu Marinated Maki

4 Sheets Nori
1 ½-2  C Brown Rice
3 C Water
2 Tbsp Brown Rice Vinegar
1 Tbsp Sugar
2 Carrots grated
4 Green onions thinly sliced
1lb Block of Extra Firm Tofu

Sweet Lemongrass Marinade 

1/3 C Soy Sauce
1/4 C Agave
1/4-1/2 C water
2-4 Tbsp Minced Lemongrass
2-3 Tbsp Kieffier Lime Leaves minced
4 garlic cloves
1 piece ginger
½ tsp red pepper flakes

Soy Sauce or Thai Chili Sauce for Dipping
Pickled Ginger and Wasabi to Garnish

- First prepare your tofu. Drain your tofu and squeeze out as much water as possible. You want it to become dense. I used my tofu press for this, and left it in for about 2 hours. If you don’t have a tofu press you can simply wrap the tofu in a clean dish towel and place heavy objects on top of it.

- In the meantime pour all marinade ingredients into a blender and blend on high until thoroughly combined. 30-60 seconds. Set aside.

- When tofu has been thoroughly drained, place it in a container with a secure lid and pour the marinade over top. Leave in the fridge to marinate for 1-2 hours.

- Now is a good time to think about making your rice. For this recipe I used brown rice because that’s what I had, but if you prefer you can easily switch it out for sushi rice and there won’t be any difference. So combine your rice, your water, the vinegar and sugar in your rice cooker and cook as directed. If you don’t have a rice cooker combine rice, water, vinegar and sugar into a pot, stir to combine cover and bring to a boil. Reduce heat and let simmer until all water is absorbed and rice is cooked. Cooking time varies but for brown rice I’d say it’s usually done within 35 - 40 minutes so just check on it every now and again and make sure to stir so the bottom doesn’t burn. Add more water if necessary. However if you are using sushi rice the cooking time will be shorter, count on 20-25 minutes cook time but be sure to check.

- When your rice is cooked set aside until cool enough to handle.

- When tofu has finished marinating. Heat a large non-stick or cast iron pan over medium-high heat. Spray with a touch of non-stick spray. Remove the tofu from the marinade and reserve marinade. On a clean cutting board slice the tofu into 1/4 inch thick strips. Dip the strips back into the marinade to coat and then place in the heated pan.

- Fry tofu slices until firm, crisp, golden, and slightly blackened. Roughly five minutes per side, perhaps a little longer if using a non-stick pan. Once all slices have been fried on both sides remove the tofu to a plate and set aside. Once cooled slice each strip into thinner slices lengthwise.

- Now you’re ready to assemble your Maki, which is by far the trickiest part, but trust me you’ll be okay. On your clean work surface. - I use a clean bamboo cutting board - lay down your bamboo sushi rolling mat. On top lay down 1 sheet of Nori with the shiny side facing up. Have a bowl of cold water at your work station and with wet - but not profusely dripping - hands grab handfuls of rice and spread evenly over the sheet of nori. Spread the rice as close to the edges as possible but leave about a half to a quarter inch of space on the horizontal side of the Nori furthest from you. This little boarder will help your rolled Maki stick together. Rinse your hands before moving onto the next step.

- Next layer in 2-3 strips of tofu on the left parallel with the horizontal edge of the nori closest to you. Laying them down over the rice you just spread out. If they’re not long enough to reach from left to right then layer in 3 more strips on the right so that the edge closest to you is completely filled with tofu. If some poke out past the nori you can trim them off, or leave them as is.

- Sprinkle desired amount of grated carrots and sliced green onions over top of the tofu,

- Now, using your mat, and working slowly pull the mat up slightly and roll it over. Moving slowly and using both hands slowly roll your Maki, using the bamboo mat to press down and make the roll tight. You may have to stop at some point to push the filling back under the Nori or to help guide the roll. Stop just before you get to the opposite edge that you’ve left empty. Dip your fingers into the water, run them along the empty edge then roll your nori closed. Press down tightly to seel.

- It’s okay if it’s not perfect, rolling Maki takes practice and even though I’ve done it a ton of times I still don’t make a perfect roll each time. Sometimes my rolls are to fat, sometimes they don’t seel properly, sometimes I don’t cut them well. It happens, don’t beat yourself up about it. Remember that you’re doing it for the fun of it, and it’s - maybe - your first time, you’ll get better the more you practice.

- Next, and this step is very important. Before cutting your Nori into one inch sections run your chef knife under cold water. By the way you should always use a chef knife or other similar smooth edged knife to cut sushi. If you use a steak knife, or a bread knife or some other kind of knife with a jagged edge your Maki is going to get shredded and will likely fall apart. Once seaweed is wet it is very, very durable, your roll will fall apart before the seaweed cuts properly. I know from experience. So run your Chef knife under cold water. Give it a shake and then starting from one edge and working towards the other cut your roll into rounds.

- The best way to cut your roll is to do it in one smooth motion. Do not use your knife as a saw. Press down firmly it’s okay if the roll doesn’t cut right away, it’s okay if it looks like it’s getting squished a bit this is normal. Use one fluid motion, press down on the knife with your knife hand and hold the long end of the roll steadily in place with the opposite hand. Press the knife firmly down until it has cut all the way through. To separate the round from the rest of the roll you may have to give one quick saw motion depending on the sharpness of your knife, but otherwise that is it. Run your knife under cold water before EACH cut! This is important. Before each cut your knife must be wet. The drier your knife Is the more difficult this will be and the more likely your roll will fall apart.

- Congratulations! Now that one roll is finished - You should have gotten 6-8 rounds out of it by the way - give yourself a pat on the back, and then begin again from step one. Repeat all steps until ingredients are used up. At the end you may have some leftover rice. If this is the case no worries, stick it in the fridge and toss it into a salad tomorrow, or make a veggie roll for lunch!


- To serve arrange on plates and serve with dipping bowls of soy sauce, the reserved lemongrass marinade and my favorite Sweet Thai Chili Sauce. Serve with dollops of wasabi if desired and pickled ginger, yum!


*** Note - Gluten-Free if using GF Tamari. If you don't have  Kieffier lime leaves you can just use some fresh grated lime zest and fresh lime juice.***

Monday, March 5, 2012

Greek Style Dolmathes...


Dolmathes are an essential part of Greek Cuisine for me, and no Greek feast can be complete without these delicious rice stuffed vine leaves. Dolmathes - or dolmas, which is the Turkish name they’re more commonly known by - originated sometime during the Ottoman Empire and have many different variations depending on the region. Though they may not have originated in Greece exactly, they have certainly become synonymous with the culture and the cuisine; and to be honest it’s the simple Greek preparation of dolmathes that I love and appreciate the most.


The cool thing about dolmathes is that they’re one of the few - possibly the only? - dish in Greek cuisine that is traditionally vegan. That’s right, true Greek dolmathes are vegan, they contain no meat, no cheese, no egg, and no other dairy products. So don’t allow people to tell you that dolmathes are meat based, or that meatless dolmathes are not traditional or are in some way lacking, because they’re not. Dolmathes have always been one of the many great vegetarian dishes of Greece that just happens to also be vegan. Having said that however, you should be mindful when eating dolmathes in restaurants because there are meat stuffed variations of dolmathes as well. In Greece the meat stuffed versions are called Dolmathakia, but on restaurant menus - at least in North America - rarely is a distinction drawn between the two. Most often all types of dolmathes are simply labeled dolmathes or dolmas and so you’ll want to read the ingredients.


Typically dolmathes are served cold with Avgolemono sauce while dolmathakia are served warm with yogurt sauce, though dolmathes can also be served warm which is usually how I serve mine. Except the leftovers of course which I prefer to eat cold. Believe it or not they taste amazing either way though even if you eat them cold you’ll want to warm your avgolemono up a bit. In restaurants dolmathes are also generally served as an appetizer but served with a nice Greek salad or small side dish they make a wonderful main course in their own right. If you’ve never had dolmathes, and in particular never made your own you really must try it!

They may appear intimidating upon first glance but I assure you they are not as fussy as they seem. In fact preparing them is relatively easy and it’s true that the more often you make them the more you improve. They don’t require any special equipment and all they really ask for is a bit of patience and a gentle hand. Be gentle with your grape leaves so as not to tear them, role your dolmathes tightly like you’re rolling sushi and pack them firmly together. Follow that advice and you shall not be led astray. Though everyone - including myself - is bound to have at least one or two dolmathes burst on them during the cooking process, no worries, they may not look pretty and they may not be the ones you choose to serve to your guests but they taste just fine so scoop ‘em into a bowl to eat the next day and don’t worry about them. My only other advice is that you buy more grape leaves then you think you need, and my reason for this is simple - you never know. You never know what the quality of your leaves will be like, you never know if you’re going to tare any or how many you might tare, and you never know how big or small the leaves are. If you get a jar of small leaves you may want to overlap two leaves to make one dolmathes instead of using one leaf. I tend to do this a lot and it actually makes the process a lot easier. So with all that in mind lets get rolling....


Dolmathes

At least a16oz jar of Grape Vine Leaves
1 ½ C Cooked Brown Rice
2 Medium Onions grated
2 Large tomatoes grated
4 tsp or 1 Tbsp Fresh Mint minced (to taste, I typically like more)
1/3 C Olive Oil (or more as needed)
2 ½ C Water
1/4 C Olive Oil
1/4 C lemon Juice or ½ a Lemon Juiced
Sea Salt and Black Pepper to taste

- First bring a pot of water to boiling drop your tomatoes into it for a couple of minutes then dunk in a bowl of ice water. Rub skins until they come off and set aside.

- Grate onions and tomato on a cheese grater, then add it to a bowl with your cooked rice. Add in the mint, salt and pepper to taste and 1/3 C olive oil. This should be enough oil, however depending on how juicy or not juicy your onions and tomatoes are you may want to increase the oil to 1/2 C. It's up to you, but also keep in mind that while you want the mixture moist and flavorful, you don't want it liquidy.

- On a clean cutting board lay out one vine leaf. Place a spoonful of filling down the center of the leaf. Carefully but firmly roll tucking in the sides as you go until you’ve formed a neat, tight roll. Think of it like rolling sushi or a burrito. Repeat this process until all filling has been used. Remember if your leaves are small or a little bedraggled you can always use a second leaf, overlapping it with the first to create a larger sturdier roll.

- Place a pot big enough to hold your dolmathes in a single layer, on the stove. Place reserved tomato skins at the bottom and then pile your dolmathes on top. Try to keep them in a single layer, packing them in tightly. If you need to go two high, or have a few extras on top it’s okay, but they cook best when packed tight so try to cram them in. Gently of course. Add the 2 ½ cups of water, plus the 1/4 of olive oil to the pot.

- Place a plate, or another pot inside the pot on top of the dolmathes to hold them down then cook over medium-low heat for fifteen minutes.

- Remove the plate or pot and discard. Give the dolmathes a gentle stir and add the lemon juice. Then cover with a lid and cook another fifteen minutes.

- Drain off any liquid that may remain in the pot then remove dolmathes from the pot with a slotted spoon and place on a serving plate or individual plates. Discard tomato skin.

- Serve with a huge dollop of Avgolemono sauce and enjoy!


PS: In retrospect I probably should have taken a picture of one of these guys cut in half so you could see the inside, apologies!

Friday, February 17, 2012

Japanese 7 Spice Rice Bowl with Greens...


Yesterday I was really craving greens, all kinds of greens! Anything from broccoli to kale to collards to cabbage. Originally I had planed to make some sauteed Swiss Chard with Baked Tempeh but as the day drew nearer it’s close I started longing for something a little less involved. I started thinking about rice, which got me thinking about Japanese food, which in turn got me thinking about sushi. Sushi, now there was an idea! Except it was eight o’clock at night and after a couple hours of hard study I wasn’t really in the mood to break out the bamboo mat and start rolling Maki.


Instead I decided to make a Japanese inspired rice bowl. One that would combine the flavors I love about sushi, with simplicity and my desire for a plate loaded up with greens. Though you can really use any green veggie you like I strongly suggest the broccoli asparagus combination. Not only do they taste good together but they always taste great with rice. Initially I chose them out of convenience, as I always have bags of frozen broccoli on hand and I had just bought a pound of asparagus the day before yesterday. Convenience or not though it turned out to be a stellar choice.


This bowl is so full of flavor, and I particularly like the application of Japanese 7 Spice here - also known as Shichimi Togarashi - for the subtle heat and refreshing citrus flavor it lends to the dish. This meal is both satisfying and filling yet light. Which is exactly what you want if you’re forced to have a late dinner. You don’t want to be bogged down with digestive distress and gastric upset right before you slip into bed right?


Japanese 7 Spice Rice Bowl with Greens

Rice

2 C Brown Rice
2 1/4 C Water
2 tsp Kelp Granules
2 Tbsp Brown Rice Vinegar
1 Tbsp Sugar
½-1 Tbsp Grated Ginger
6 Garlic Cloves Minced
1 tsp Sesame Oil

Sauce

2 Tbsp non-dairy Mayo
2 tsp Liquid Smoke
1 tsp Umeboshi Plum Pate
½ tsp Agave Nectar
1 1/4 tsp Japanese 7 Spice Seasoning (or to taste)

1lb Asparagus trimmed
½-1 lb Broccoli Florets
1 tsp Sesame Oil (or to taste. Optional)
2-4 tsp Sesame Seeds (to taste)

- To make the rice combine rice, water, vinegar, kelp, and sugar in a rice cooker and cook as directed by manufacturer. Or combine in a pot and cook the old fashioned way. (Bring to a boil, then reduce heat to simmer and let cook for 30-45 minutes making sure to check and stir occasionally so the rice doesn’t burn.)

- While rice is cooking heat the tsp of sesame oil in a small pan over medium heat. Add the grated ginger and minced garlic. Saute for a few minutes until fragrant and golden. About five minutes. Remove from heat and set aside.

- Trim asparagus of tough ends and place into a steamer basket along with the broccoli. Or if your steamer basket is small work in batches. Asparagus first then broccoli. Steam the vegetables until they are tender but still a bit crisp, about 5-8 minutes. They should be bright green and vibrant!

- To make sauce combine Mayo, liquid smoke, umeboshi paste, agave and 7 spice seasoning. Taste for flavor and adjust as needed. A word of caution though, both umeboshi and 7 spice seasoning are strong, so a little goes along way. It’s important that you taste the sauce before deciding to add more and If you do add more add it in small increments. Once sauce is combined set aside.

- Once the rice has finished cooking add the sauteed ginger and garlic mixture to the pot. Stir until combined.

- Divide the rice mixture amongst two bowls. Into each bowl place 1-2 Tbsp of the sauce and mix it into the rice until well combined. Top each bowl with an equal amount of asparagus and broccoli.

- Drizzle any remaining sauce over top of the veggies. Divide the remaining 1 tsp of sesame oil and drizzle a half tsp over each bowl. (Optional but recommended) Then sprinkle 1-2 tsp of sesame seeds over top of each bowl. I used black sesame seeds because it was all that I had but feel free to use brown.

- Serve and enjoy!