Showing posts with label Sesame Seeds. Show all posts

Thursday, November 20, 2014

Stir-fried Bean Curd and Chinese Flowering Chives in Garlic Black Bean Sauce....


Black Bean Sauce is one of my favorite things in Chinese Cuisine, something about that salty, earthy flavor really gets me. Since I haven’t had it in a while, and we’ve been on an Asian Food kick lately, I was really craving this long-time favorite. I just didn’t know what kind of stir-fry I wanted to make. The thing about Black Bean Sauce is that it requires a hearty protein, something that can really soak up that black bean flavor. You need a sturdy protein that can get coated and glazed in the delicious black bean sauce. Naturally I’d think to use seitan, only I don’t have any at the moment. My next thought was tempeh but wasn’t in the mood for the distinctive tempeh flavor. The next logical choice then is tofu, only I didn’t have the time to pre-bake or pre-fry the tofu to get it really firm. Then it hit me, why not use that package of Bean Curd I’d picked up at the Korean Market the other day? Oh, and why not pair it with those Chinese Flowering Chives I had sitting in my crisper drawer. Perfection!


Chinese Flowering Chives - or Garlic Chives, as they’re also sometimes called - are a relative of the onion family. They look kind of like a thin green onion - or chive - but they have little white flower buds on the end that taste more like garlic. They have a potent smell, but not a particularly overwhelming flavor. They’re great in stir-fry’s. Fried Bean Curd is a kind of tofu, it has a much lower moisture content then the regular tofu you buy at the store, and it’s been previously fried till golden. The texture is very chewy, very meaty, and it shreds rather then crumbles. It’s a great stand-in for meat in any dish, and doesn’t taste anything like regular tofu which may make it more appealing to people who claim not to like tofu. Actually both the texture and the flavor remind me more of tofu skin, then tofu. Fried Bean Curd stands up really well to stir-frying, and it paired amazing with the Chinese Flowering Chives and the Black Bean Sauce to make the perfect lunch.

Most well stocked Asian Groceries should have everything you need to make this dish, and If you love Asian food as much as we do then I urge you to go on a little scavenger hunt, and then make this dish.


Stir-fried Bean Curd and Chinese Flowering Chives in Garlic Black Bean Sauce

1 Tbsp Toasted Sesame Oil
1 Tbsp Minced Ginger
3 Garlic Cloves sliced thin
8oz Fried Bean Curd Sliced into Strips
12oz Chinese Flowering Chives cut into ½ inch pieces
2 Tbsp Fermented Black Bean Paste
2 Tbsp Tamari
2 Tbsp White Wine
2 Tbsp Brown Sugar
1 Tbsp Chinese Black Vinegar
Sesame Seeds to Garnish

- First make the marinade. Add Black Bean Paste, Tamari, White Wine, Brown Sugar, and Chinese Black Vinegar to a small bowl and whisk together. Set aside until ready to use.

- Heat Sesame Oil in large pan over medium-high heat.

- Add in Garlic and ginger and stir-fry for 2-3 minutes until fragrant and garlic is golden-brown.

- Add in Sliced Bean Curd and stir-fry for 8 minutes until golden-brown on both sides.

- Add in the Chinese Flowering Chives and stir-fry for 2-3 more minutes until softened and bright green.

- Add in Marinade, and let cook for 2-4 minutes until slightly reduced.

- Remove from heat, garnish with sesame seeds and serve over a bed of brown rice or eat as is.


*** Note - Make sure you read the labels on your Black Bean Paste. Make sure it is FERMENTED, and made with black soybeans. Do not confuse it with sweet black bean paste which is sweeter in nature and made with mung beans. Fermented black bean paste is more like a miso, where as the other kind of black bean paste is used like red bean paste in pastry’s, desserts, and other confections. *** 


Monday, November 17, 2014

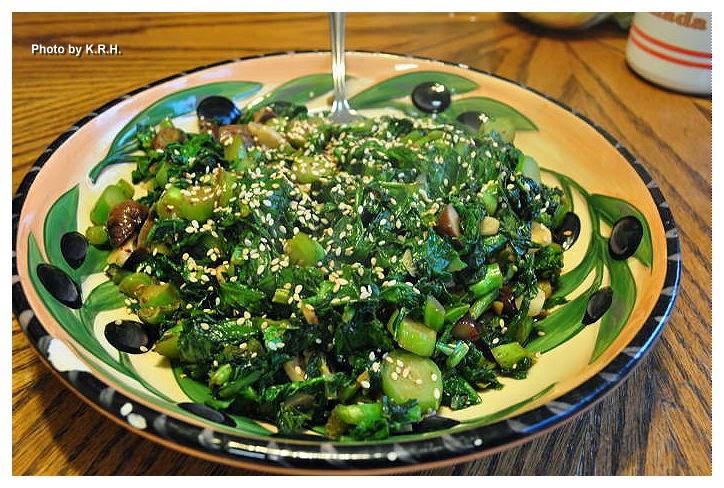
Garlic Sesame Gai Lan with Chestnuts...


My husband and I have been really diggin’ on Chinese food lately. I think every day this week I’ve made something from Donna Klein’s “The Chinese Vegan Kitchen,” and we just can’t get enough. Asian cuisine in general is our favorite, and my husband would be quite happy to live the rest of his life on noodles and rice. So this week when we were doing our grocery shopping I found myself particularly enamored with the fresh Asian greens. The Choy’s, the Chives, the Cabbages, and then there were these huge bunches of Gai Lan that really caught my attention. Growing up in Vancouver - with Chinese food being a particular staple, I’m quite familiar with Gai Lan, but despite having eaten it at many restaurants I’ve never actually cooked it at home. Despite not knowing what exactly I was going to do with it I just couldn’t help but grab a bunch.


Gai Lan - in case you don’t already know - also goes by the name of Chinese Broccoli, and as that name would suggest it’s very similar. Though the stems are longer and thinner, and it has a lot long, flat, spinach-like leaves. The taste of Gai Lan is mild, but slightly more bitter then broccoli. Gai Lan is eaten throughout China, but is particularly common in Cantonese Cuisine. Oh, and fun fact, Broccolini - those cute little baby broccoli’s - are actually a hybrid of regular broccoli and Gai Lan. Cool right? Anyway, you can use Gai Lan in just about any way you like, stir-fry’s, soups, vegetable side dishes. You can boil it, roast it, fry it, or saute it. You can season it lightly, or drench it in a nice sauce. The possibilities are endless, but I decided to go with a very simple preparation for my lunch yesterday. I was really craving sesame and garlic and I knew that combination would taste great paired with Gai Lan. I wasn’t wrong. I also had a package of chestnuts leftover from another dish I made a while back and so I decided to toss those in too. You can leave them out if you prefer but I think they really add something to the overall dish. If you’ve never had Gai Lan I urge you to give it a try next time you see it at the market.

Just a little note about this recipe, it is not in any way meant to be a 'traditional' Chinese recipe, as you might have guessed from my use of Korean Chili Pepper, but it is delicious!


Garlic Sesame Gai Lan with Chestnuts 

1 Large Bunch Gai Len
8 Cloves Garlic Sliced thin
1 Tbsp Toasted Sesame Oil
1 ½ Tbsp Soy Sauce
1 Tbsp Agave
3oz Roasted Chestnuts Chopped
1-2 Tbsp Sesame Seeds
1/4 Gochugaru (Korean Red Chili Powder)
Sea Salt and Black Pepper to taste (Optional)

- Slice the ends off the stems of the Gai Lan and discard.

- Remove the stems from the leaves, set the leaves aside and slice or chop the stems.

- Heat the Sesame Oil in a large pan over the stove, when hot add in the sliced garlic and chopped Gai Lan stems. Saute on high for 5-6 minutes until garlic is golden and fragrant and stems are bright green.

- Add in the soy sauce, agave, and Gai Lan leaves. Saute for 2-3 minutes until leaves are wilted.

- Add in the Chestnuts, sesame seeds, gochugaru, and salt and pepper. Saute 1 minute.

- Remove the pan from the heat and serve with additional Sesame seeds and gochugaru if desired.

*** Note - You can make this Gluten-Free by making sure to use a Gluten-Free Soy Sauce. You can make this Soy-Free by making sure to use a soy-free sauce like Bragg's Liquid Aminos, or Coconut Aminos***

Thursday, September 26, 2013

Vegan Mofo #25 - Donna’s Sesame Crusted Tofu with Spicy Pineapple Rice Noodles...


Vegan Mofo #25 - Donna’s Sesame Crusted Tofu with Spicy Pineapple Rice Noodles 

The Region - China
The Book - The Chinese Vegan Kitchen
The Author - Donna Klein
The Recipe - Sesame Crusted Tofu with Spicy Pineapple Rice Noodles
Page # 119
Difficulty - Easy
Duration - About 35-40 minutes


From the Caribbean we move back to China with a dish that Donna claims hails from Yunnan Province. Yunnan province is in the extreme southwest of China bordered by Myanmar, Laos, and Vietnam, because of it’s diverse ethnic population Yunnan cuisine is an eclectic mix of local ingredients and outside influences. Most of the dishes tend to be spicy, though this is complimented by what Donna says is their liberal use of sweet, cool, pineapple.


Personally I really love pineapple, after all I practically grew up gorging myself on the tropical fruits, but as much as I love it fresh and raw, I also love it in savory and sour cooked dishes. I’ve eaten a lot of sweet and sour in my time, and so for me pineapple with vegetables or a protein just works, it’s like comfort food to me, you know? Needless to say I was pretty stoked to try out this dish when I first saw it in “The Chinese Vegan Kitchen” as I also love sesame and rice noodles. Can there be any greater combination of flavors?


What I really love about Donna’s dish is that it’s simple, and easy to throw together but the flavor is so powerful that you don’t feel like you’re compromising or wussing out when you make this on a busy workday evening. All that’s required is a few minutes of saute time and a little chopping. The noodles are made with garlic, ginger, red pepper flakes, snow peas, pineapple juice, fresh pineapple, soy sauce, cornstarch, sesame oil, salt a little pepper and that’s it. For the tofu you simply press out the water slice it and bread it in a mixture of salt, cornstarch and sesame seeds then fry it till golden brown. Voila! Dinner! And as an added bonus if you make the tofu first, then wipe out the pan to make the noodles next you only need to use one pan! Also it’s very handy to make the rice noodles in advance to make this dish even easier!


Sunday, September 22, 2013

Vegan Mofo #19 - Donna’s Sesame Balls filled with Red Bean Paste (Jin deui)...


Vegan Mofo #19 - Donna’s Sesame Balls filled with Red Bean Paste (Jin deui)

The Region - China
The Book - The Chinese Vegan Kitchen
The Author - Donna Klein
The Recipe - Sesame Balls filled with Red Bean Paste
Page # 188 Red Bean Past is on Page 182
Difficulty - Easy
Duration - About - 1 hour to make the paste from scratch but this can be made up to a week in advance. About 30-40 minutes to make the balls once the paste is made, it depends on how fast you work and how good you are with dough.

So from Europe we move back to China with one of my all time favorite dessert/sweet’s in the known universe. Sesame Balls filled with Red Bean Paste. I think I’ve mentioned my love affair with red bean past before, but incase I haven’t - this stuff is to die for! I go crazy for it, if I ever see it in anything on a menu I immediately order it. I grew up eating red bean paste filled sesame balls, and red bean paste stuffed buns in Vancouver’s Chinatown. I love red bean paste filled mochi, I love red bean paste in ice cream, you name a use for red bean paste and you can be sure that I love it. So the minute I got Donna Klein’s wonderful book The Chinese Vegan Kitchen and saw this recipe I knew I’d have to make it.


Sesame Balls or Jin deui as they’re known in China can be traced back to the Tang Dynasty, where they were originally a palace food.  Though with the southward migration of people from Central China they became a popular part of Southern Chinese cooking. Recipes for Jin deui abound, and each different region has their own variation that may bare a name that differs from Jin deui. The most common filling seems to be lotus seed paste, though they are also often filled with sweet black bean paste, and red bean paste. The red bean past of course being my utmost favorite. Apparently Sesame Balls are one of the most popular pastries found in Hong Kong, and are commonly found in Chinatown markets and bakeshops overseas. Everything about them is great!


Of course it’s a recipe that requires some work. You could use canned red bean paste if you wanted but honestly it’s best to make your own. Nothing’s going to taste as good as making your own paste, and you can freeze it if you have leftover to use in some other concoction. Despite my reservations about working with dough the sesame ball dough is actually really easy to work with and doesn’t crumble or fall apart or tear like other dough’s might. Maybe this is due to the sticky sweet potato used in the dough recipe, or maybe it’s the glutenous rice flour, whatever it is, I found that this dough was one of the easiest I’ve ever had to work with. It’s a simple mix of glutenous rice flour, sweet potato, all purpose flour, sugar and water. The red bean paste is equally as easy made with adzuki beans, sugar, water, salt, and peanut oil.


Frying the sesame balls was a bit more of a challenge for me. I’ll be honest, and say I hate frying things, really. I can never control the temperature properly. My oven burners get really hot, and my cast iron conducts so well that even after the pan is hot and I turn the burner on medium-low stuff still burns. Trying to get the sesame balls to brown evenly was no easy task for me, and there were a few burnt spots but overall I think they turned out really well, and even where there was a bit of burning the flavor was still really good. I know I’ll definitely make these again now that I know how easy it is but I think maybe next time I’ll save myself some trouble and deep fry them instead.

Once cooked the balls are ready to serve right away, you can dust them with a bit of powdered sugar as I did for the photo or eat them plain. I like them plain, but they do look pretty with a light dusting of sugar. If you have never had red bean paste filled sesame balls you need to try them now!


Wednesday, August 21, 2013

Super Garlic Stir-fry Bowl...


Lately I’ve just been craving real, simple, whole, foods, and my craving’s have perfect timing because that’s exactly what my body needs right now. I know I promised to post more about my experiments with “Cookin’ Crunk” and about my Artisan Vegan Cheese making but last Monday I started getting a strange cough. By Wednesday it had gotten much worse and I was feeling quite poorly overall. I spent most of the day in bed, and by the weekend the cough had escalated to downright awful. So I broke down and went to the doctor the other day and was diagnosed with Pertussis, that’s Whooping Cough for those of you who don’t know the medical lingo. How I got Whooping Cough and who from I have no idea. I was vaccinated against it as a child, and I’m never around children - sick or otherwise - unless I happen to pass them on the street or in the store, and so far as I know I haven’t been around any sick adults either. I thought whooping cough was a dead disease, something that only surfaced in third world countries, but apparently I was wrong. After doing a bit of research I read that it has been making a fierce comeback in the United States particularly over the past 3 years. In 2012 alone there were three massive outbreaks in Washington, Wisconsin, and Vermont, and the reports of whooping cough in those areas are considered to be at epidemic levels. Personally I blame all these people who refuse to vaccinate their kids for fear of the Autism boogie man, but I wont’ get into that.

So how do you get whooping cough if you’ve been vaccinated? Well according to the doctor vaccines aren’t always 100% effective, sometimes they may prevent you from getting a disease entirely, and sometimes they may only limit the severity of the disease vaccinated against. Also vaccines apparently aren’t designed to last for a person’s entire lifetime. They’re really just meant to get you through childhood, since most of the diseases vaccinated against are more contagious - and dangerous - to children. Unfortunately for me there isn’t much the doctor could do in the way of treatment, the whole point of vaccinating is prevention, because once you get an illness like whooping cough there isn’t a cure or a treatment, you have to just let it run it’s course all on it’s own and that can take as long as a month or more. I was told that because I’m healthy and came in relatively early I might be able to kick it sooner but we’ll see.


Since conventional medicine didn’t have a lot for me I looked to my training as a holistic health practitioner to see if there was anything I could do for myself, still even natural treatment options are limited. Licorice Root, Garlic, Plantain Leaf, Mullen, Anis Seed, Echinacea, and Elderberry, are the main herbs I’ve been using but I started using those way back last Monday when the cough first came on and they’re only providing moderate and brief relief. So in addition to supportive herbs I’ve decided to simplify my diet for the time being. Smaller portions, only whole foods, little to no oil, no sugar, very limited salt. A lot of greens, a lot of fresh veggies, fruit, garlic, ginger, and wheatgrass. I think it’s helping, at least it feels good to nourish myself with whole foods. The following recipe is what I made for dinner last night and I think it turned out extremely well, it’s so packed with flavor you wouldn’t even know it didn’t have any salt, or sugar, and wasn’t cooked in oil. The important thing with this recipe is to cook it at a lower heat to preserve some of the crunch of the vegetables. It's equally important to add the garlic in closer to the end of cooking so that it retains as much nutritional potency as possible while still mellowing out a little. I'll admit this is really garlicky so it's not for the faint of heart, but you can cut back on the garlic a little if you like. Garlic is a great food for illness, and a lot of garlic is always my personal preference. Delicious and filling! I do also add a tsp of sesame oil after cooking to add a bit of sesame flavor but you can leave that out if you wish .

As for the rest of it, hopefully I’ll start feeling better soon, but in the meantime you may have to wait for those other posts I promised because honestly most days I’m not really in the mood to do too much.


Super Garlic Stir-fry Bowl

2 tsp Garlic Chili Sauce
2 Large Carrots peeled and sliced
4 C Bok Choy chopped. Leaves and stems separated.
6 Shiitake Mushrooms sliced
1 C Sliced Red Cabbage
! C Frozen Lima Beans thawed
8 Cloves Garlic sliced thin
3/4 tsp Ground Ginger
2 Tbsp Bragg’s Liquid Amino’s
Water as needed - about ½ C
1 tsp Toasted Sesame Oil per serving (Optional)
Sesame Seeds
1 ½ C Brown Rice

- Cook Brown Rice in a rice cooker according to manufacturer instructions or in a pot according to package instructions.

- Meanwhile add Garlic Chili Sauce and ground ginger to a large saute pan with roughly 1/4 cup of water. Turn on the heat to medium and bring it to a simmer.

- Add in the sliced carrots, and the bok choy stems. Saute on medium for about ten minutes until softened.

- Add in the Shiitake Mushrooms and sliced garlic and saute for another 4-5 minutes. Add in more water if the pan is getting dry.

- Add the Red Cabbage, Bok Choy Leaves, and Lima Beans. Saute until Red Cabbage is wilted but still has some crunch and lima beans are heated through.

- Add in the Bragg’s and toss to coat.

- Distribute the rice evenly amongst bowls, top each bowl of rice with a generous helping of the sauteed veggies, sprinkle with desired amount of sesame seeds, and drizzle 1 tsp of Toasted sesame oil over each bowl.

- Serve and enjoy!

***Note - Remember to leave out the sesame oil to make this oil free, and you can make this soy-free by using a soy-free sauce, in place of Bragg's.***

Wednesday, June 19, 2013

Black Sesame Rice with Steamed Kale, Cabbage and Edamame...


Tonight’s dinner was less of a recipe and more of a ‘lets throw some stuff together and see what happens’ kind of affair, but it turned out so good that I just had to share it. Originally I didn’t know what I wanted to make, but as the day grew later and I became more and more involved with homework I realized whatever I did choose to make wasn’t going to be anything elaborate. Midway through the day I started feeling like rice, and once I got thinking about rice I got thinking about bowls - again!

Well, I was all out of brown rice, but had a jar of black rice that I’ve been neglecting. Black rice pairs particularly well with sesame seeds which I have plenty of and so that got me thinking of Asian flavors. Asian flavors brought me to Edamame which is a good protein source, and then all I needed was a vegetable. Today I had to write an essay on the health benefits of Cruciferous vegetables, and writing that essay inspired me to utilize the kale and red cabbage that were sitting in my fridge. Steam it, and toss it into a bowl with a few well picked condiments and a lovely nutritious dinner was served.


This is a light but filling dinner packed with dense nutrition. Black rice provides you with 18 amino acids, zinc, copper, iron, carotene and several vitamins as well as protein and fiber, which makes it more nutritious then plain ‘ole brown rice. Not to mention - if you believe in such things anyway - in China black rice is claimed to be good for the kidney’s, stomach, and liver. Sesame seeds are a great source of manganese, copper, calcium, iron, phosphorus, Vitamin B1, zinc, magnesium, selenium and fiber. They’re also great at relieving the liver of oxidative stress.  Edamame provides you with complete protein - meaning it contains all of the essential amino acids - as well as fiber, calcium, iron, Vitamin A, C & E and various other minerals. Kale is the best known cancer fighting vegetables on the planet, and the richest of all leafy greens in carotenoids. Ounce for ounce it has more calcium then milk, and it’s calcium is more bioavailable then milk - meaning our bodies can utilize more of it, better. It’s also packed full of essential vitamins and minerals. Cabbage is another great cancer fighter and an immune stimulant packed full of vitamins, minerals, and phytonutrients and by now we should all be well aware of the amazing health benefits of both Ginger and Garlic.

This is exactly the kind of delicious meal you can eat every day and not feel guilty about it. Every ingredients is packed full of beneficial nutrients to help you! This is definitely going to be a ‘go-to’ meal for me from now on.


Black Sesame Rice with Steamed Kale, Cabbage and Edamame

For the Rice  

1 1/4 C Black Rice
2 ½ C Water
1 Tbsp Toasted Sesame Oil
3 Garlic Cloves minced
½-1 tsp Japanese 7 Spice blend (To taste)
1/4 C Sesame Seeds

For the Kale - Cabbage - Edamame 

! Bunch Kale torn into bite sized pieces
1 ½ C Red Cabbage sliced
1 ½ C Edamame
Sliced Green Onions to taste
2 Tbsp Rice Vinegar
2 Tbsp Bragg’s Liquid Amino’s (Tamari or Soy Sauce can be used instead)
1 Tbsp Maple Syrup
Ume Vinegar to taste
½-3/4 tsp White Truffle Oil (Optional but strongly recommended!)
½ tsp ground ginger

- Cook rice in a rice cooker, or according to package directions. Once rice is done cooking add in the sesame oil, garlic cloves, and 7 Spice blend. Stir to combine and cover the pot or cooker with a lid for 5 minutes to let the steam infuse the garlic into the rice.

- Add Sesame seeds to the rice just before serving and stir to combine.

- Meanwhile in a large pot steam the Kale, Cabbage and Edamame, for roughly 5-7 minutes until the kale is wilted and the cabbage is wilted but still a little crisp. If you need to you can steam in two batches, kale first, then cabbage and edamame together.

- Combine all the steamed vegetables in a large bowl. Add the Bragg’s Liquid Amino’s, Rice Vinegar, Ground Ginger, Maple Syrup, Ume Vinegar, White Truffle Oil, and Green Onions. Stir to combine and taste for flavor.

- Serve by scooping the rice into a large bowl, then layering in the steamed vegetables. Enjoy!


*** Note - If you taste the mix and feel it’s too salty but don’t want to add any more maple syrup to even it out you can add 5-6 drops of liquid stevia. This works really well. ***

Saturday, June 8, 2013

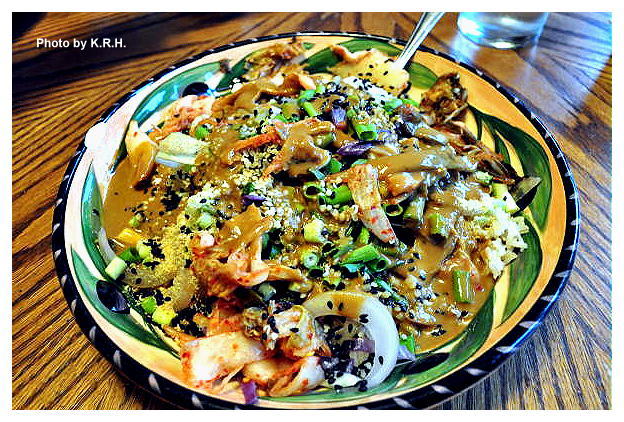
Crispy Cabbage and Rice Bowl with Miso Molasses Dressing...


Lately, when it comes to food I’ve been feeling really uninspired and over-stimulated. What I mean by that, is in my mind I’ve been battling two contrasting desires. On the one hand I want to make everything. I want to make all those delicious, gourmet meals that has my mouth watering when I log into the blogosphere, or crack open a cook book, yet on the other hand everything sounds so good that nothing seems right, does that make sense? Plus I just can’t seem to muster the energy to do any ‘gourmet’ cooking. I want food that quick, simple, and easy, I want food that’s low calorie and high in nutritional density, I want food that’s good for my body, food that is fuel. Yet I want it to taste amazing and I want it to seem decadent.


All these contrasting desires have been leaving me feeling so blah in the kitchen, not to mention that I’ve just been feeling really ‘fooded’ out since being back from Vancouver. In Vancouver we didn’t exactly eat junk, but we did eat a lot, and I mean a lot. There are so many good vegan restaurants in Vancouver that we probably ate double the amount of food we normally do, so that’s where this intense desire for simple, and basic food is coming from.  Since our return I’ve been really into smoothies, juices, beans, salads, bowls and superfoods. We ate a lot of that kind of stuff in Vancouver and now that I’m back I want to really focus on good for you whole foods. Unfortunately there are only so many salads and so many bowls that one can make before you start to get bored. As I already said the 100+ cook books in my collection haven’t been much help as I feel kind of uninspired to actually put in any of the work they require.


So lately my meals have revolved around four basic principals, and I actually find that these four things are actually the best things to consider when making a bowl - or even a salad. Firstly a survey of what you have in the pantry and fridge is an absolute necessity. Second it’s good to look for what you have in abundance or what needs to be used ASAP. Third it’s always important to take into consideration any food craving or interest you may be having that day. Lastly pick one culinary or cultural theme, whatever inspires you the most in that moment. Once you’ve gone through these steps putting together a bowl or salad is pretty effortless work.


At least that’s how it works for me. This is the method I employed to make dinner Thursday and surprisingly it came together rather well. As it happened I had a lot of cabbage, rice and various seeds. The cabbage needed to be used. I wanted something sugar-free and nutritionally dense, and I was interested in an Asian sort of flavor. The miso molasses dressing might sound strange to you, but I assure you it’s quite good. Molasses is great because it’s relatively low in sugar with a low-glycemic load plus it has a bounty of trace minerals like copper, iron, calcium, magnesium, manganese, potassium, B6, and selenium. The cool thing is that you don’t even need to eat that much molasses to get the nutritional benefits, a Tbsp is enough to enjoy the nutrition. It’s also much lower in calories then other liquid sweeteners - such as Agave or Maple Syrup. So when I decided to add a touch of sweetness to my miso dressing that’s why I chose to try Molasses. “What’s the worst that can happen?” I reasoned, and much to my surprise it turned out fantastic.


I also love the combination of slightly wilted cabbage with crispy kimchi, crunchy seeds, a creamy dressing and cooked rice. All these things just seem to go together in perfect textural harmony. Give it a try and you’ll see what I mean!


Crispy Cabbage and Rice Bowl with Miso Molasses Dressing 

1 C Brown Rice
3 C Shredded Green Cabbage
1 C Shredded Red Cabbage
½ Large Yellow Onion
5 Green Onions Sliced
1 Tbsp Hemp Seeds (per serving)
1 Tbsp Black Sesame Seeds (per serving)
1 Tbsp Ground Golden Flaxseed (per serving)
1 tsp Toasted Sesame Oil
1/3 C Kimchi (per serving)


Miso Molasses Dressing 

1/3 C Rice Vinegar
½ C Water
4 Tbsp Mellow White Miso
1 ½ Tbsp Molasses
2 Garlic Cloves
1 Tbsp Nutritional Yeast
1 Tbsp Toasted Sesame Oil

- Cook brown rice according to package instructions.

- Heat sesame oil in a large pan over medium-high heat. When hot add the cabbage and the onion and stir-fry for 6-8 minutes until onion begins to turn soft and cabbage is sightly wilted. Do not overcook, you want the cabbage to still have some texture!

- Combine all dressing ingredients in a blender and blend on high until smooth.

Assembly.

- Divide the rice amongst 2 - large portions - or 3 - smaller portions - bowls. Divide the cabbage mixture evenly between the bowls and sprinkle each bowl with 1 Tbsp hemp seeds, 1 Tbsp black sesame seeds, and 1 Tbsp Ground Golden Flaxseed.

- Garnish with desired amount of sliced green onions, and add 1/3C of kimchi to each bowl. Top with desired amount of dressing and serve!


*** Note - Can be made soy-free if using a soy-free miso like Chickpea Miso.***

Wednesday, March 20, 2013

Broccoli Stem and Kohlrabi Salad with Chickpeas and Smoky Pepper Tahini Dressing...


I love a big ‘ole salad, by now this should be perfectly obvious. For me, any day of the year - but particularly on sunny Spring and summer days - there are few things better then a gigantic bowl filled to the brim with a luscious array of rainbow colored vegetables, fruits, nuts, seeds and legumes.  There are days where I just crave salad, and nothing had me craving salad more then my week long foray into Irish cooking. As much as I loved the Irish cuisine I cooked up leading up to St. Patrick’s Day, the Irish aren’t exactly known for ‘light’ meals, nor are they particularly known for their salads. So after a long week of heavy seitan and potatoes fair I was desperate for a good old fashion salad.


Unfortunately the usual salad fixings were pretty scarce in my house yesterday. There wasn’t a scrap of any sort of lettuce, no avocado, no fresh herbs, and only one tomato. What’s a girl who needs a salad to do? Well, she’s got to get creative. I took a quick inventory of my crisper drawers and then began to formulate a plan. I might not have had lettuce, but I had two kohlrabi that had been in my fridge since who knows when, and two broccoli stalks leftover from the night before. Since I got my juicer I’ve been a big fan of re-proposing vegetables. I save all of my stalks and stems now instead of junking them, and feed them through my juicer. That was the original plan for these broccoli stalks but then I thought, why juice them when I can eat them? Washed and steamed and combined with a bit of red cabbage that I had, some red bell pepper, green onions, sesame seeds and tomato I was well on my way to lunch!


This is a really great way to use up your broccoli stalks, if you’re saving them or don’t want to throw them away, and if you’ve never had Kohlrabi before you’re really in for a treat. Kohlrabi is such a strange vegetable, it’s round like a beet but green, and it tastes like something between a potato, a cabbage and a sunchoke. They’re really unique and they can be eaten either raw or cooked. So a light steam is a really nice way to have them. They also pair really nice with a creamy-smoky dressing. It makes the perfect lunch salad.


Broccoli Stem and Kohlrabi Salad with Chickpeas

2 Broccoli Stems Chopped
2 Medium Sized Kohlrabi Peeled and Chopped
1 Tomato Chopped
½ Red Bell Pepper Chopped
1/4-1/2C Shredded Red Cabbage
1/4C Green Onions Sliced
½ Can of Chickpeas rinsed and drained
2 Tbsp Sesame Seeds (to taste)
3 Garlic Cloves Minced (or to taste)

Smoky Pepper Tahini Dressing 

3 Tbsp Lime Juice
3 Tbsp Tahini
2 Tbsp Bragg’s Liquid Amino’s
2 Tbsp Water (to thin and dilute as needed)
1 Tbsp Agave Nectar
1/4-1/2tsp Smoked Paprika
White Pepper to taste
Black Pepper to taste

- Steam the Broccoli and Kohlrabi together in a steamer basket fitted into a medium sized pot. Steam for about 5-6 minutes until tender, but still a bit firm.

- Combine all other salad ingredients in a large bowl. Add the steamed vegetables and mix together.

- Whisk together all dressing ingredients in a bowl until smooth and creamy. Then pour desired amount over your salad, mix well and enjoy!


Thursday, November 29, 2012

Heidi's Seed Crusted Amaranth Biscuits...


More and more lately I find myself interested in cooking and baking more with whole grain flour types that aren’t wheat. I don’t have a problem with wheat, or a gluten-intolerance but I like the idea of expanding my palate, and there is such a wealth of different kinds of flour out there that it seems almost criminal not to try them out. Not to mention that switching up your flours keeps things interesting.

My pantry is well stocked with a variety of flours, all of them organic. I have unbleached all-purpose, whole wheat, whole wheat pastry, white rice flour, soy flour, almond flour, buckwheat flour, amaranth flour, and several starches like potato, tapioca and corn. Despite having these things I rarely use the non-wheat flours, and so I didn’t really know what to use nor what to make. Then one afternoon I was sitting at my desk flipping through Heidi Swanson’s cook book “Super Natural Cooking” which is a book I never use and found total inspiration in her recipe for Seed Crusted Amaranth Biscuits. The recipe isn’t gluten-free - which is fine for me but not for those who may have a gluten-intolerance, - but it does utilize amaranth flour which I was really interested in trying out. I also really liked the idea of a seedy biscuit. I love seeds, and anyway I can include more of them into my cooking is a good enough reason for me to try. I particularly love seeds in bread, which probably stems from my childhood. As my mom always makes homemade bread - and it’s the best - and her bread recipes usually include seeds of some kind.


So anyway I decided to give these biscuits a go. It’s an easy enough recipe to veganize just swap butter for Earth Balance, Milk for your favorite non-dairy milk, and leave out the egg-white. The egg is really not necessary anyway as it’s used for a wash to coat the tops of the biscuits before sprinkling on the seeds. You can achieve the same effect by brushing them with a little melted Earth Balance which is what I did. For the seed mixture I used a combination of poppy, brown sesame, black sesame, and nigella seeds. Nigella seeds are another thing I’ve had in my pantry for a long time and never used, but I’m so glad I took Heidi’s suggestion and tried them in this recipe because they give the biscuits a nice subtle onion flavor which I loved. Also because I only had about 3/4 C left of unsweetened almond milk, I also ended up using about a 1/2 C of Vanilla Almond milk and making up the remaining difference with water. I thought this might make the biscuits sweet, or have them taste like vanilla but it didn't do either. At least not that we could tell. They certainly didn't taste like vanilla, and neither of us found them to be sweet. They were very savory, but because vanilla almond milk is richer then unsweetened almond milk perhaps it did something subtle to the overall flavor or the texture.

Though these biscuits smelt like heaven when they were baking, my husband was rather skeptical about them when he saw them. My husband loves his biscuits, and has always been a ‘traditional biscuit’ kind of guy, not to mention the fact that he’s not as over the moon about seeds as I am. Yet he sat down with a plate of three earth balanced smeared biscuits and began to eat. I waited with baited breath as he took his first bite, and then his second. I watched his facial features change and contort and was ready to call the experiment a fail when he suddenly declared that “These are the best biscuits I’ve ever eaten!” Wow! High praise from him indeed. I took a bite of my own biscuit and had to agree. That’s not to say that we’ll never return to eating the regular kind of biscuit again, but it does inspire my tastebuds to make these more and more often, they are just to good to pass up, and way to good not to at least try.


This recipe used whole what flour and whole wheat pastry flour in addition to the amaranth flour and at first you might think that would make these pretty dense but they are surprisingly light and fluffy, even flaky. They are super moist which I love and have a really great well rounded flavor, thanks both to the flour and the seeds. These biscuits really are a joy to eat, and when you eat them you really feel as though you’re putting something good into your body, like you’re fueling it properly for the day. They’re also very filling thanks to their whole-grainyness. If you have this book you should definitely try these out, and if you don’t have the book it may be worth checking out just for these biscuits alone. I’m certainly glad I gave this cook book a second look, because it’s reminded me that just because a book is vegetarian instead of vegan doesn’t mean it doesn’t have some recipes worth trying.

Monday, November 12, 2012

Umeboshi Noodles with Black Soybeans and Collard Green Ribbons in Soy Broth...

I know with all the toppings it's kind of hard to see all
the awesomeness in this bowl


If you know me, or If you’ve been following this blog for any length of time you probably know that Asian Cuisine is one of my favorites. I love the duality between the simple fresh ingredients and the bold complex flavors that are so characteristic of Asian cooking. I also love bowls and one pot meals, especially on cold days. Well, today was a cold day, and I was feeling particularly inspired thanks in part to the reading I’ve been required to do for my Chinese Medicine class, as well as my most recent trip to Mitsuwa, the Japanese Market in Arlington Heights.


My last trip to Mitsuwa was a couple of weeks ago, and I was on a mission for Miso and a variety of Japanese noodles. These are things I can find easily in the health food stores in my area, however they’re roughly half the price at Mitsuwa, which is way more economical considering how much miso I go through. As for the noodles I found exactly what I wanted, a ton of Udon, Soba and Somen, and then I found some packages of Green Tea flavored noodles, and Ume flavored noodles. Ume of course referring to Umeboshi, the tart, sour, slightly sweet plum typically used as a paste or made into vinegar in Japanese cooking. I’d never seen Ume noodles anywhere else before, nor had I even heard of them, but they were bright pink and beautiful, and contained no weird or nefarious ingredients and so I bought a package.


I really had no idea what I was going to do with them once I got them home, and so they’ve just been sitting in my pantry for the past couple of weeks. Until today. Today, for whatever reason was the day I decided to give them a try. Initially I was a bit stumped as to what to pair them with, or what kind of dish to put them into because I wasn’t sure what their flavor would really be like. Eventually I decided to go with traditional Asian seasonings such as garlic, ginger, sesame, and tamari, and picked my vegetables according to what I had on hand and what I thought might make the most startling contrast. Green, orange and black I thought would all look fantastic against the bright pink noodles, and I had really been trying to find a use for the solitary can of Black Soybeans left over in my pantry from a squash stew I made a couple of months ago.


Now, I’ll be honest, at first I wasn’t sure how this would turn out. I was kind of just flying by the seat of my pants so to speak. Whenever you just start tossing things together there is always the risk that you’ll under season or over season whatever your making, or just make a bad call on an ingredient. So when we sat down to eat I was a little hesitant and a bit skeptical, particularly of the noodles since I had no idea what to expect from them. Turns out there was no real need to worry because this delicious hearty bowl really blew me away. The flavors were exactly what I was looking for, rich - complex - and warming, and the entire thing came together in the most delicious way. The Ume noodles in particular were fantastic, and now I can’t wait for my next trip to Mitsuwa so I can buy myself some more packages. If you see Ume Noodles in your area pick some up, and make this dish!


Umeboshi Noodles with Black Soybeans and Collard Green Ribbons in Soy Broth.

8oz Umeboshi Noodles
1-2 Tbsp Toasted Sesame Oil
6 Garlic Cloves Minced
1 Thumb Sized Piece of Ginger grated
1 Medium Sized Leek sliced
1 Bunch Collards - ribs removed cut in ribbons
4 oz Enoki Mushrooms
1 15oz can Black Soybeans
A Few Dashes of Ume Vinegar
1 tsp Japanese 7 Spice

For Broth 

1 1/3 C Low-Sodium Vegetable Broth
2 Tbsp Low-Sodium Tamari
½ Tbsp Agave nectar

For Garnish 

1 Large Grated Carrot
½ Tbsp Brown Rice Vinegar per bowl
2 tsp Sesame Seeds per bowl


- Cook Ume Noodles according to package directions. Then drain in a colander and rinse with cold water to stop cooking and set aside, until ready to serve.

- While Noodles are cooking heat 1 Tbsp of sesame oil in a large skillet. Add the minced garlic, grated ginger and sliced leek. Saute over medium-high heat until the leek has softened, and garlic is fragrant. About 5-7 minutes.

- Add in the collard green ribbons, then cover and cook for three minutes. Then add in the enoki mushrooms and cook another 3-5 minutes until the mushrooms are soft and the collard greens are bright green and tender. If the pan starts looking dry during this time you can add an additional 1 tbsp of toasted sesame oil.

- Lower the heat and stir in the black soybeans, ume vinegar, and 7 spice seasoning. Replace the lid and let sit over low heat until the soy beans are warmed through then turn the heat off. And set the pan aside until ready to serve.

- To make the broth whisk the vegetable broth, soy sauce, and ume vinegar in small sauce pan. Then bring to a boil and reduce to simmer. Let simmer one minute then turn off the heat.

- To serve divide the noodles into two bowls. Then divide the broth and the collard green mixture evenly among them. Top each bowl with grated carrot, sesame seeds and the rice vinegar.


PS: Black Soybeans by the way are pretty interesting. They look like a black bean but a bit lighter, and taste a regular soybean or maybe a blander edamame. Outside of health food or specialty stores I don’t know how easy it is to find them, the brand I used was Eden Organic’s but if you can’t find them you could always sub in regular soybeans, edamame or black beans if you want to keep the contrast. Shiitake mushrooms would also be good if you don't have Enoki.


Once I mixed it all up you could better see those lovely
Pink Ume Noodles!

Thursday, August 30, 2012

Tropical Greens Smoothie with Super Seedy Milk...


I love smoothies, I’m sure you know this by now. I especially love them in the summer, but this summer thanks to two extended vacations and a busy schedule I haven’t been feeling much creative inspiration in the smoothie department. I still drink a smoothie each morning of course but over the past month and a half I’d say I’ve mostly been drinking flax-milk chocolate vega shakes. They’re delicious of course but nothing that really needs to be written about.


Well yesterday I decided to try something new. I decided to make some homemade seed milk. I’d made homemade nut milk before and that was fun and easy, so I thought I’d give seed milk a try. It’s even easier then nut milk because you don’t have to filter out any pulp and it gets super creamy without having to soak the seeds first. Of course the recipe makes quite a bit (3-3 ½ C) so today I wanted to make sure I used up some more of it. Of course the next logical question became “What should I use it on/in?” After a bit of thought I decided a good belly-filling smoothie was just the ticket, and since I’ve been thinking a lot about the glorious combination of pineapple and spinach that seemed the natural choice for the smoothie.


The seed milk on it’s own is a bit bitter, as you would expect from sunflower and sesame seeds, so I wasn’t sure how it would pair in a smoothie. However I figured pairing it with sweet frozen pineapple could only make a good thing better and I was right. This smoothie came out so creamy and delicious, really you won’t believe how creamy it is! The seed milk becomes a subtle flavor addition and the tropical flavors really shine through. A perfect blend, and super filling, which is great for a first day meal.

I know it may sound a bit weird “Seed Milk” but trust me, this smoothie is delicious! And the best thing about it is that this is a super quick and easy way to get in some greens and some seeds. Two food groups I think a lot of us often neglect.


Tropical Greens Smoothie with Super Seedy Milk

1 ½ C Frozen Pineapple Chunks
1 Big Handful Baby Spinach
1 Banana
1 C Super Seedy Milk (Recipe Follows)
½ - 3/4 C Filtered Water

- Place all ingredients into a highspeed blender and blend on high for 1 minute or until completely smooth and creamy. Pour into glasses and enjoy with a nice bowl of strawberries!

Note - If desired you can use half frozen pineapple chunks and half frozen mango chunks to give the smoothie a slightly more tropical feel.

Super Seedy Milk

 3/4 C Raw Sunflower Seeds
1/4 C Hemp Seeds
1/4 C Sesame Seeds
4 Medjool Dates
A Tiny Pinch of Cinnamon
2 ½ - 3 C Water (Depending on how thick you want it)

- Place all ingredients into a highspeed blender and blend on high for 1-2 minutes or until the milk is smooth and creamy. Add more or less water for your preferred consistency.

- Store leftover super seedy milk in an air tight container or mason jar in the fridge for 3-5 days. Shake well before using because the milk may settle and or separate when in the fridge overnight.