Showing posts with label Nutritional Yeast. Show all posts

Monday, November 4, 2013

My Favorite Creamy Macaroni and Cheese...


I know I’ve been ridiculously absent since Canadian Thanksgiving and for that I’m sorry. I just haven’t had the cooking spirit lately. My Oma’s somewhat unexpected passing has been hard on me, and the rest of the past month wasn’t much better. A variety of things culminated to leave me feeling uninspired and uninterested in doing much cooking, or blogging. For almost the entire week post-Thanksgiving we ate leftovers. Then we ate simple rice bowls that tasted delicious but aren’t exactly blog-worthy in my opinion. Then the past week we’ve been having something of a pizza extravaganza - of which I meant to take photos but my camera battery is dead and every day I absentmindedly forgot to re-charge it - thanks to my latest cook book purchase of “Vegan Pizza” by Julie Hasson. But now we’re into a new month, and I’m feeling better, re-inspired, and I’ve missed the blogesphere, and so Im going to make a greater effort to be more active this month.


To kick things off I thought I’d share a favorite Mac and Cheese recipe with you. I know there are tons of mac-loving vegans out there, vegan mac is like the holy grail for some, and yet I’ve never been much of a mac lover. Blasphemy I know, but I was never one to eat food from a box, that had a lot to do with my upbringing I suppose. Certainly as a kid I ate macaroni and cheese now and then, and I’m sure I liked it well enough but I never developed that ‘ohmygodgottahaveit!’ love affair with it. After I grew up and moved out I don’t think I ate Macaroni and Cheese at all, except for maybe trying my hand at making a home-made baked mac once or twice. My husband was also not a mac and cheese fan - he didn’t like cheese at all in any form in fact - and so it was not a meal that ever made it onto our radar.


Of course, as happens with so many things, the minute you go vegan all your previous ideas and notions about food go out the window. I like Mac and Cheese much more now, then I ever did growing up, and these days I really love and appreciate creative mac and cheese recipes. While I still wouldn’t consider it anything close to being a favorite food, I do now and then find myself getting a wicked bad craving for it. One such crazy craving hit me out of the blue in mid-October as I was reminiscing about the Toronto Vegetarian Festival - more to come about that in a very belated review post. - and the epic Mac and Cheese Burrito we ate there courtesy of Hot Beans. - More on that to come as well. - My husband and I were so blown away by this absurd concoction that we just knew we’d have to eat it again. Of course Toronto is a far way to travel from Chicago just for a burrito and so I decided to try and recreate this masterpiece at home.

Now, the first step to making any mac and cheese burrito is making mac and cheese. Essentially you can use any mac and cheese recipe you like, but the following recipe is one of my very favorite mac recipes. - Inspired by THIS recipe from Vegan Mischief who also happens to be a Vancouver Vegan -  Coconut milk is really the silent star here, as it gives the mac a thick and creamy texture without imparting any coconut flavor. It is hands down my favorite non-dairy milk to use when making macaroni and cheese, and I love the unique combination of spices. I hope you enjoy it as much as I do.


My Favorite Creamy Macaroni and Cheese 

½ Small Yellow Onion minced
1 tbsp Olive oil
4 Garlic Cloves Minced
½ tsp Smoked Paprika
1/4-1/2 tsp Turmeric
1 tsp Mild Curry Powder
½ -1 Tbsp Ground Fenugreek
1/4 tsp White Pepper
½ tsp Dried Oregano
½ tsp Dried Basil
1 Vegan Chicken Flavor Bouillon cube
2 Tbsp White Miso
4 Tbsp Water
1/4 C Nutritional Yeast
2 C Full-Fat Canned Coconut Milk
1 Tbsp Dijon Mustard
1 Tbsp Cornstarch
1 Tbsp Water
1 Bag Daiya Cheddar Shreds
12-16oz Elbow Macaroni Noodles (Gluten-Free)
Salt and Pepper to taste (Optional)

- Cook pasta according to package directions. Drain in a colander and then return to the pot until your sauce is ready.

- Heat the olive oil in a medium sized pot over medium heat. Add in the minced onion and saute for 3-5 minutes until softened. Add in the garlic and saute another 2 minutes.

- Add Smoked Paprika, Turmeric, Curry, Fenugreek, white pepper, oregano, and basil. Saute another 2 minutes.

- Meanwhile combine the 2 tbsp of Miso with 2 tbsp of water, stir until smooth.

- Also combine the vegan chicken bouillon cube with 2 tbsp of water and mix until smooth.

- Add the Nutritional Yeast and the Coconut milk to the pot with the onions, whisk until combined and smooth. Add in the Bouillon mix, along with the miso mix, and let simmer stirring frequently for five minutes.

- Whisk together the cornstarch and the 1 tbsp of water to make a slurry.

- Add the cornstarch mixture to the Pot, along with the Dijon Mustard, and the Bag of Daiya shreds. Continue to simmer, whisking until all the daiya has melted into the sauce and the sauce has thickened. This could take roughly 5-10 minutes.

- Once the daiya has melted and the sauce has reached a creamy thickness that you like, taste for flavor and if you feel it’s needed you can add ½ -1 tsp of sea salt, along with a bit of fresh cracked black pepper.

- Then add the sauce to your cooked Macaroni and serve as is garnished with a bit of Italian parsley or use it to make an epic mac and cheese burrito - recipe to come tomorrow!

As always, enjoy!

*** Note - I typically always use gluten-free noodles, if you do then the dish is gluten-free. You can also make the dish soy free by using a soy-free miso such as chickpea miso.***

Tuesday, September 17, 2013

Vegan Mofo #13 - Taymer’s Plantain Balls...


Vegan Mofo #13 - Taymer’s Plantain Balls 

The Region - The Caribbean
The Book - Caribbean Vegan
The Author - Taymer Mason
The Recipe - Plantain Balls
Page # 64
Difficulty - Easy
Duration - About 35 minutes

We’re kind of going backwards today, I started with a Caribbean dessert earlier this afternoon and now I’m brining you a Caribbean appetizer. This recipe comes once again from Taymer Mason and her lovely book Caribbean Vegan, and it pretty much caught my attention from the get-go. I mean plantains mashed up with vegan ham rolled into balls and breaded? Yum!  I don’t know, maybe it’s just me, I mean I really, really love plantains


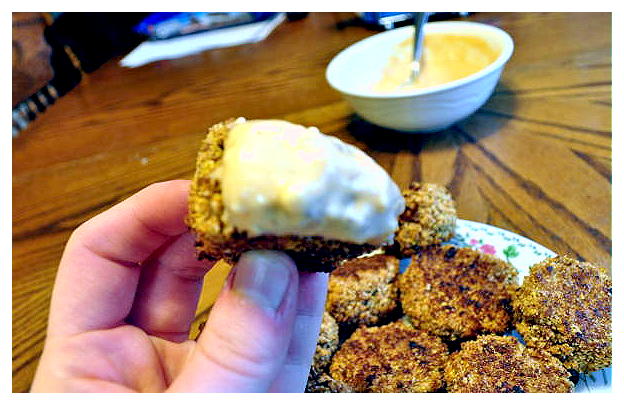
Despite loving plantains I have to admit I’m usually pretty uncreative when it comes to cooking them. I pan fry them or deep fry them and that’s about it. In this recipe the plantains are mashed with cinnamon, cayenne, and minced up vegan ham. Then you take tablespoon sized blobs, and roll them into a mixture of salt, breadcrumbs, smoked paprika, nutritional yeast and wheat germ. Then you bake them in the oven for 25 minutes. They’re a little mushy though so it can be hard to roll them into a proper ball. The best thing to do is scoop some up and plop it down in the breading and then roll it around in there until it forms a ball shape. It actually works out better then you might think.


Unlike a lot of other ball recipes these come together in a snap thanks to their not being very many ingredients, and they cook quickly too. However I think their best feature is their unique flavor, and their subtle blend of sweet and savory. Definitely a nice appetizer.


Lastly Taymer recommends serving them with Caribbean pickle which is a mixture of habanero pepper, onion, cucumber, lime juice and herbs, but I didn’t have any cucumbers and so instead I just made a spicy style Thousand Island dressing to dip them in. This worked out really great though I’m sure the Caribbean pickle would have been even better. Next time I suppose.


Sunday, July 28, 2013

Creamy Carrot Top Pesto...


So, you go to the farmer’s market, and you see bunches upon bunches of beautiful long, thin, baby carrots. They’re bright orange, and luscious looking, with beautiful bushy tops that scream a bright vibrant green. You can’t help yourself from buying them because they’re everything that summer seems to represent. You take them home, and you use the carrots in whatever way most appeals to you, but then you’re left with a massive pile of carrot tops. Now the dilemma begins, because what is one suppose to do with a bunch of carrot tops anyway?

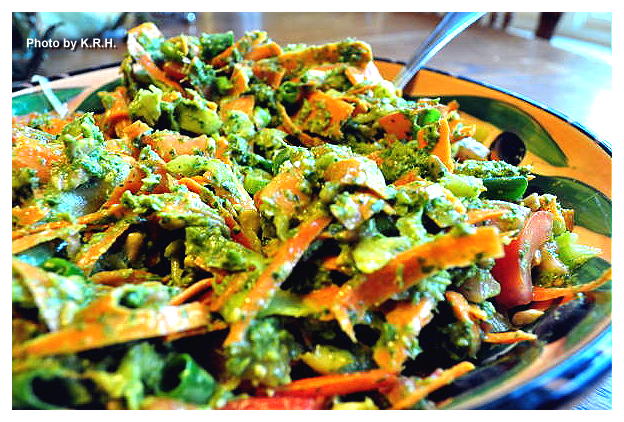
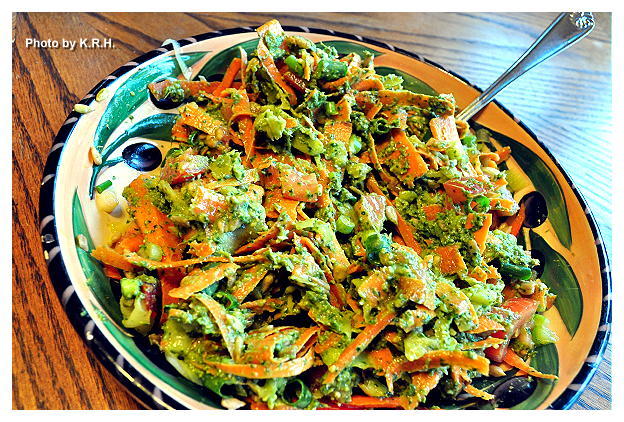
Carrot Top Pesto on some Thin Vegetable Ribbons


Carrot tops are not an item found on many restaurant menus. They’re not an item commonly features in cook books or on the food network. We don’t really live in a world where carrot tops are considered food, they are - more often then not - discarded, which to me seems like a terrible waste. Carrot tops are viable food, they’re full of nutrients just like any other green, and are probably better for you then the actually carrot itself. Still everyday they get thrown away as garbage, so if you’re like me and you hate to see waste, next time you buy some carrots at the Farmer’s Market put those tops to use in this delicious and creamy pesto!  It’s time for us to take carrot tops back and make them a feature on our plates rather then just another item in our compost or rubbish bins. Hopefully over the course of the summer I’ll come up with a few more creative uses for these delicate greens to share with you all, but this pesto is so good I might get side tracked and just make this all summer long instead! Oh, and did I mention what the bonus of making a pesto with carrot tops instead of basil is? You can get 4 Cups of carrot tops - plus the carrots they’re attached to - for half the coast of 2 oz of Basil. Maybe this depends on where you live, but in IL basil is expensive, at roughly $5 for 2oz organic basil, when I can get 2 bunches of carrots with 4 Cups of tops for $4.

My vegetable pasta contained Carrot and Zucchini Ribbon Noodles
Chopped Roma Tomatoes, and some Diced Green Onion
A Delicious combination with the Carrot Top Pesto 


Anyway, enjoy this pesto like you would any other, in a wrap or on a sandwich, in a warm or chilled soup, as a dip, as a sauce, as a dressing, on a pizza. I ended up enjoying it on raw noodles, you could do that too or use it on fresh cooked pasta. It’s up to you, it’s so versatile that the options are endless. As always enjoy!


Creamy Carrot Top Pesto 

Carrot Tops from 2 Bunches Carrots - Roughly 4 C
½ C Slivered Almonds
3 Green Onions
1 ½ tsp Garlic Powder - or 2 Cloves fresh Garlic
½ tsp Sea Salt
½ tsp Smoked Paprika
2-3 Tbsp Lemon Juice
½ C Flaxseed Oil
2 Tbsp Nutritional Yeast
1 Tbsp Mellow White Miso
1/4 tsp White Pepper
Slightly less then 1/4 C Water (Optional depending on how thin or thick you want your pesto)
Fresh Black Pepper to taste

- Add the almonds to a food processor and pulse until finely ground.

- Add the carrot tops and garlic and pulse until fine.

- Add in all the other ingredients - except water -  and pulse until you have a smooth paste. At this point check for consistency, if it’s too thick for your liking add in some water to thin. I used less then 1/4 cup but you can add as much as you need to, to get the pesto to your preferred consistency.

- Serve however you see fit and enjoy!


*** Note: I highly recommend using the miso as it adds a depth of flavor. However if you're following a soy-free diet you can leave it out, or you can replace the soy-based miso with an alternative miso like Chickpea Miso which is soy-free.***

Friday, July 12, 2013

Arugula Lasagna with Garlic Scape Pesto and Tofu Ricotta...


Okay, so I know it’s summer, and I know a lot of you are living in placed where it’s currently hot, hot, hot, but here in IL yesterday it was actually quite nice. It felt more like spring then summer with a cool breeze and no humidity. It was a perfect day, and while it might not have been a lasagna day per say, that’s inevitably what I ended up making for dinner.


You see, yesterday I was extremely busy writing essays and doing other homework. It consumed most of my day up until about 3pm. By then I was feeling a little tired and brain-fried and so I didn’t really feel like thinking to hard about making dinner. Originally I was just going to cook something from a cook book, but every recipe I found that was ‘quick and easy’ and looked appealing didn’t really utilize the bounty of fresh produce I had on hand. I had pounds of arugula, garlic scapes, kale, spinach, tomatoes, cabbage and beets and so I really wanted to make something that would use at least one or more of the most perishable items in that list. I started thinking about noodles, using my garlic scapes and kale to make a pasta dish but I didn’t feel like spaghetti. Then I remembered a box of whole wheat lasagna noodles my mom gave me to take home with me when I left Vancouver in May. Hm... Lasagna.....


So the wheels got turning, and I must say as much as I love a good lasagna I really hate actually making lasagna. It’s always such a process, but once I got thinking about it I couldn’t stop. I mean what if I put garlic scapes and arugula in a lasagna? I’d never heard of that before, It could be very interesting. What about some olives? Do I have tofu to make ricotta? What if I made a pesto out of the garlic scapes? Hm.. The questions just kept on coming and finally I decided, ‘lets do this thing!’ Of course pesto alone in a lasagna might be a bit too overpowering I thought, so I made a red sauce too, and everything combined together made the most perfect, and delicious lasagna. My husband says this is one of my best ever. No one flavor overpowers another, they all work In perfect harmony together. So If you like lasagna I urge you to make this one, it’s unique blend of flavors is really a pleasure. Of course, if it’s a bit too hot where you live to turn on the oven, then wait for a cool day to try it!


Arugula Lasagna with Garlic Scape Pesto and Tofu Ricotta 

Lasagna

14oz Whole Wheat or Gluten Free Lasagna Noodles
1 Large Yellow Onion Diced
½-1 lb Baby Arugula (I used roughly 1/2 to 2/3 of a 1 lb package)
1 Tbsp Olive Oil
2 Tomatoes Sliced
Handful of Kalamata Olives
Sea salt and Black Pepper to garnish if desired
1 Recipe Tomato Sauce
1 Recipe Garlic Scape Pesto
1 Recipe Tofu Ricotta

Tomato Sauce 

1 28oz Can Diced Tomatoes
8oz Can Tomato Sauce
3 Cloves Garlic
2 tsp Dried Basil
2 tsp Dried Oregano
1 tsp Red Pepper Flakes
Sea Salt and Black Pepper to taste
1/4 C Capers

Garlic Scape Pesto 

14 Garlic Scapes Steamed
½ C Walnuts
½ C Olive Oil
½ C Water
2-4 Tbsp Nutritional Yeast (to taste)
2 Tbsp Lemon Juice
1 tsp Smokes Paprika
1 tsp Sea Salt
1 tsp Garlic Powder
2oz Fresh Basil

Tofu Ricotta 

1 lb Extra Firm Tofu drained and Pressed
4 Garlic Cloves Minced
2 tsp Dried Basil
2 tsp Dried Oregano
½-1 tsp Sea salt
Black Pepper to taste
4 Tbsp Lemon Juice
2 Tbsp Tahini
1 Tbsp Mellow White Miso
Slightly less then 1/4 C Water


To Make the Tomato Sauce 

- Combine all ingredients except capers and blend until smooth, add in the capers and give a gentle blend for 2 seconds just to incorporate.

- Set aside until ready to use.

To Make the Pesto 

- Trim the ends off of your garlic scapes and steam in a pot fitted with a steamer basket for 5-7 minutes until bright and fragrant.

- Pulse Walnuts in a food processor until very fine.

- Add in Olive oil and garlic scapes. Process until relatively smooth. You may need to scrape down the sides of the bowl.

- Add in all other ingredients along with the water. Process again until you reach your desired consistency. (I like my pesto slightly textured.)

- Set aside till ready to use

*** Note - You can use more or less water depending on your desired thickness. You can also leave the garlic scapes raw if you prefer, but some people find the taste too strong which is why I suggest steaming them for a few minutes before hand.***


To Make the Tofu Ricotta 

- Crumble Tofu into a mixing bowl.

- Mix the White Miso with the water until smooth.

- Add all other ingredients to the tofu including the miso water mixture and use a fork to mash until everything is thoroughly combined and tofu reached desired ricotta-like consistency.

- Set aside until ready to use.

For the Lasagna 

- Boil the Noodles per package directions then drain and rinse under cold water.

- Heat 1 Tbsp of olive oil in a pan and saute the onion until soft. Add in the arugula and saute for roughly 5 minutes until wilted. Remove from heat and let cool for a few minutes.


Assembly 

- Preheat oven to 400'F

- Fill the bottom of a baking dish with a thin layer of the sauce. Place a layer of cooked noodles over top.

- Place half of the pesto mixture on top of the Noodles and spread to coat evenly.

- Spread half of the arugula mixture over top of the pesto.

- Spread half of the tofu mixture over top of the arugula mixture and spread as evenly as possible.

It’s okay if the Arugula shows through the tofu.

- Spread another thin layer of sauce over the tofu mixture, then top with another layer of noodles.

- Spread the remaining pesto over the noodles.

- Spread the remaining arugula mixture over the pesto

- Spread the remaining tofu over the arugula and top with another layer of noodles.

- Spread the remaining sauce over top of the noodles. Then garnish with thinly sliced tomatoes, kalamata olives and a bit of freshly ground sea salt and black pepper if desired.

- Place in the oven and bake for 20-30 minutes until tomatoes are shriveled and sauce is bubbling.

- Let cool for 15 minutes then cut into the Lasagna and enjoy!


***Note: This can be made gluten-free by using gluten-free noodles.*** 

Saturday, June 8, 2013

Crispy Cabbage and Rice Bowl with Miso Molasses Dressing...


Lately, when it comes to food I’ve been feeling really uninspired and over-stimulated. What I mean by that, is in my mind I’ve been battling two contrasting desires. On the one hand I want to make everything. I want to make all those delicious, gourmet meals that has my mouth watering when I log into the blogosphere, or crack open a cook book, yet on the other hand everything sounds so good that nothing seems right, does that make sense? Plus I just can’t seem to muster the energy to do any ‘gourmet’ cooking. I want food that quick, simple, and easy, I want food that’s low calorie and high in nutritional density, I want food that’s good for my body, food that is fuel. Yet I want it to taste amazing and I want it to seem decadent.


All these contrasting desires have been leaving me feeling so blah in the kitchen, not to mention that I’ve just been feeling really ‘fooded’ out since being back from Vancouver. In Vancouver we didn’t exactly eat junk, but we did eat a lot, and I mean a lot. There are so many good vegan restaurants in Vancouver that we probably ate double the amount of food we normally do, so that’s where this intense desire for simple, and basic food is coming from.  Since our return I’ve been really into smoothies, juices, beans, salads, bowls and superfoods. We ate a lot of that kind of stuff in Vancouver and now that I’m back I want to really focus on good for you whole foods. Unfortunately there are only so many salads and so many bowls that one can make before you start to get bored. As I already said the 100+ cook books in my collection haven’t been much help as I feel kind of uninspired to actually put in any of the work they require.


So lately my meals have revolved around four basic principals, and I actually find that these four things are actually the best things to consider when making a bowl - or even a salad. Firstly a survey of what you have in the pantry and fridge is an absolute necessity. Second it’s good to look for what you have in abundance or what needs to be used ASAP. Third it’s always important to take into consideration any food craving or interest you may be having that day. Lastly pick one culinary or cultural theme, whatever inspires you the most in that moment. Once you’ve gone through these steps putting together a bowl or salad is pretty effortless work.


At least that’s how it works for me. This is the method I employed to make dinner Thursday and surprisingly it came together rather well. As it happened I had a lot of cabbage, rice and various seeds. The cabbage needed to be used. I wanted something sugar-free and nutritionally dense, and I was interested in an Asian sort of flavor. The miso molasses dressing might sound strange to you, but I assure you it’s quite good. Molasses is great because it’s relatively low in sugar with a low-glycemic load plus it has a bounty of trace minerals like copper, iron, calcium, magnesium, manganese, potassium, B6, and selenium. The cool thing is that you don’t even need to eat that much molasses to get the nutritional benefits, a Tbsp is enough to enjoy the nutrition. It’s also much lower in calories then other liquid sweeteners - such as Agave or Maple Syrup. So when I decided to add a touch of sweetness to my miso dressing that’s why I chose to try Molasses. “What’s the worst that can happen?” I reasoned, and much to my surprise it turned out fantastic.


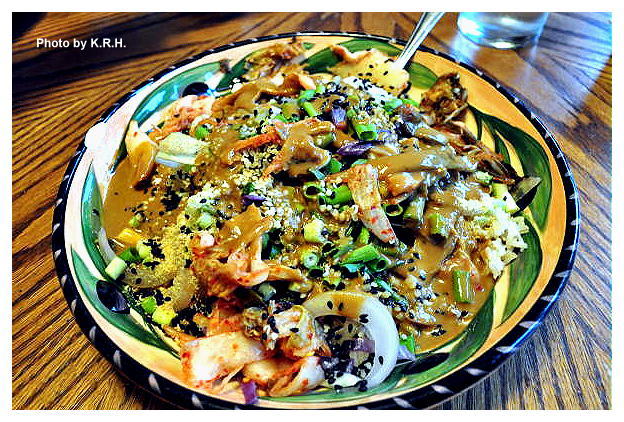
I also love the combination of slightly wilted cabbage with crispy kimchi, crunchy seeds, a creamy dressing and cooked rice. All these things just seem to go together in perfect textural harmony. Give it a try and you’ll see what I mean!


Crispy Cabbage and Rice Bowl with Miso Molasses Dressing 

1 C Brown Rice
3 C Shredded Green Cabbage
1 C Shredded Red Cabbage
½ Large Yellow Onion
5 Green Onions Sliced
1 Tbsp Hemp Seeds (per serving)
1 Tbsp Black Sesame Seeds (per serving)
1 Tbsp Ground Golden Flaxseed (per serving)
1 tsp Toasted Sesame Oil
1/3 C Kimchi (per serving)


Miso Molasses Dressing 

1/3 C Rice Vinegar
½ C Water
4 Tbsp Mellow White Miso
1 ½ Tbsp Molasses
2 Garlic Cloves
1 Tbsp Nutritional Yeast
1 Tbsp Toasted Sesame Oil

- Cook brown rice according to package instructions.

- Heat sesame oil in a large pan over medium-high heat. When hot add the cabbage and the onion and stir-fry for 6-8 minutes until onion begins to turn soft and cabbage is sightly wilted. Do not overcook, you want the cabbage to still have some texture!

- Combine all dressing ingredients in a blender and blend on high until smooth.

Assembly.

- Divide the rice amongst 2 - large portions - or 3 - smaller portions - bowls. Divide the cabbage mixture evenly between the bowls and sprinkle each bowl with 1 Tbsp hemp seeds, 1 Tbsp black sesame seeds, and 1 Tbsp Ground Golden Flaxseed.

- Garnish with desired amount of sliced green onions, and add 1/3C of kimchi to each bowl. Top with desired amount of dressing and serve!


*** Note - Can be made soy-free if using a soy-free miso like Chickpea Miso.***

Saturday, March 30, 2013

Spanish Style Scramble with Piquillo Peppers and Spinach...


A few months ago I was in the grocery store and I just happened to stumble upon a large jar of Piquillo Peppers. I immediately became excited about this because I had a recipe for Stuffed Spanish Peppers that I really wanted to try out but it called for Piquillo’s and I couldn’t find them anywhere. Then suddenly here they were. The jar however was massive, and my recipe only called for six peppers. No matter - I bought the jar anyway and thought I’d figure out something to do with the rest another time.

Well strangely even though I was super excited to try out these Piquillo Peppers, once I got the jar home and put away in the pantry I kind of forgot about it. Until earlier this week anyway when I finally made that stuffed pepper recipe. Which was phenomenal by the way, the only problem was what was I going to do with the rest of the peppers?

Piquillo Peppers are a really delicious sweet chili, cultivated in Northern Spain,  though their flavor is more reminiscent of a roasted red bell pepper then a spicy chili. After they’re picked they’re roasted over embers which gives them a distinct smokey and even slightly spicy flavor. Though when I say spicy, think Paprika not Jalapeno. Once roasted they’re seeded, peeled and packed into jars or tins for sale, and if you can find a jar or a can anywhere definitely pick it up because they are divine. I could eat them plain straight out of the jar, they’re that delicious! Of course I didn’t want to just eat them all straight out of the jar, because what If I never find Piquillo peppers again? I wanted to take advantage of them while I had them, and so I started dreaming about Piquillo pepper combinations.


The first thing that popped into my head was spinach. Piquillo’s and spinach I thought would make excellent partners and then from there I began thinking about onions, and olives. Eventually I worked my way around to Piquillo’s for breakfast and naturally came to the conclusion that they’d be excellent in a scramble. Though Piquillo’s are typically stuffed and eaten as tapa’s in Spain I wanted to do something a little bit different, besides I was really in the mood for a scramble, and who doesn’t love a good hearty veggie stuffed scramble?

The Piquillo’s really add a unique flavor component to a scramble, making it slightly sweet and slightly smoky, combined with the earthy mushrooms, the leafy spinach, the cheesy nooch, and the tart olives it’s a winning combination. You can serve your scramble over toast, or for a really heavy and hearty breakfast do what I did and serve it with avocado toast. A super simple and delicious way to eat your avo. Mashed with lime juice, sea salt, black pepper and red pepper flakes spread nice and thick on a piece of crunchy toasty bread. YUM!


Spanish Style Scramble with Piquillo Peppers and Spinach 

1 Tbsp Olive Oil
½ Large Yellow Onion Diced
6 Garlic Cloves Minced
3/4 C Baby Bella Mushrooms Chopped
14oz Extra Firm Tofu drained and pressed
1/8 C Nutritional Yeast
½ tsp Thyme
1 tsp Black Salt
Black Pepper to taste
1 tsp Chili Powder
1 tsp Smoked Paprika
1 tsp cumin
½ tsp turmeric
3oz Fresh baby Spinach
5 Jarred Piquillo Peppers Chopped
1/3 C Spanish Olives with Pimento sliced


*** Note -  To press the tofu either use a tofu press or place it between two sheets of paper towel and load some heavy objects on top of it. ***

- Heat olive oil in a medium sized pan over medium-high heat. Add the onions and saute for 4 minutes until beginning to get soft. Add in the garlic and the mushrooms and saute another 4-5 minutes until fragrant and mushrooms are soft.

- Crumble the pressed tofu in to the pan, and add the Nutritional yeast, thyme, chili powder, paprika, turmeric, cumin, black salt and pepper. Stir until well combined and the tofu mixture begins to look the color of scrambled eggs.

- Add in the Spinach and Piquillo Peppers. Stir to incorporate then cover and cook until the spinach has wilted. 3-5 minutes. Fold in the olives and serve.

Enjoy!

Sunday, March 10, 2013

Irish Style Seitan In Mustard Cream Sauce With Wild Rice and Crispy Cabbage...


St. Patrick’s Day is only a week away, can you believe it? Now, I’m not Irish, and I’ve never really ‘celebrated’ St. Paddy’s but I do like to observe most holiday’s and occasions with at least a good or special meal. This year I’m feeling a little more festive, I guess it’s the ugly weather we’re having, it makes me daydream a lot, and one of the places I’ve been dreaming about lately is Ireland in the Summer. Thanks no doubt to all of the Flogging Molly, The Pogues, Gaelic Storm and Dropkick Murphys I’ve been listening to of late. Anyway, I feel festive and inspired so I wanted to observe this year’s St. Paddy’s with a weeks worth of Irish style cooking.

Crispy Cabbage


Now, I know Irish fare may not seem all that vegan friendly to you, after all what is Irish cuisine most famous for? Potatoes, Cabbage and Meat - particularly bacon - and it’s also probably never struck you as a particularly creative or mouth-watering style of cooking. You never hear people say “I’m really craving Irish today.” Anyway. However I think the culinary traditions of England, Scotland and Ireland get a bad rap, it may not be ‘haute cuisine’ it may not have the fire of Latin cuisine, or say the romance of Italian but to say the Irish lack culinary creativity is to do them and their cuisine a disservice. Honestly I think the lack of creativity when it comes to Irish cooking has more to do with people outside of Ireland trying to re-create Irish food. I mean just open up any Vegan cook book that includes recipes for St. Patrick’s Day, and tell me what you see. Recipes for Champ, Colcannon - both of which I might add can basically be defined as mashed potatoes - cream of broccoli, pea, asparagus - anything green really - soup, and Irish soda bread. It’s repetitive and boring! But don’t think omnivores are any more ingenious when it comes to recreating Irish cooking. Bacon and cabbage, mashed potatoes and corned beef are about all I ever hear omnivores eating, and corned beef, really? Now I have a huge bone to pick with people who say corned beef is Irish - it’s not. First of all corned beef is just a name for salt-cured beef, and salt curing beef as well as other meats has been done since ancient times. As the dish that we know today noone is exactly sure who started it or when but it became popular with the British Navy during the 18th century English Industrial Revolution. The Irish may have been making a form of corned beef around this time to sell to the British navy but they likely weren’t eating it themselves.

Seitan in Mustard Cream Sauce


In fact, the entire time I was in Ireland - and keep in mind that I traveled the entire country from Dublin to Derry, and the Giants Causeway, to Galway, to Kerry, to Waterford, Cork and the Wicklow Mountains - I never once, on any restaurant menu saw Corned Beef as an option. It’s interesting that in Ireland Corned Beef is almost exclusively only sold to tourists or sold in tourist geared establishments, and that the majority of Irish in Ireland do not identify this food with Traditional, National Cuisine. It’s also interesting to note that corned beef actually has a stronger connection to Jewish Cuisine then it does Irish. But I digress - we were talking about a lack of creativity. When you ask the average person what they eat in Ireland you’ll undoubtably get the response “potatoes” and while it’s true that the Potato - still to this day - is the number one most commonly eaten vegetable in Ireland - along with cabbage and carrots - it does not mean that Irish cuisine has to be bland, boring, or potato heavy.


A lot of wonderful things grow in Ireland, from herbs such as parsley, rosemary, sage and thyme, to garlic, onions, potatoes, carrots, parsnips, cabbage artichokes, sunchokes, asparagus, and seaweed! Eating seaweed in Ireland isn’t just for the vegetarians and vegans! Mustard, wine and cream are also common for making sauces and flavoring dishes, so you see there’s a bounty of available options that any chef worth his or her salt could use to invent a dish that’s far more creative and tastier then corned beef or colcannon.


So for my first foray into Irish cooking I decided to try out a dish that utilized a mustard cream sauce. I’m a big fan of mustard - Dijon or stone ground in particular - and so a creamy, mustardy sauce with fresh garlic and herbs quite appealed to me. Now traditionally this is a sauce usually served with lambs kidneys - or the kidneys of any game animal - which is disgusting, and not something I would have even eaten back in the days when I ate meat, so I had to come up with something else. However since I wanted to keep the spirit of the dish alive I didn’t just want to throw some tofu or tempeh into a mustard sauce, that’s not all that creative is it? Besides organ meat is reported to be so flavorful that I didn’t think tofu would really make a good stand in.


I wanted something meaty and something with flavor and so I decided to make some Irish Style Seitan. I call it Irish Style because I flavored it with all of the most common herbs used in Irish cuisine, basil, celery seed, mint, sage, thyme, onion, garlic and parsley. It may not taste like a lambs kidney but it holds flavor notes true to Irish cooking and that’s all that matters. Seitan also stands up well to a good simmer, and retains a nice chewy texture.


Since the dish is also traditionally served over a bed of white rice - to soak up the sauce - and a salad I decided to do one better. I served my Irish style Seitan in mustard cream sauce over wild rice, and served it with a big ole’ pile of crispy cabbage. Crispy cabbage by the way is also another traditional Irish side dish, and while it may not be super creative it is surprisingly really satisfying as well as delicious! It’s hard to believe something so simple can be so good, but it is.

Make sure when you eat this meal you get a fork full of rice, sauce, seitan and cabbage all at once. Heaven!

The Full Plate - Seitan, Mustard Cream Sauce, Crispy Cabbage
and Wild Rice


Irish Style Seitan with Mustard Cream Sauce 

1 lb Irish Style Seitan Sliced into rounds or cubed (Recipe Follows)
2 Tbsp Earth Balance or other non-dairy butter
1 C White Wine
2-4 Tbsp Dijon Mustard
8 Garlic Cloves Minced
6-7 Green Onions sliced thin
½ Bunch Fresh Parsley Minced
2 Tbsp Fresh Minced Rosemary
1/4 tsp ground Thyme
Celtic Sea Salt to taste
1/4 - ½ tsp White Pepper
6 Tbsp Unsweetened Almond Milk (or other non-dairy milk)

- Melt butter in a pan over medium-high heat. Place seitan rounds or chunks in the butter and fry for 2-3 minutes a side until nice and brown. Remove seitan from the pan with a slotted spoon and set aside on a plate.

- Pour the wine into the pan, and add the garlic, onion, and herbs. Stir to combine and then let simmer for 5-10 minutes until reduced slightly and garlic is cooked.

- Add the almond milk to the pan and stir until combined and creamy.  Season with salt and pepper, then return the seitan to the pan and heat through.

- Serve Seitan and mustard cream sauce over wild rice, garnished with extra parsley. With a nice side salad or crispy cabbage (recipe follows)

Now - Making Seitan is super simple and actually really quick. Trust me when I say that if you can bake a cake you can make seitan. I love the steam method, it's fast, cheap, and requires little prep. Basically mix a bunch of stuff in a bowl roll it into loaves and steam away, what could be easier and it's done in under an hour! I like to make a big ole' batch of seitan every 2-3 months and sore it in the freezer for quick and easy use. I will probably use this particular seitan recipe for several dishes to come later this week.

Irish Style Seitan 

1 ½ C Water + 1 Vegan Beef Boullion Cube (Could use a dark vegetable broth instead)
1 ½ C Vital Wheat Gluten
1/4 C Chickpea Flour
1/4 C Nutritional Yeast
1 ½ tsp Dried Basil
½-3/4 tsp Celery Seed
3/4 tsp Dried Mint
1 tsp Sage
1 1/4 tsp Dried Thyme
3 tsp Dehydrated Onion Flakes
3 Tbsp Tomato Paste
3 Tbsp Tamari
1 Tbsp Olive Oil
6 Garlic Cloves minced

- Mix all dry ingredients and spices together in a large bowl.

- Whisk together the broth, tomato paste, tamari, olive oil and minced garlic, in a small bowl.

- Make a well in the center of the dry ingredients, and pour the wet ingredients in. Mix until combined and a dough forms. Turn the dough out onto a clean surface and kneed for 2-3 minutes. Then return the dough to the bowl and let rest for 10 minutes.

- Cut 4 rectangles of aluminum foil.

- Turn the dough out and kneed for another minute. Then divide the dough into 4 chunks. Shape the chunks into small oval loaves.

- Place one chunk of dough onto one sheet of aluminum foil. Fold the long side of the aluminum foil over the dough. Fold over the sides of the foil, then roll up like you would roll a burrito. Don’t roll the foil too tight because you need to leave a little room for the seitan to expand.

- Once all the chunks are rolled in the foil, place them into a steamer basket and steam for 45 minutes until nice and pulp. Seitan should be firm but springy.

- When seitan is done, remove from the steamer basket and place on a wire rack or plate to cool. Let cool for one hour and then place in the refrigerator or freezer until you’re ready to use it. Should keep in the freezer for 2-3 months if placed in an airtight container or zip-lock bag.

Crispy Cabbage 

1 Medium Head of Green or Savoy Cabbage sliced thin
2 Tbsp Peanut Oil
2-3 Tbsp Fresh Minced Parsley
Celtic Sea Salt and Black Pepper to taste

- Heat Peanut oil in a large pan over medium-high heat.

- Add the cabbage and stir-fry 3-5 minutes, until just cooked but still crisp. Make sure you really watch it, you don’t want it to wilt, get mushy, or burn. A few golden spots are okay but it should retain it’s bright green color.

- Season with sea salt, pepper, and parsley and serve.

Wild Rice

1 ½ C Wile Rice
3 ½ C Water

- Place in a rice cooker and cook according to cooker’s directions.

PS: Sorry I forgot to take pictures of the seitan making process but I promise to do so next time! Also if you need this to be wheat-free you could try it with Tempeh. Tempeh is chewy enough to work, though you wont' get the added flavor of the seasoned seitan.

Wednesday, April 11, 2012

Mediterranean Scramble...


My husband and I are suckers for a good tofu scramble. I think in the beginning we were both a little bit skeptical but we quickly came to the realization that tofu scrambles are the way to go. They look like scrambled eggs and taste a million times better, plus they’re so versatile. You can literally add anything in that you like.


I generally only make scrambles for special occasions, - I don’t know why since they’re so darn good! - and typically I only make one of two versions that have become my go too scramble recipes. One is just a basic garden scramble that I came up with. The other is a slightly sweeter tad spicier scramble that includes vegan chorizo, sort of meant to be like a Mexican Eggs and Chorizo sort of thing. Both are wonderful - I’ll have to post the recipes some time. - However when my husband requested a scramble for Easter breakfast, rather then the quiche I’d originally planned I decided to stick with the Mediterranean theme we’d set for dinner.


When I started out I just had a vague idea of what I wanted. Sausage and peppers to start, seasoned with Greek spices, but beyond that I didn’t really have a clue as to what I was going to do. So I picked through my cabinets, sorted through my fridge and pilfered my brain of every tiny bit of it’s culinary knowledge and Greek inspiration. What I ended up with was so utterly mind blowing that neither my husband nor I could resist the urge to utterly gorge ourselves silly. Everything about this scramble is perfect! The flavors are subtle and play off each other beautifully, the aroma is heavenly, and the entire dish transports you to a new level of culinary bliss. It must also be said that long ago my husband happened upon the realization that if you add a bit of ketchup to a tofu scramble it makes it taste all the more like eggs. Both of us know people who actually eat ketchup on real chicken’s eggs and both of us have always found this utterly sickening. However, ketchup on a scramble makes total sense and over time I’ve picked up this habit as well. Although, this is one scramble that definitely doesn’t need it. I gobbled my plate up as was, without making any alterations. If you like Mediterranean flair, and both Greek and Italian spices I strongly suggest you give this scramble a try, you won’t be sorry!


Mediterranean Scramble

2 Tbsp Olive Oil
1 lb Firm Tofu (Pressed and Drained)
1 lb Vegan Italian Style Sausage (I used Field Roast)
1 C chopped Mixed Peppers (I Used Red and Orange)
1 Small Yellow Onion Diced
10 Cloves Garlic Minced
10 Sun-dried tomatoes chopped
2 Large handfuls Baby Spinach
10-15 Kalamata Olives Halved
½-3/4 tsp ground Fenugreek ***
½ tsp ground Fennel ***
1 tsp ground Cumin
1 ½ tsp ground Thyme
1-2 tsp Dried Oregano
1/4-1/2 tsp Dried Crushed Rosemary
1/8 Ground Turmeric
Dash of Dried Dill
Dash of Smoked Paprika
Sea Salt and Black Pepper to taste
1/8-1/4 C Nutritional Yeast
Water as needed

- Put tofu in a tofu press - or wrap in a towel and place between two heavy objects - and press for about 2 hours.

- Heat 1 tbsp of oil in a pan over medium-high heat. Slice Italian sausages into thin rounds and fry in the oil until nicely browned on both sides. Roughly 5-10 minutes. You can add a bit more oil or water if needed. Once browned, remove to a plate and set aside.

- Heat remaining tbsp of oil in the same pan. - No need to clean it out. - Add garlic, onion, and peppers and saute over medium heat for 5-8 minutes until flagrant, and onions are translucent and peppers are soft.

- Drain tofu and crumble into the pan. Alternately if you want large pieces you can cube it using a knife rather then just crumble it.

- Add in all your spices. The fenugreek, fennel, cumin, thyme, oregano, rosemary, turmeric, dill, smoked paprika, sea salt, pepper, and nutritional yeast. Adjust for personal taste preferences and color and stir until everything is well combines and tofu has taken on a yellow color. If the pan seems dry you can add in a bit more oil or water to de-glaze and moisten it, as needed.

- Add in the cooked Italian Sausage, Spinach and sun-dried tomatoes. Stir to combine and saute over medium for 2-4 minutes until tofu and sausage are well heated through and spinach has wilted. Add in the kalamata olives, saute another minute then taste for flavor, adjust as needed and serve.


*** Note - Both Fenugreek and Fennel may only be sold in seed form. If this Is the case no worries, just grind the seeds yourself in a spice or coffee grinder. It works perfectly. I actually have a coffee grinder for just this purpose. Also fenugreek may not be in everyone’s average grocery store depending on where you live. However grocery retailers such as Whole Foods, as well as specialty and spice shops, typically carry it. You could also check out your nearest Mediterranean, Indian, Turkish, Middle Eastern, or even Chinese Grocery as Fenugreek is used in all of these cuisines. Trust me when I say it’s worth your looking for!***


*** Note - Can be made Gluten-Free by using a GF Vegan Sausage*** 

Tuesday, December 13, 2011

Fusilli In Cream Sauce With Caramelized Onions, Sun-dried Tomatoes, and Crushed Pink Peppercorns...


A few nights ago I was in the mood for pasta, but not just any kind of pasta. I wanted a rich and creamy white sauce, rather then olive oil, pesto, or marinara and I wanted it to be kind of cheesy. Whenever I think of cream sauce I think of Alfredo, but that’s not really what I wanted. I wanted something ‘cleaner’ if that makes sense, that was just a tad sweet, with just a touch of delicious cheesy goodness.

White Miso, Nutritional Yeast and Coconut Milk immediately sprung to mind. Now you may have done a double take on the words coconut milk, but trust me on this. The best, richest, and creamiest sauces I’ve made yet for pasta whether they be for mac and cheese, Alfredo or other have all been made with coconut milk. I don’t know what it is about coconut milk but it works so much better then any other non-dairy milk or cream that I’ve tried for that rich flavor and thick texture. I know you might be skeptical but it’s true, and you may be asking yourself ‘doesn’t it make what you’re cooking taste like coconut’ and the answer is no. I find that if you don’t add sugar into your coconut milk, and use savory seasonings there isn’t any coconut flavor at all. I know it sounds crazy right? And I get your reluctance, because I was a total skeptic too when I first happened upon this amazing culinary discovery, but then I tried my first coconut milk mac and cheese and nearly lost my mind! I really is that good, so phenomenal in fact that coconut milk has since become my ‘go-to’ for cream sauce as well as a few other things.


As for the White miso and the Nutritional Yeast, it’s only natural they sprung to mind for this recipe considering the cheesy taste they impart to dishes. People think I’m a little crazy for thinking that White Miso has a cheese like flavor, but I don’t know, that’s what I taste. Something about the fermentation I think gives it a quality similar to aged cheeses. It has that sharp, salty full-bodied flavor you -or at least I - associate with a rich aged cheddar. So whenever I want to make something cheesy White Miso is my ‘go-to.’ Darker Miso, such as red or brown doesn’t really have the same flavor or quality. It’s more salty and bitter to me rather then cheese like so I wouldn’t recommend using them for this. Stick to white miso, or perhaps yellow. As for the Nooch. Since I’m not a big fan of nutritional yeast I played it kind of conservative here, but if you like the taste of nooch then by all means feel free to add in more. I went with the 1/4 cup but think a 1/3 cup would be just as good too, but if you really want to heighten the flavor you could go up to a ½ cup.


Of course once I had the sauce all figured out there was still the matter of what else to put in the pasta. After some careful consideration I decided to go with red onion, garlic, sun-dried tomatoes, fresh parsley and pink peppercorns. Since the pasta is a tan color, and the sauce is so white I wanted to include ingredients that would really stand out and pop with brightness when they came together in my bowl. Red onion, sun-dried tomatoes and parsley are perfect for that, and the pink peppercorns give the dish a cute pink dusting and interesting flavor.


However Pink Peppercorns definitely have a distinct and unique flavor, they’re not hot, but rather have a delicate almost fruity flavor. For some they may be an acquired taste, so if they’re not your cup of tea so to speak, or you’re unable to find them then by all means leave them out and add in white pepper or even black pepper instead. I don’t think the dish will suffer any from their absence, and in fact I think white pepper might give it another distinctive component. The pink peppercorns do lend a hint of sophistication though, and I do really enjoy them.

Now, before we get started I do want to say that there are a couple of steps to this recipe, but if you plan it well it can all come together rather quickly, so don’t feel intimidated!


Fusilli In Cream Sauce With Caramelized Onions, Sun-dried Tomatoes, and Crushed Pink Peppercorns

1 lb Whole Wheat or Gluten-Free Fusilli

1 Tbsp Olive Oil
1 Red Onion
8 Cloves Garlic minced
½-1 C Sun-dried tomatoes (not oil packed)

3/4 C Raw Cashews
½ C water
1 Tbsp Lemon Juice
3-5 Tbsp Mellow White Miso

1 15oz Can Coconut Milk (not light)
½ tsp Smoked Paprika (or to taste)
½ tsp rubbed Sage (or to taste)
1/4 tsp ground Nutmeg (or to taste)
1/4-1/3 Cup Nutritional Yeast
½ Bunch Fresh Parsley Finely Minced
*** ½-1 Tbsp Pink Peppercorns (crushed or ground with a mortar and pestle) (Optional)

- Bring a pot of water to boil and cook Fusilli as directed by the package. When cooked drain, and return to pot.

- Meanwhile, place oil in pan or pot, over medium-high heat. Add onions and saute over medium-high heat for five minutes. Lower to medium and saute another five minutes. Add in garlic and reduce heat to medium-low. Add in the sun-dried tomatoes. Cover and let saute until onions become very soft and light golden brown. Roughly another ten minutes. Make sure to stir every once in a while so the onions and garlic don’t stick. Add a little water If they do.

- When onions are caramelized to your liking transfer them to a plate or bowl and set aside.

- While onions are caramelizing you can blend the cashews, water, lemon juice, and miso in a highspeed blender on high for 30-60 seconds until super smooth and creamy. Taste for flavor and adjust miso as needed.

- Next begin your sauce. Poor coconut milk into medium pot. Add the cashew-miso mixture from your blender making sure to scrape out as much as possible, and whisk until combined. Whisk in Nutritional Yeast, smoked paprika, sage and nutmeg and taste for flavor. Adjust as needed. Let simmer on the stove for roughly ten minutes. Add in crushed pink peppercorns and minced parsley.

- Add your caramelized onion mixture into the pot with your fusilli, then pour in your cream sauce. Mix until everything is thoroughly combined and then serve garnished with a little extra parsley and crushed pink peppercorn if desired.

*** Note - Soy-Free if using Chickpea Miso***