Showing posts with label Rosemary. Show all posts

Wednesday, June 21, 2017

French Inspired "Venison" Seitan Casserole

Yesterday was Litha, or Summer Solstice. I made lots of delicious food and sweets, but one of the dishes I want to share most with you is a French Inspired Casserole. The Original Recipe calls for Venison but I used Gardien Beef Tips, though you could easily use homemade seitan (I would have, if I'd had any prepared.)  The dish is super rich, and flavorful and tastes wonderful alongside roasted tomatoes with thyme, charred asparagus and soft bread for sopping up excess sauce. It's a fairly simple recipe though does require some advanced prep.


French Inspired "Venison" Seitan Casserole.

1 Yellow Onion
4 Cloves
8 Juniper Berries Crushed
8 Black Peppercorns Crushed
1 1/2 Cup Red Wine
2 Celery Stalks
2 Carrots
2 Bay Leaves
6 Whole Garlic Cloves sliced
Zest of half a lemon
5 Sprigs Rosemary
2 Packages Gardien Beefless Tips (or Equivalent amount of homemade Seitan)
All Purpose Flour
1 Tbsp Olive Oil
1 Tbsp Earth Balance
4 Shallots Sliced
2 Cups Brown Stock
2 Tbsp Raspberry Jam
1 Heaping Tbsp Marmite
1 Vegan Beef Bouillon Cube (Optional but recommended)


- First defrost Tips or Seitan (if frozen) Place seitan in a large bowl.

- Quarter the Onion and stick a clove in each quarter. Place the Onion Quarters into the bowl with the seitan.

- Add Juniper Berries, Crushed Pepper, Chopped celery Stalks, Chopped Carrots, Sliced Garlic, Bay Leaves, Lemon Zest, and Minced Rosemary from the five sprigs to the bowl. Stir with a large wooden spoon to combine.

- Place a medium sized sauce pan on the stove. Bring 2 cups of water to a boil, and add in the Marmite and Bullion Cube. Whisk until the marmite and cube dissolve and you have a nice brown liquid. Add in 1 cup of the red wine, and raspberry jam, whisk to combine and lower the heat. Simmer for five minutes.

- Pour the stock/wine mixture over the beef and veg in the bowl. Stir to combine and make sure everything gets nice and covered. Place the bowl in the fridge and let marinate overnight.

- After the stew has marinated. Melt the Butter and oil in a large fry pan on the stove. remove the Onions from the bowl discard cloves and slice onions thin. Slice the shallots as well. Add both onions and shallots to the butter in the pan, fry until brown.

- Place the Tips or Seitan in a zip-lock bag and dump in enough all purpose flour to cover all the pieces. Shake the bag around to make sure evenly coated.

- Once onions are cooked place them in a well oiled cast iron casserole dish.

- Use the same pan to fry the floured seitan. Fry until brown, and add it to the Casserole.

- Add the remaining veg to the casserole. Then strain the marinade into the casserole through a fine mesh sieve. Discard bay leaves, peppercorns and juniper berries. You can season to taste with additional pepper and salt if you like but it should be salty enough.

- Bake in the oven at 350'F for 1 1/2 hours until tender and marinade has reduced by half. Serve with roast tomatoes, asparagus, a salad and soft bread like pita.

PS: Sorry for the poor picture quality I was more interested in eating, drinking and being marry to care much about photography.

Sunday, February 14, 2016

Roast Seitan With Spring Vegetables...


Happy Valentine's Day everyone!  Though I normally go 'all-out' when it comes to holiday cooking, I just don't really have that level of dedication in me these days. Most often I'm looking to cook something simple and quick that's healthy and tastes good, and on those days where I like to spend a little more time on something I typically only make one really nice dish rather then a dozen.

So this year we kept Valentine's Day low-key. At first I struggled with what to make, and then I decided to make something French (of course!)  Last year when we were in Paris I bought a cook book, it's non-vegan but I wanted it because it was full of 'traditional' French recipes as opposed to 're-imagined' French-fusion. I love the idea of French food, even if I can't eat most of it, and I bought the book with the intention of trying to veganize some of the less common recipes.


As I was thinking about what to cook, it occurred to me that Valentine's Day was the perfect opportunity to try something new, so I dug the book out and flipped through it. Suddenly a recipe for Roast Lamb with Spring vegetables caught my eye. I have no idea what makes this dish inherently French, or if you can really consider it much of a recipe but something about the photo was appealing to me. All those tasty spring vegetables I imagined sitting around a Seitan Roast and it just seemed perfect. I'm tired of winter, tired of winter food, lets bring on the Spring already!  So here's my version of it, you could use any seitan roast you desire I suppose, but I made my own. I used the 'Moo-Free Seitan" recipe from "Vegan Sandwiches Save the Day" cooked it in the slow cooker then left it in roast form rather then slicing it as the book suggests. If you make your own roast for the recipe or buy a roast I suggest buying or making one that's beef flavored as opposed to chicken flavor. Beef and Lamb taste little alike, but Beef Seitan is as close as I'm coming to lamb in this life. I also used the original cooking liquid from the seitan roast as my stock, but you could use any vegan beef stock. Also take into consideration that a store bought roast will be much drier then a homemade one, so cooking time may vary.


Roast Seitan with Spring Vegetables

1 Large Seitan Roast
3 Sprigs Rosemary
3 Sprigs Thyme
6 Garlic Cloves Sliced Thin
1 Pound Baby Potatoes Cut in Half
8oz Baby Carrots Left Whole
2 Medium Sized Zucchini Cut into Rounds
6 Small Leeks or in lieu of that 6 Large Green Onions
2 Tbsp All-Purpose Flour
1/2 Cup Red Wine
2/3 Cup Vegan Beef Stock
Earth Balance as needed
Sea Salt, Black pepper and Garlic Powder to taste


- Pre-Heat Oven to 350'F

- Spray a large roasting pan with a little non-stick spray. Place the roast inside. With a small knife make several incisions in the top of the roast. Slip the sliced garlic into the incisions. Lightly season the roast with sea salt, black pepper, and garlic powder. Add two small dollops of Earth Balance to the pan and place the roast in the oven.

- Cook for 15 minutes. Add the Potatoes to the pan remove the Rosemary and Thyme from their sprigs and scatter it over the roast and potatoes. Season the potatoes with a little salt and pepper then return to the oven and cook another 15 minutes.

- Flip the Roast over, season the underside with salt and pepper and garlic powder. Add the carrots to the pan along with another 2 dollops of Earth Balance. Return to the oven and roast for 20 minutes.

- Flip the Roast Over once more.  Add Zucchini and Leeks to the pan. (If using Green onions instead do not add them yet) Continue to roast until all the vegetables are fork tender.

- When the vegetables are fork tender add in the green onions if you're using them instead of leeks and roast for an additional five minutes until they are wilted and browned a little.

- Remove the whole pan from the oven. Transfer the Roast to a carving board and spoon the vegetables into a serving dish. Making sure to leave behind any juice

- Now to make the gravy. Heat your roasting pan over medium heat on the stove top. If there wasn't a lot of juice left over in your pan at the end of cooking add in two nice dollops of Earth Balance and wait for it to melt.

- Add the flour and whisk the flour around in the juice and EB until it has become a roux.

- Slowly pour in the stock, and then the wine, whisking the whole time. Season lightly with salt and pepper if you like and whisk slowly until the gravy has thickened to your liking.

-Slice the roast, divide it amongst plates, add a scoop of vegetables and drizzle with gravy. Enjoy with some nice red wine.

Monday, August 5, 2013

Summer Leek and Lemon Noodle Soup...


I don’t know about where you live but the weather here has been weird lately. One day it’s hot, humid and sunny as the tropics and the next day it’s cool, windy, overcast and drizzly. Now since I’m a Vancouver girl a drizzly or even a full on rainy day doesn’t get me down - even if it’s in the middle of summer - because it reminds me of home. For me rainy days are days to laze on the couch and read a good book with the windows open so that you can listen to the rain splatter against the pavement. Rainy days are days to get things done that you never seem to get around to when the weather is nice - like organization or hard-core baking. Rainy days also mean soup. Now, it wasn’t exactly cold today, but it was cool and so I really felt like a bowl of soup. Really there’s nothing better then a steaming bowl of soup on a grey day, is there?


Of course even if the temperature is a little cool, it’s still the middle of summer, so I didn’t think a thick hearty soup would be appropriate. I was craving something ‘chicken-noodle’ style, with lots of broth and wholesome veggies, but I also wanted it to represent summer. I wanted a fresh and light soup that you could really eat anytime of year and feel good about. Lemon, summer savory, and tarragon all give this soup that summery feel, and they paired extremely well with the leeks I had in my fridge. The great thing about this soup is that it’s pretty quick and easy to prepare and if you really want to utilize summer’s bounty you can substitute fresh herbs for the dried.


Summer Leek and Lemon Noodle Soup

2 tsp Olive Oil
2 Large leeks cleaned and sliced
3 Stalks Celery Diced
4 Carrots Diced
10 Garlic Cloves Minced
4 C Low-Sodium Vegetable Broth
1 ½ C Water
*** 2 Bunches Soba Noodles
1 tsp Dried Basil
1 ½ tsp Dried Oregano
1 tsp Ground Thyme
1 tsp dried Tarragon
1 tsp dried Summer Savory
1 tsp Smoked Paprika
1/4 tsp Ground Ginger
1/4 tsp Dried Rosemary
Sea Salt and Black Pepper to taste
1/4 C Lemon Juice
2 Tbsp Bragg’s Liquid Amino’s

- Heat the olive oil in a medium-large sized pot over medium-high heat. Add the sliced leeks and garlic and saute for 3-5 minutes. Add in the celery and carrot and saute for 3-5 more minutes.

- Add in the vegetable broth and water and bring the mixture to a boil. Boil for about 10 minutes then add the basil, oregano, thyme, tarragon, summer savory,. Smoked paprika, ground ginger, rosemary, sea salt and black pepper. Reduce to simmer and simmer for about 10 minutes.

- Add in the Soba noodles and simmer for an additional 5-10 minutes until the noodles are soft.

- Turn off the heat and stir in the Bragg’s Liquid Amino’s and the Lemon Juice. Let stand ten minutes and serve dished up into large bowls.


*** Note - Packages of Soba Noodles usually come separated into bundles. Each small package has about 3-4 bundles of noodles, and each large package has about 8 bundles of noodles. I just grabbed two bundles and didn’t exactly measure the dry weight. Though if your noodles don’t come packed in bundles I would say somewhere between 4-6oz would be appropriate for this soup. Also if you would prefer you can use a gluten-free noodle instead of the Soba to make this gluten-free*** 


Thursday, July 11, 2013

White Beans and Garlic Scapes with Caramelized Tempeh...


Garlic Scapes are still abundant at many markets, and since the season for them is so short I love to take advantage of them. Unfortunately last week I had a ton of them in my fridge but hardly anytime to cook. Still one afternoon as I was preparing to leave for work I needed something quick and easy to throw together to take with me for lunch and this just happened to be it.


It was one of those ‘Grab whatever’s around’ affairs. One of those ‘throw everything into a pot’ deals, you know? I’m becoming more and more fond of this style of cooking because it seems no matter what I throw together it always comes out great. With this dish in particular the scapes work so well with the creamy white beans. I used Italian flavors as inspiration and caramelized some tempeh for a bit of extra oomph and a little sweetness, By the way, caramelized tempeh is like my new favorite thing ever. If you’ve got some garlic scapes you don’t know what to do with I urge you to try this dish. It’s packed with good stuff and you can whip it together in under 30 minutes.


White Beans and Garlic Scapes with Caramelized Tempeh 

1 15oz Can White Beans (rinsed and drained)
1 Large Tomato Diced
12 Garlic Scapes cut into 1 inch dice
1 Tbsp Lemon Juice
1 Tbsp Olive Oil
½ tsp Red Pepper Flakes
1/4 tsp Dried Rosemary - (or fresh if you have it)
Sea Salt and Black Pepper to taste
8 oz Tempeh cubed and steamed for 10 minutes
3 Tbsp Bragg’s Liquid Amino’s - or Tamari or Soy Sauce
1 Tbsp Maple Syrup

- Heat the olive oil in a pan over medium heat. Add the garlic scapes and saute until nearly tender 4 minutes.

- Add in the White Beans, Tomato, Red Pepper Flakes, Rosemary, Sea salt and pepper and saute until the scapes are tender, the tomatoes have softened and the beans are heated through. About 4 more minutes.

- Add the lemon juice and stir to combine then transfer to a serving dish.

- Using the same pan as you used to cook the scapes and beans turn the heat up to medium-high. Add the cubed tempeh and saute until beginning to brown on all sides. About 5-6 minutes.

- Add in the Bragg’s, and Maple syrup. Let the mixture bubble up and get thick using a wooden spoon or spatula stir the tempeh around so that it all gets coated with the mixture. Cook about 2-3 minutes until most of the sauce has been absorbed into the tempeh and the tempeh takes on a ‘sticky’ look.

- Add the caramelized tempeh to the bean and scape mixture and enjoy!


PS: You can eat this as is, or you can enjoy it over a bed of greens or a bed of cous cous or rice.

Sunday, March 10, 2013

Irish Style Seitan In Mustard Cream Sauce With Wild Rice and Crispy Cabbage...


St. Patrick’s Day is only a week away, can you believe it? Now, I’m not Irish, and I’ve never really ‘celebrated’ St. Paddy’s but I do like to observe most holiday’s and occasions with at least a good or special meal. This year I’m feeling a little more festive, I guess it’s the ugly weather we’re having, it makes me daydream a lot, and one of the places I’ve been dreaming about lately is Ireland in the Summer. Thanks no doubt to all of the Flogging Molly, The Pogues, Gaelic Storm and Dropkick Murphys I’ve been listening to of late. Anyway, I feel festive and inspired so I wanted to observe this year’s St. Paddy’s with a weeks worth of Irish style cooking.

Crispy Cabbage


Now, I know Irish fare may not seem all that vegan friendly to you, after all what is Irish cuisine most famous for? Potatoes, Cabbage and Meat - particularly bacon - and it’s also probably never struck you as a particularly creative or mouth-watering style of cooking. You never hear people say “I’m really craving Irish today.” Anyway. However I think the culinary traditions of England, Scotland and Ireland get a bad rap, it may not be ‘haute cuisine’ it may not have the fire of Latin cuisine, or say the romance of Italian but to say the Irish lack culinary creativity is to do them and their cuisine a disservice. Honestly I think the lack of creativity when it comes to Irish cooking has more to do with people outside of Ireland trying to re-create Irish food. I mean just open up any Vegan cook book that includes recipes for St. Patrick’s Day, and tell me what you see. Recipes for Champ, Colcannon - both of which I might add can basically be defined as mashed potatoes - cream of broccoli, pea, asparagus - anything green really - soup, and Irish soda bread. It’s repetitive and boring! But don’t think omnivores are any more ingenious when it comes to recreating Irish cooking. Bacon and cabbage, mashed potatoes and corned beef are about all I ever hear omnivores eating, and corned beef, really? Now I have a huge bone to pick with people who say corned beef is Irish - it’s not. First of all corned beef is just a name for salt-cured beef, and salt curing beef as well as other meats has been done since ancient times. As the dish that we know today noone is exactly sure who started it or when but it became popular with the British Navy during the 18th century English Industrial Revolution. The Irish may have been making a form of corned beef around this time to sell to the British navy but they likely weren’t eating it themselves.

Seitan in Mustard Cream Sauce


In fact, the entire time I was in Ireland - and keep in mind that I traveled the entire country from Dublin to Derry, and the Giants Causeway, to Galway, to Kerry, to Waterford, Cork and the Wicklow Mountains - I never once, on any restaurant menu saw Corned Beef as an option. It’s interesting that in Ireland Corned Beef is almost exclusively only sold to tourists or sold in tourist geared establishments, and that the majority of Irish in Ireland do not identify this food with Traditional, National Cuisine. It’s also interesting to note that corned beef actually has a stronger connection to Jewish Cuisine then it does Irish. But I digress - we were talking about a lack of creativity. When you ask the average person what they eat in Ireland you’ll undoubtably get the response “potatoes” and while it’s true that the Potato - still to this day - is the number one most commonly eaten vegetable in Ireland - along with cabbage and carrots - it does not mean that Irish cuisine has to be bland, boring, or potato heavy.


A lot of wonderful things grow in Ireland, from herbs such as parsley, rosemary, sage and thyme, to garlic, onions, potatoes, carrots, parsnips, cabbage artichokes, sunchokes, asparagus, and seaweed! Eating seaweed in Ireland isn’t just for the vegetarians and vegans! Mustard, wine and cream are also common for making sauces and flavoring dishes, so you see there’s a bounty of available options that any chef worth his or her salt could use to invent a dish that’s far more creative and tastier then corned beef or colcannon.


So for my first foray into Irish cooking I decided to try out a dish that utilized a mustard cream sauce. I’m a big fan of mustard - Dijon or stone ground in particular - and so a creamy, mustardy sauce with fresh garlic and herbs quite appealed to me. Now traditionally this is a sauce usually served with lambs kidneys - or the kidneys of any game animal - which is disgusting, and not something I would have even eaten back in the days when I ate meat, so I had to come up with something else. However since I wanted to keep the spirit of the dish alive I didn’t just want to throw some tofu or tempeh into a mustard sauce, that’s not all that creative is it? Besides organ meat is reported to be so flavorful that I didn’t think tofu would really make a good stand in.


I wanted something meaty and something with flavor and so I decided to make some Irish Style Seitan. I call it Irish Style because I flavored it with all of the most common herbs used in Irish cuisine, basil, celery seed, mint, sage, thyme, onion, garlic and parsley. It may not taste like a lambs kidney but it holds flavor notes true to Irish cooking and that’s all that matters. Seitan also stands up well to a good simmer, and retains a nice chewy texture.


Since the dish is also traditionally served over a bed of white rice - to soak up the sauce - and a salad I decided to do one better. I served my Irish style Seitan in mustard cream sauce over wild rice, and served it with a big ole’ pile of crispy cabbage. Crispy cabbage by the way is also another traditional Irish side dish, and while it may not be super creative it is surprisingly really satisfying as well as delicious! It’s hard to believe something so simple can be so good, but it is.

Make sure when you eat this meal you get a fork full of rice, sauce, seitan and cabbage all at once. Heaven!

The Full Plate - Seitan, Mustard Cream Sauce, Crispy Cabbage
and Wild Rice


Irish Style Seitan with Mustard Cream Sauce 

1 lb Irish Style Seitan Sliced into rounds or cubed (Recipe Follows)
2 Tbsp Earth Balance or other non-dairy butter
1 C White Wine
2-4 Tbsp Dijon Mustard
8 Garlic Cloves Minced
6-7 Green Onions sliced thin
½ Bunch Fresh Parsley Minced
2 Tbsp Fresh Minced Rosemary
1/4 tsp ground Thyme
Celtic Sea Salt to taste
1/4 - ½ tsp White Pepper
6 Tbsp Unsweetened Almond Milk (or other non-dairy milk)

- Melt butter in a pan over medium-high heat. Place seitan rounds or chunks in the butter and fry for 2-3 minutes a side until nice and brown. Remove seitan from the pan with a slotted spoon and set aside on a plate.

- Pour the wine into the pan, and add the garlic, onion, and herbs. Stir to combine and then let simmer for 5-10 minutes until reduced slightly and garlic is cooked.

- Add the almond milk to the pan and stir until combined and creamy.  Season with salt and pepper, then return the seitan to the pan and heat through.

- Serve Seitan and mustard cream sauce over wild rice, garnished with extra parsley. With a nice side salad or crispy cabbage (recipe follows)

Now - Making Seitan is super simple and actually really quick. Trust me when I say that if you can bake a cake you can make seitan. I love the steam method, it's fast, cheap, and requires little prep. Basically mix a bunch of stuff in a bowl roll it into loaves and steam away, what could be easier and it's done in under an hour! I like to make a big ole' batch of seitan every 2-3 months and sore it in the freezer for quick and easy use. I will probably use this particular seitan recipe for several dishes to come later this week.

Irish Style Seitan 

1 ½ C Water + 1 Vegan Beef Boullion Cube (Could use a dark vegetable broth instead)
1 ½ C Vital Wheat Gluten
1/4 C Chickpea Flour
1/4 C Nutritional Yeast
1 ½ tsp Dried Basil
½-3/4 tsp Celery Seed
3/4 tsp Dried Mint
1 tsp Sage
1 1/4 tsp Dried Thyme
3 tsp Dehydrated Onion Flakes
3 Tbsp Tomato Paste
3 Tbsp Tamari
1 Tbsp Olive Oil
6 Garlic Cloves minced

- Mix all dry ingredients and spices together in a large bowl.

- Whisk together the broth, tomato paste, tamari, olive oil and minced garlic, in a small bowl.

- Make a well in the center of the dry ingredients, and pour the wet ingredients in. Mix until combined and a dough forms. Turn the dough out onto a clean surface and kneed for 2-3 minutes. Then return the dough to the bowl and let rest for 10 minutes.

- Cut 4 rectangles of aluminum foil.

- Turn the dough out and kneed for another minute. Then divide the dough into 4 chunks. Shape the chunks into small oval loaves.

- Place one chunk of dough onto one sheet of aluminum foil. Fold the long side of the aluminum foil over the dough. Fold over the sides of the foil, then roll up like you would roll a burrito. Don’t roll the foil too tight because you need to leave a little room for the seitan to expand.

- Once all the chunks are rolled in the foil, place them into a steamer basket and steam for 45 minutes until nice and pulp. Seitan should be firm but springy.

- When seitan is done, remove from the steamer basket and place on a wire rack or plate to cool. Let cool for one hour and then place in the refrigerator or freezer until you’re ready to use it. Should keep in the freezer for 2-3 months if placed in an airtight container or zip-lock bag.

Crispy Cabbage 

1 Medium Head of Green or Savoy Cabbage sliced thin
2 Tbsp Peanut Oil
2-3 Tbsp Fresh Minced Parsley
Celtic Sea Salt and Black Pepper to taste

- Heat Peanut oil in a large pan over medium-high heat.

- Add the cabbage and stir-fry 3-5 minutes, until just cooked but still crisp. Make sure you really watch it, you don’t want it to wilt, get mushy, or burn. A few golden spots are okay but it should retain it’s bright green color.

- Season with sea salt, pepper, and parsley and serve.

Wild Rice

1 ½ C Wile Rice
3 ½ C Water

- Place in a rice cooker and cook according to cooker’s directions.

PS: Sorry I forgot to take pictures of the seitan making process but I promise to do so next time! Also if you need this to be wheat-free you could try it with Tempeh. Tempeh is chewy enough to work, though you wont' get the added flavor of the seasoned seitan.

Wednesday, March 6, 2013

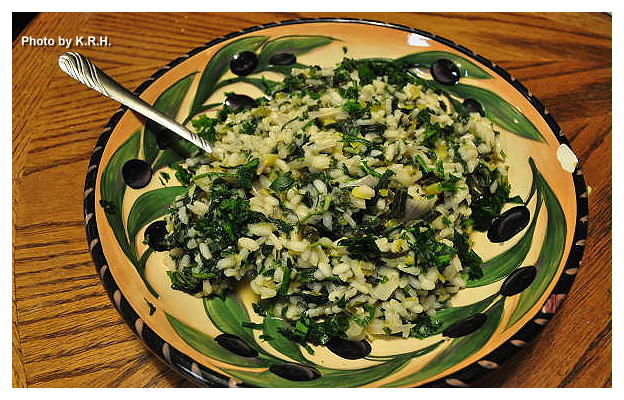
Arugula Risotto with Leek and Fresh Herbs...


Risotto is one of those pain in the ass Italian dishes that everyone loves and noone likes to make. Well, actually I don’t mind making risotto, yes it’s usually a lot of prep work, and it’s definitely a lot of stirring, but there’s something about it that I kind of love. I love watching the rice go from small hard granules to this very rich, and creamy aromatic concoction. There’s something really satisfying in witnessing this transformation, and risotto is universally perfect for cold winter nights and late summer evenings. It’s the kind of dinner you decide to make when you just want to chill by the oven and daydream. You put on some good music, open a nice bottle of wine to sip, and you daydream about far away places.


Anyway this particular recipe was inspired by a recent trip to the library. I was browsing through the cook books as I so often do when I’m there and book entitled ‘La Tartine Gourmande’ caught my eye. This is by no means a vegan cook book, or even a vegetarian cook book, I wouldn’t say that it’s even particularly vegan friendly but the cover photo was so beautiful and I was intrigued by the French so I picked it up and started flipping through it. Now it’s not very often that I find myself inspired by non-vegan recipes but when I saw the author Beatrice Peltre had made a risotto utilizing Arugula I knew I would have to try the combination. Ever since my trip to Europe I’ve been obsessed with Arugula I use it frequently these days and throw it into all sorts of dishes. I’m always on the lookout for creative ways to use this new favorite green of mine, so when I saw this recipe I knew it was a must.


Initially I wasn’t sure how arugula would go In a risotto since it has the tendency to be bitter but it worked out perfectly and wasn’t bitter at all. I love the accent from the lemon and subtle flavor of the wine and the leek. The parsley and basil make it almost reminiscent of a light pesto, and the miso gives it that rich, tart flavor that cheese would traditionally provide. However if you prefer you can leave the miso out and I’m sure it would be just as delicious! So here is my recipe adapted from ‘La Tartine Gourmande’ No matter how you decide to make it, just make it!


Arugula Risotto with Leek and Fresh Herbs

4 C Packed Arugula
1 C Packed Fresh Basil
1 C Packed Fresh Parsley
1-2 Tbsp Fresh Minced Rosemary
2 Tbsp Olive Oil
1 Large Leek Sliced thin
½ Red Onion chopped
Zest of 1 Lemon
1 tsp Garlic Powder
½ tsp Sea salt
1 ½ C of Arbrorio Rice
½ C Dry White Wine
2 C Vegetable Broth + 2 C Vegan Chicken Broth
1 Tbsp Earth Balance
1 ½ Tbsp White Miso mixed with 3 Tbsp water
Black Pepper to taste
Fresh Minced Parsley for garnish

- Bring a medium pot of salted water to a boil over high heat. Once boiling add the Arugula, Basil, and Parsley. Blanch for one minute then drain and run under cold water.

- Once cool enough to handle squeeze all the excess water from the arugula and herbs. Then place on a cutting board and finely chop and set aside.

- In the same pot you used to blanch the arugula heat the vegetable/vegan chicken broth and keep warm.

- Meanwhile heat the olive oil in a large pot over medium-high heat. Add the leek, and red onion. Saute for 4-5 minutes then add the lemon zest and garlic powder. Saute for another 2 minutes then add the rice, and saute for 1 minute, stirring constantly.

- Add the white wine, and cook stirring until the liquid has been absorbed.

- Add the salt and minced Rosemary along with 1 cup of warmed broth and cook stirring occasionally until the liquid has been absorbed. Repeat this process until you have no more broth left and the rice is thoroughly cooked and creamy. This takes roughly 20 minutes or so depending on your oven. Depending on how hot your burners get you may need to readjust the heat to a lower setting. Either medium, or even medium low so that the rice doesn’t cook too quickly.

- With the last cup of broth add in the chopped Arugula and herbs. Stir to thoroughly mix the arugula and herbs in. Once the liquid has been absorbed turn off the heat and stir in the tablespoon of Earth Balance, along with the white miso/water mixture, and black pepper to taste. Stir until fully incorporated.

- Taste for flavor and adjust seasonings as needed. Garnish with fresh minced parsley.

Enjoy on a cold winter night with some crusty bread, a glass of wine and dreams of a warm Mediterranean climate.


*** Note - If you prefer you can use all vegetable broth or all vegan chicken broth. I used half and half because I only had 2 cups of vegetable broth left, so I subbed in 2 cups of water with one vegan chicken bouillon cube. Also if you need to be soy-free you can use a soy-free barley miso or chickpea miso instead, or as I already suggested you can leave it out altogether.***


Thursday, December 20, 2012

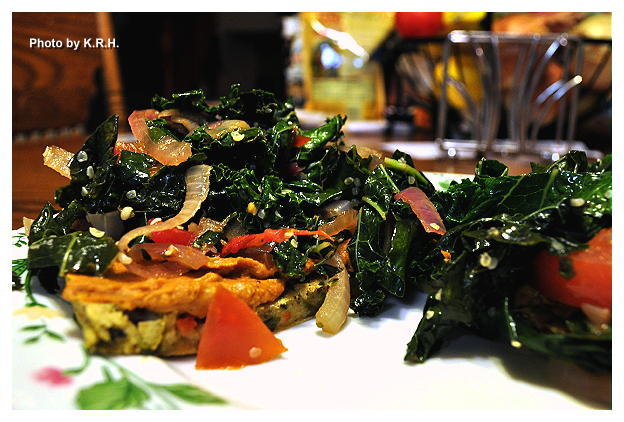
Simple Socca with Fava Bean Spread and Sauteed Kale...


I know I haven’t been keeping up with this as well as I should have been, but with the holiday season I’ve been a little pressed for time. School has been brutal the past couple of weeks as I struggled to finish all of my assignments in time to take my final - which I did today, and aced! - And any time I’ve had not devoted to school has been divided between work, holiday planning/Christmas shopping and watching documentaries on Netflix until my one month free-trial runs out on the 24th. Suffice to say I haven’t been doing a lot of cooking, or rather I have been, but I haven’t really been ‘creating. ‘ Mostly I’ve been relying on my good and trusty cook books to see me through, particularly those cook books devoted to healthful recipes that can be made in under 30 minutes. As unlike everyone else - or so it seems - I’m actually trying to keep with my routine this holiday season rather then use the holiday as an excuse to excessively binge on high fat junk foods. So I’ve been eating a lot of salad - which I’ve been craving lately anyway - and a lot of soup because the days are growing colder, a lot of things you probably wouldn’t find to enticing except for maybe the Socca.


Socca you see is my new favorite thing. - That and firtatta but more on that another time! Now Socca is a specialty in Southeastern French cuisine particularly in and around Nice. However it apparently originates in Genoa, Italy, and over time spread to Nice where it became popular throughout the region of the Ligurian Sea.  There are apparently similar dishes in countries such as Algeria, Argentina and Uruguay but I digress. The Socca I’m talking about is of the French variety. For those of you still unsure of what a Socca is, it’s a crispy thin pancake cooked in a cast iron skillet and eaten as a finger food while piping hot. It’s seasoned with fresh herbs, and generous amounts of black pepper and is typically eaten on it’s own. However I’m quite fond of turning my socca into a kind of pizza topped with a bean dip instead of a marinara sauce, and a lightly dressed salad. Making your meal an all in one sure makes cleanup a breeze! Over the past few weeks I’ve made quite a few socca’s, I’m typically making it twice a week now, and so I’ve tried a lot of different things, but this was one of my favorite combinations, and my husbands too. It’s sort of a cross between Provincial and Italian with a little red hot jalapeno thrown in for good measure, but what it really is, is delicious so I hope you try it out.


Simple Socca with Fava Bean Spread and Sauteed Kale

Socca 

1 ½ C Chickpea Flour
½ tsp Sea Salt
1/4 - ½ tsp Freshly Ground Black Pepper
3-4 Nice Sprigs Fresh Rosemary minced
1 tsp Dried Basil
1 tsp Dried Oregano
½ tsp Garlic Powder
1 ½ C Water
2 Tbsp Olive Oil
1/4 C Minced Kalamata Olives
1/4 C Minced Sun-dried Tomatoes
1/4 C Minced Green Onion
Minced Pickled Jalapeno to taste - try between 2-4 Tbsp.

Fava Bean and Sun-dried Tomato Spread

1 15oz Can Fava Beans drained and rinsed
2 Garlic Cloves - or to taste
6 Oil-Packed Sun-Dried Tomatoes
1 tsp Dried Basil
Sea Salt and Black Pepper to Taste
2 Tbsp Olive Oil - optional
1 Tbsp Lemon Juice
2 Tbsp Water to thin as needed

Topping 

1-2 Tbsp Olive Oil
1 Large Red Onion sliced thin
1 Large Bunch Kale cut into bite sized pieces.
10 Cherry Tomatoes halved
2 Tbsp Hemp or Sesame Seeds
Sea Salt and Pepper to taste
Ume Vinegar to taste


- Preheat oven to 425'F

- To make Socca whisk flour, salt, pepper, rosemary, basil, oregano, garlic powder, water and olive oil together in a bowl and set aside for 30 minutes.  - While Socca is resting you can make the Fava Spread and the topping.

- After thirty minutes whisk in all remaining ingridients.

- Heat a cast iron skillet over high heat on top of the stove. Spray with a little non-stick cooking spray. Once hot enough that water sizzles pour the Socca batter into the pan. Let the socca cook on high in the pan for 1 minute until the edges turn golden brown.

- Turn off the burner, and remove the cast iron pan, placing it into the heated oven. Bake for 15-20 minutes until light golden brown.

- To make the Fava Bean Spread combine all ingredients in a food processor and process until completely smooth and spreadable. Adding more water or oil to thin as needed. Taste for seasonings and adjust as necessary.

- To make topping. Heat olive oil in a pan over medium heat. Add onion and saute until translucent about 5-7 minutes.

- Add Kale and saute for another 5-8 minutes until kale is wilted and tender. Add in cherry tomatoes and saute for 2-3 minutes. Season with salt, pepper, ume vinegar and hemp seeds. When the mixture has reached it’s desired tenderness and flavor remove from heat.

- To assemble, cut the socca into four equal pieces and divide amongst 2-4 people. Spread each wedge of socca with a generous amount of the fava spread and top with a generous helping of the sauteed kale mixture.

- Enjoy! Seriously i'm so in love with socca you may see more recipes for it and variations of it from me in the future!


PS: Socca’s seem to be becoming a little more popular in North America. Over the past few weeks I’ve been making them I’ve seen them mentioned a few times in magazines, blog posts, and even in newly released cook books! Also another great fact about Socca is that they’re naturally gluten-free, and vegan! 

Thursday, November 8, 2012

Harvest Pumpkin Apple Galette...


Sometime last week I saw an item listed on a menu that really intrigued me. It was a Squash and Apple Galette. I’ve only eaten a Galette once. I made one a few months ago and it was delicious, delicious enough to make me wonder why I’d never made one before, and delicious enough to make me want to try my hand at making one again. As I looked over the ingredients listed in the menu for this particular galette my salivary glands started dripping. Butternut Squash, Apples, Onions, Spices and Parmesan. Minus the parm that sounded pretty damn good. It sounded warm and comforting and autumnal, and really who doesn’t love anything baked inside a crust? Looking over the menu I thought, ‘I could make that.’ and so a few days later - armed with nothing but a few vague ideas - I did just that.


As it turns out though I didn’t have any butternut squash, I did however have two beautiful sugar pumpkins that I’d bought in a moment of inspiration and then never used. I wanted to - no I needed to - use them, and since I like pumpkin, and sugar pumpkins are naturally a little sweeter like a butternut squash I didn’t see any reason why they wouldn’t be just as delicious in my Galette. Apples and onions of course I had and so the only thing left to decide was the spices. The menu had been vague on that account, but that was okay, I’m good with spices. After a few minutes thought I decided to go with a subtle Middle Eastern flavor, with a French twist. These two seemingly distinct and different flavors actually paired quite well together, who would have thought?


Now I hate to break a bit of bad news but the night I made this I was in a bit of a hurry and I didn’t exactly measure any of the spices. I added what I thought would be good, taste tested it and adjusted as needed. I hadn’t originally intended to post this recipe on the blog as I wasn’t sure if it would even be any good - in fact I was expecting it to be a fail - but it far exceeded my expectations. This was so phenomenal that I knew I would have to post it and so I’ll try to give you an approximate. I would suggest maybe half to one full tsp of smoked paprika, Rosemary, and Coriander. And a quarter to half a tsp of cinnamon and ginger, or something there about. You want all the flavors to blend together you don’t want any one flavor to overpower the others. You want enough cinnamon and ginger to be able to taste them but not enough so that it’s all you taste. Same with the paprika and coriander you want enough to taste them fully, but not enough that your entire galette is ruined by them. Go with your gut and you’ll be alright I think.


This turned out so well in fact that I can’t wait to make another galette! Enjoy!


Galette Dough 

2 ½ Unbleached All-Purpose Flour
1 C Whole Wheat or Whole Wheat Pastry flour
1 Tbsp Sugar
1 - 1 ½ tsp Sea Salt
1-2 Tbsp Fresh Rosemary minced finely
! C Vegetable Shortening (Earth Balance Shortening is what I used)
3/4 C Ice Water or as needed
Olive Oil for Brushing
Sea Salt, Black Pepper and Basil to taste

Pumpkin Apple Filling

2 Small-Medium Sized Sugar Pumpkins (Pie Pumpkins)
2 Granny Smith Apples
1 Large Yellow Onion Diced
8 Garlic Cloves Minced
Smoked Paprika
Ground Cinnamon
Ground Coriander
Ground Ginger
Fresh Minced Rosemary
Sea Salt and Black Pepper to taste
1-2 dashes of Dried Basil
3 Tbsp Maple Syrup
2 Tbsp Dijon Mustard
1-2 Tbsp Lemon Flavored Olive Oil (or a mixture of Olive Oil and Pure Lemon Juice)
1-2 Tsp Olive Oil

I served our galette with a side of Terry Waters Fingerling Potatoes with
Red Onion and Sage from "Clean Start" which were very good!


To Make the Dough 

- In a food processor combine the flours, salt, sugar, and rosemary. Pulse to combine.

- Cut the Shortening into the food processor with a knife in small dice. Then pulse until the dough becomes pebbly and crumbly.

- Add in the ice water a little at a time, 1-2 Tbsp at a time, and pulse until the dough just holds together. You may need to add more water or use less. Do not over process.

- Form dough into a disk wrap in plastic and place in the fridge for 20 minutes

- Lightly oil a 12 to 14 inch pizza pan. Remove dough from fridge and roll out onto a floured surface. Roll out into a circle big enough to fit your pan with some dough hanging over the edges. It doesn’t have to be a perfect circle. Thickness should be between 1/4 -1/2 inch.

- Carefully transfer dough to the pizza pan and brush lightly with olive oil.


To Make the Filling 

- Preheat Oven to 400'F

- Cut Pumpkins, Remove seeds, Peel and cut into cubes.

- Toss pumpkin with the lemon olive oil, and sprinkle with sea salt and black pepper to taste. Roast in the preheated oven for 45-60 minutes until pumpkin is tender.

- Set aside and let cool.

- Heat 1-2 tsp of olive oil in a pan over medium heat. Add diced onion and minced garlic. Cook until onion is translucent and just beginning to caramelize. About 10-15 minutes.

- Peel, and dice apples.

- Once onions have cooked, add the roasted pumpkin and the diced apples to the pan, stir to combine. Season to taste with fresh Rosemary, smoked paprika, ground cinnamon, and ground ginger. Stir to combine.

- Add in the maple syrup and Dijon Mustard and stir again to combine. Remove from heat and let cool while you make the dough.

Assembly 

Preheat oven to 375"F

- Scrape your pumpkin apple filling onto the dough lined Pizza pan. Spreading the filling out evenly to the edges of the pan with the back of a spoon or spatula.

- Carefully fold over any excess dough hanging off the edges of your pizza pan. Folding them into a rustic looking shape and leaving the middle open.

- Brush the folded dough lightly with olive oil. Sprinkle with sea salt, black pepper, and a little dash of dried basil.

- Bake in the oven for 30-40 minutes until the crust is lightly brown.

And of course no dinner is complete without dessert. This is Isa and Terry's
She's my Cherry Pie from "Vegan Pie in the Sky"


PS: I know there are quite a few steps involved here, but this can be super simple to make if you do a little work in advance. You can roast your pumpkin a day ahead and even make the dough a day ahead leaving it wrapped in plastic until ready to use. 


Wednesday, June 6, 2012

Garlic Scape and Collard Green Pizza...


There are few things better then a truly good pizza, and I’ve made plenty of tasty pizza’s in my life, but this one beats them all by a thousand miles. The flavors in this pizza are out of this world amazing! It’s truly amazing what you can create when you’re making every effort to use every last bit of fresh produce in your fridge. Collard greens, tomatoes, and non-dairy cheese were all staring at me yesterday afternoon threatening to spoil unless I used them before vacation. A quarter of a jar of garlic and green onion olive oil had been sitting on my counter for the better part of a month. A jar of sun-dried tomatoes sat nearly empty in my fridge, and I had just purchased 4 bunches of garlic scapes from my local grocery.


I was not suppose to buy groceries this week, but when I saw that scapes were back in season I knew I’d have to have them before I left, because by the time I get back they’ll surely be gone. It was a total impulse by, and my stomach not my brain was responsible. When I got them home, I thought “What am I going to do?” I have hardly anything left in my fridge. I stared down the contents of my fridge for a good long while and then the above mentioned ingredients started calling to me. They started saying “pizza, pizza, piiiizzzzaaaa!” Until I just had to listen.


Though this was my own idea, I was skeptical at first. Collard greens on a pizza? I’d never hear of such a thing, and collards - love them though I do - are just one of those things that one immediately identifies with ‘health food’ not pizza. Still, I decided it was better to try and fail and have to through the collards out because dinner was terrible, vs throwing the collards out because they went bad. I can not tell you how amazed I was by the end result. This is literally the best pizza I have ever made, perhaps even the best pizza I have ever eaten and I do not say that lightly. We’re talking mind-blowing, mouth-watering, tastebud-tickling good, so good that you’ll crave it! Even my husband, a pizza eating fanatic said it was one of the best pizza’s he’d ever eaten, and last night he simply couldn’t get enough of it!


Instead of sauce I decided to coat the crust in home-made garlic and green onion infused olive oil. I wanted a lighter, cleaner tasting pizza, and wasn’t in the mood for a heavy acidic tomato based sauce. Of course if you’re anti-oil this may not be the pizza for you, but you can control how much oil you brush onto the crust. You don’t have to go overboard and if you’re only eating a slice or two it’s really not all that bad. You can of course try it with a tomato based sauce though I can’t grantee that it’ll taste at all the same. The infused oil is highly recommend. Also though I list the non-dairy cheese as optional I highly recommend that too. I used Daiya’s Garlic Jalapeno Havarti which was amazing and really kicked the pizza up to a new level, but you could use vegan mozzarella if that’s all you can find. Remember though to use just a little bit, you want it more as a garnish than anything else, the pizza shouldn’t be dripping with it. Just sprinkle on enough that you get a few good bites of it per slice. On it’s own the pizza is hearty and filling, but to make it even more of a meal you could serve it with a nice side salad and perhaps even a glass of red wine if wine is your thing. However you serve it, just be sure to enjoy it! And trust me when I say this comes together a lot quicker then the length of the recipe may imply. Also the topping can be made ahead and saved till needed, which makes it that much easier!


Garlic Scape and Collard Green Pizza 

Topping 

2 Leeks white and light green parts only sliced thin
2 bunches collard greens chopped into bite size pieces
3 Roma tomatoes sliced thin
1-2 Bunches garlic scapes sliced into 1 inch lengths
Garlic and Green Onion infused Olive Oil for brushing ***
1/8 C Shredded non-dariy cheese (optional)
10-15 sun-dried tomatoes sliced into strips
Rosemary sea salt ***
Fresh Black pepper to taste (Optional)
1 ½ Tbsp Balsamic Vinegar to drizzle over top

Dough

2 1/4 C All Purpose Flour
1 ½ Whole Wheat Flour
1 pack active dry yeast
1 C warm water
3/4 tsp salt
2 Tbsp Olive Oil

Preheat Oven to 400'F

- Water Saute leeks, collard greens, and garlic scapes in large pan over medium-high heat. Saute about 10 minutes until veggies are tender and all the water has been absorbed. You want the mixture to be a bit dry. Transfer to a bowl when finished and set aside, or if making ahead refrigerate until ready to use.

- To make the dough, combine all purpose and whole wheat flour, and salt in a food processor and pulse to incorporate.

- Combine Active Dry Yeast with Warm water and set aside for five minutes

- Drizzle the olive oil into the food processor and add the yeast/water mixture. Process until mixture forms a cohesive dough. If the dough is too moist or sticky add in more flour until you’ve reached your desired consistency.

- Remove the dough from the food processor, shape into a ball and set aside to rest for 10 minutes.

- After the dough has sat, you can either divide it to make two smaller thin crust pizzas or leave it as is to make one large regular crust pizza.

- Flour a clean work surface and flour a rolling pin. Gently roll dough out into a large circle. Start with the edge closest to you and roll the dough outwards in a circular motion. Flip the dough over and continue rolling outwards in a circle. Flip the dough one more time and continue to roll outwards until the circle is large enough to fit your pizza pan.

- Lightly grease your pizza pan with some non-stick cooking spray. Then gently transfer your pizza dough to the pan. There should be excess dough flowing over the edge of the pan. Roll it up to form a crust around the edge of the pan. Trim some off as needed if the excess is too much.

- Poke your pizza dough with the tings of a fork a few times. Then brush the dough with a generous amount of garlic and green onion olive oil (or regular olive oil) make sure to brush both the base of the dough as well as the crust.

- Place pan in preheated oven and cook for 10-15 minutes until dough is firm. Remove from the oven.

- Brush with a little more garlic and green onion oil, then layer sliced Roma tomatoes around the crust. Evenly distribute the collard green, leek and garlic scape mixture over top of the tomatoes. There will be a lot but that’s okay, pile it all one and spread it as evenly as possible.

- Next scatter the sun-dried tomato strips over top of the pizza, and the shredded non-dairy cheese if using.

- Finish the pizza by drizzling the balsamic vinegar over top, sprinkling with Rosemary sea salt and a few twists of a black pepper mill.

- Return the pizza to the oven and bake for 15 or so minutes until the cheese has melted, and the edges of the crust begin to golden.

- Slice and serve hot with a bowl of garlic and green onion olive oil dotted with balsamic vinegar for dipping your pizza crusts! Enjoy!


*** Note - The Garlic and Green Onion Olive Oil is super easy to make and tastes amazing on this pizza. If you prefer you can use regular olive oil, but this oil really does kick the pizza up a notch and infuses it with such great flavor. I highly recommend it, especially since it’s so easy. All you do is pour 2 cups of olive oil in a mason jar. Add 1 cup of sliced green onions (just the green parts) ½ cup of finely minced parsley or basil (or a mixture of both) a pinch of sea salt, and 10-12 garlic cloves finely minced. Screw a lid on tight, give it a good shake then leave it on your kitchen counter for 24 hours to let the flavors develop. So delicious! ***


*** Note - Rosemary Sea Salt is easy to make. All you need is fresh Rosemary springs and sea salt. Remove the Rosemary leaves from the stems and grind in a food processor. Then add to a shaker with an equal (or slightly less) amount of sea salt. Use on everything because it tastes delicious! ***


*** Note - This pizza is only soy-free if you use a soy-free non-dairy cheese.***