Showing posts with label Turmeric. Show all posts
Thursday, February 11, 2016
Roasted Root Bowl...
I've really been craving root vegetables lately. Radishes, Turnips you name it. The problem is I eat them so seldom I don't really know what to do with them most of the time. This is one of those magical dishes born somewhat out of necessity. Meaning, it was really all I had on hand and I needed to make something for dinner.
I am beyond amazed at how well this turned out. It's a super simple dish to throw together, and despite the hour and fifteen minute cooking time it is super low effort. I kept it lightly and simply seasoned so as not to overpower any of the natural roasted flavor of the veg. All the flavors work so well together and I love the variety of texture between the different roots and the cous cous. I hope you enjoy it too!
Roasted Root bowl
2 medium Sized Turnips Diced
1 Large Parsnip cut into Half Moons
1 large Onion Diced
12 Radishes cut in Half
1/2 Bag of Baby Carrots Left whole if small otherwise cut in half
Olive Oil to taste
Maple Syrup to taste
Sea Salt to taste
Garlic Powder to taste
Black Pepper to taste
Garlic Olive Oil Cous Cous
2 Cups Pearled Cous Cous
4 cups Water
1 Vegan Chicken Bouillon Cube
1 tsp Garlic Powder
1-2 Tbsp Olive Oil
1/4 tsp Ground Turmeric
Garlic Infused Olive Oil to taste (Optional but recommended)
Minced Parsley to Garnish
- Combine everything for the Roasted Roots in a large glass baking dish. Stir it so it's all mixed together then cool it at 400'F for 1 hour.
- Increase the heat to 500'F and cook for an additional 15 minutes until the roots are nice and browned.
- Combine everything for the garlic cous cous (except the garlic infused oil, and the parsley) in a pot and bring to a boil. Reduce heat and simmer until all liquid has been absorbed.
- Drizzle garlic infused olive oil over the cous cous, and stir to combine.
- Plate the cous cous, top it with the roasted roots, and sprinkle the minced parsley over top. Add additional salt and pepper to taste if desired.
Wednesday, May 6, 2015
Chickpea Flour Scramble - With Breakfast Taco Option...
I’ve been meaning to post this recipe for a while now, but I’ve found myself preoccupied of late. Sorry for the long absence, but I hope this recipe will make up for it. So, on the 23rd of April I really wanted a hearty breakfast. I woke up ravenous and desiring a scramble of some sort. Unfortunately I didn’t have any tofu on hand, neither did I have any canned chickpeas to make Isa’s Chickpea Scramble. However, it occurred to me in a brief moment of culinary genius that if I could make a scramble with whole beans, why couldn’t I make a scramble with chickpea flour? I had heard of it done before, and didn’t think it could be all that hard. I imagined it was somewhat like making a socca - which I love - and so I set to the task of making a chickpea flour scramble.
I was very skeptical that it would work out, especially in the beginning when I realized that the chickpea flour mix just didn’t want to break apart. The whole thing clumped together and wasn’t cooking. I thought I was going to have to scrap the whole endeavor - and no doubt if you try this recipe you might just think the same thing at first, but trust me, it works! - lucky for me I have patience - which is what this recipe needs - I kept at it and was rewarded by one of the most brilliant breakfasts ever. In fact I loved it so much I ended up making it the next day for my husband and I, as he hadn’t been home when I made it the first time. Skeptical as he was, he loved it too, and we devoured this scramble in taco form, though in my opinion it’s also just as good without the tortillas and extras.
What I love about this recipe is you can make the chickpea flour taste like whatever you like, I kept it simple and kept a traditional scramble flavor but you can literally add anything. You can add any spices you can add any vegetables and it creates the perfect gluten-free, and soy free scramble alternative for those who have allergies or sensitivities. More and more people are avoiding soy and gluten but that doesn’t mean they have to cut scrambles out of their lives too.
Personally I think this scramble has a better texture and mouth feel then a tofu scramble. Don’t get me wrong I do love tofu scrambles but I prefer a slightly dryer scramble and tofu scrambles usually have a bit of wetness to them. Also I think that the chickpea scramble mimics eggs better then tofu as it gets firm, but also retains that spongy, springy, softness of an egg. So if you’re looking for a new scramble to try give this one a go. I know it probably sounds weird but trust me the reward is worth it, I know you’ll love it.
Chickpea Flour Scramble
1 ½ C Chickpea Flour
2 ½ C Water
1 tsp Black Slat
1 tsp Garlic Powder
1 tsp Onion Powder
½ tsp Turmeric
½ tsp Smoked Paprika
1/4 tsp Black Pepper
3 Green Onions diced
1 Ripe Tomato Diced
For Tacos
Corn Tortillas
Shredded lettuce or Salad Mix
Vegan Cheese
Ketchup
Hot Sauce
- Lightly oil a medium sized pan, and heat over medium heat.
- In a bowl combine the chickpea flour through the black pepper and mix until thoroughly combined.
- Once the pan is hot add the chickpea flour mixture to the heated pan. Cover the pan and cook for about 4-5 minutes until the top looks glossy and the edges look cooked.
| This is how it'll look when you first pour it into the pan |
- Using a metal spatula begin scrambling the half-cooked mixture as you would scrambled eggs. Begin by folding and flipping the mixture over. Let it cook another 2 minutes or so and begin flipping again. Bare in mind that the mixture will be sticky and it will only be partially cooked making it difficult to fold, and separate but keep at it. It does take some time but use your spatula to continue to break the mass into smaller and smaller chunks, flipping them and cutting them. It should take at least 10 minutes.
| After about 10 minutes |
- After 10 minutes the mixture should be a bit dryer and it should be easier to break into pieces. The pan may well be very dry at this time and you can add a touch more olive oil to the pan to help prevent sticking as well as to help crisp up the chickpea mix. About a tablespoon of oil should be more then enough. Continue to flip and break up the chickpea mixture into smaller pieces with your spatula. Another 10 minutes and you should have some small and medium sized chunks, it should by now resemble a more traditional tofu or egg scramble.
| Another 10 Minutes |
- When you have the chickpea mix broken into the size chunks you prefer, and they’re nicely dried and cooked through add in your green onions and cook another minute.
| We're almost there, it's time for green onions! |
- Add in your tomatoes and cook another 2 minutes.
| Just about done, add your tomatoes! |
- Your scramble should be more then ready now, and you can eat it as is - as you would any traditional tofu scramble. You can eat it on toast, as a side with ketchup, or as I did in tacos.
| The finished product, so worth the effort! |
- For Chickpea Flour Scramble Tacos spoon some of the chickpea scramble into a corn tortilla, top with your favorite shredded vegan cheese, a handful of shredded lettuce or salad mix, and then drizzle with ketchup or hot sauce as you desire. It would probably even be good with salsa.
| Tacos anyone? |
ENJOY!!
Tuesday, August 12, 2014
Scrambled Pintos...
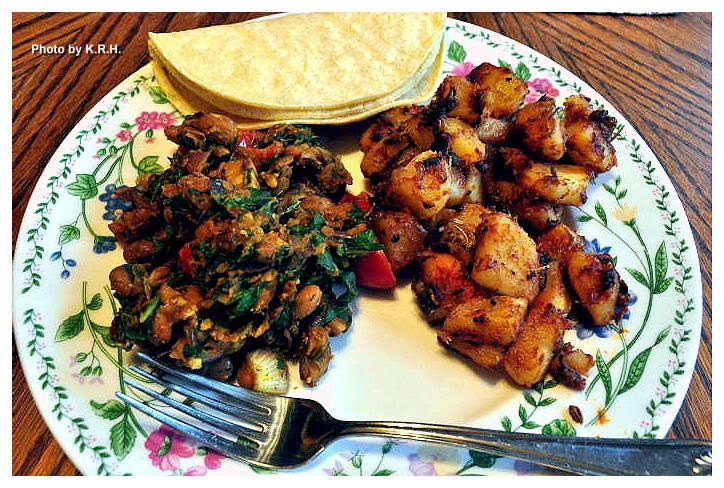
This morning I was feeling a ravenous hunger. I knew my typical breakfast of a bowl of fruit or a smoothie just wasn’t going to cut it, and besides I was really craving something savory. Tofu scramble was sounding really good to me, the only problem was that I didn’t have any tofu. I briefly considered making a tempeh scramble until I realized I was all out of tempeh too! I flipped through my wealth of cook books in desperate search of another breakfast option but everything I saw was sweet, or bready and I didn’t want that. Then I remembered Isa Chandra Moskowitz’s Mad-Genius invention of Chickpea Scramble from her latest book “Isa Does It” and I knew that was what I wanted.
I went eagerly to the kitchen, opened up the pantry and would you believe I didn’t have a single can of chickpeas. The girl who loves chickpeas, who eats them all the time, had somehow unknowingly ran out! Now I was beginning to get frustrated. I took a look around the kitchen and saw a few things I had a lot of were potatoes, spinach, and onions, but how to make a breakfast out of that. I took another look in the pantry, took inventory of the beans I did have, and thought to myself “Hey, if a scramble can work with chickpeas, why not another bean?” and that, is how the Pinto Scramble was born.
Man, this exceeded all expectations, and even my husband - who’s a notorious bean-hater, but getting better on that front - loved it. Now I want to try making different kinds of scrambles with all sorts of beans to see what kind of awesome combinations I can come up with. In the meantime I hope you try this one out, it’s super delicious, healthy, hearty and comes together in a flash. Serve it however you like - on a piece of lightly buttered toast with some fresh sliced tomatoes, on it’s own, or as I did with some fried potatoes, corn tortillas and extra hot sauce!
Scrambled Pintos
1 Tbsp Olive Oil
4 Garlic Cloves Minced
½ Red Onion Minced
1 15 oz Can Pinto Beans rinsed and drained
½ tsp Chili Powder
½ tsp Ground Cumin
½ tsp Ground Turmeric
½ tsp Sea Salt
Black Pepper to taste
1-2 tsp Hot Sauce (or to taste)
1-2 Tbsp Fresh Dill Minced
8 Cherry Tomatoes Halved
1 Large Handful Baby Spinach Chopped
- Heat the olive oil in a pan over medium heat.
- Add the garlic, and onion and saute for 5-6 minutes until softened.
- Add in the pinto beans, chili powder, cumin, turmeric, salt, pepper, and hot sauce. Mix to combine and saute for 3 minutes until the beans are warmed through.
- Using a potato masher mash the beans right in the pan, so that they turn into a thick chunky paste. You do not need to get all the beans, leave some whole. Mash about two-thirds of the mixture.
- Add in the dill, tomatoes and spinach and saute for about 2 minutes or until the spinach has wilted.
- Taste for seasonings and add additional hot sauce if desired.
*** Note - If you want a more 'Mexican' feel you can omit the dill and add in an equal amount of minced cilantro instead. Though I quite like the unique flavor that dill brings to the overall dish.***
Labels:
Breakfast,
Chili Powder,
Cumin,
Dill,
Garlic,
Gluten-Free,
Onions,
Pinto Beans,
Soy-Free,
Spinach,
Sugar-Free,
Tomato,
Turmeric
Tuesday, July 22, 2014
Moong and Toor Dal Tadka with Coconut and Red Chilies...
I know what you’re thinking, hot soup or dal in the middle of summer? You’re crazy! And normally I would agree with you only I just recently came off five days of being ridiculously ill with what was probably Norovirus and so I didn’t want to push the limits of my digestion. Since Thursday afternoon I’d been living off of crackers, bread, tea, and on Saturday evening when I finally began to feel stable enough to take in something heartier I made a very brothy vegetable soup. It was pretty basic - potatoes, carrots, celery, onion, broth, water, and spike seasoning. It was tasty, but come Monday when I was feeling roughly 85%-90% better I wanted to eat something fun!
I’ve really been craving Indian food lately, specifically lentils, and when I think of lentils I automatically think of dal, there are few things more nourishing and comforting then a big ‘ole bowl of dal. Specifically I wanted dal tadka, which I’ve only recently discovered There’s a great little Vegetarian Indian Restaurant not far from where I live that serves a wicked good Dal Tadka, I had it the week my mother was in town visiting me, and I’ve been kind of dreaming about tadka ever since.
Tadka incase you don’t know is really just a cooking technique in which you fry whole spices in oil so that they release their natural oils, and after a minute or so you pour the whole thing - oil and all - into the dish you’ve prepared. It sound a bit strange maybe since we’re used to putting spices in our food at the beginning of cooking rather then at the end but let me assure you that this technique imparts some truly phenomenal flavor! And that’s exactly what I wanted.
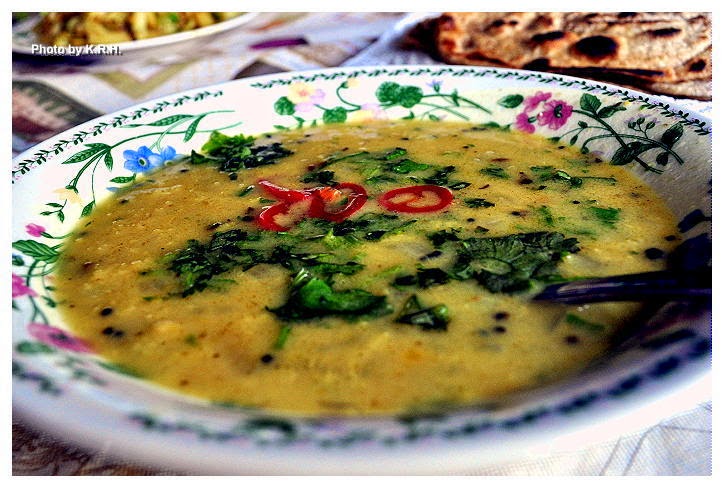
Now, I’m not going to lay any claims saying that this is in any way a traditional dal tadka, or even a traditional dal, but it is delicious. It’s full of ingredients that are delicious and healing, however if you’re unaccustomed to cooking Indian food at home you may not have them all on hand. Still, they should be easy enough to find at your local Indian grocery - that’s where I get mine - and they are well worth hunting down. Trust me once you taste the slightly bitter, onion flavor of Nigella seeds you’ll be hooked! Similarly the buttery, garlic/onion flavor of asafetida can not be matched, and black mustard has a unique flavor itself, different from that of yellow mustard. As for pickled red chilies I make them myself, and so I’m not sure if you can actually buy such a thing anywhere. Though if you have a basic pickling recipe you can easily pickle some of your own chilies. It’s not necessary but I love the added flavor note.
Moong and Toor Dal Tadka with Coconut and Red Chilies
Dal
1 tsp Olive Oil
1 Large Yellow Onion Diced
1 C Moong Dal - soaked for 1 hour and rinsed
½ C Toor Dal - soaked for 1 hour and rinsed
4 C Water
½ tsp Ground Turmeric
1 - 1 ½ tsp Salt - to taste
1 13.5oz can Full Fat Coconut Milk
½ Bunch Cilantro Minced
Tadka
2-3 tsp Olive Oil
1 ½ tsp Black Mustard Seeds
½ tsp Nigella Seeds
½ tsp Coriander Seeds
½ tsp Fenugreek Seeds
1 tsp Asafetida Powder
6 Garlic Cloves Minced
1-2 Red Chilies Minced - depending on heat preference.
To Garnish -
Extra Minced Cilantro
Sliced Pickled Red Chillies - optional but highly recommended!
For the Dal
- Heat the Olive oil in a large soup pot over medium high heat. Add the diced onion and saute for 5-6 minutes until lightly golden.
- To the pot add the soaked and rinsed Moong Dal as well as the Toor Dal. Stir to combine.
- Add the 4 cups of water, the turmeric, and the salt. Cover and bring to a boil. Boil for 10 minutes then reduce the heat and let simmer for 20 minutes.
- Check on the doneness of your dal. If the lentils are still hard, or too firm for your liking continue to simmer for an additional 10 minutes until they become soft. If the lentils are soft already, and have reached a somewhat mushy consistency add in the coconut milk and stir to combine. Simmer for 5 minutes.
- Remove the pot from the heat and add in the minced cilantro. Stir to combine.
For the Tadka
- Heat the oil on high in a heavy bottomed frying pan. Once hot add in the mustard seeds, nigella seeds, coriander seeds, fenugreek seeds, asafetida powder, minced garlic and minced chili. Fry for one minute or until the seeds pop, the garlic has turned golden and the chilies have softened slightly. It’s okay if the spices brown a little, it adds to the flavor.
- Remove the pan from the heat and scrape the entire contents - spices and residual oil - into your pot containing the dal.
Assembly -
- Stir the Tadka into the dal until it’s been well combined. Let sit for 5-10 minutes to let the flavors mingle. Then divide amongst serving bowls and garnish with additional cilantro and pickled red chilies if desired.
- Serve with basmati rice, and/or Indian Flatbread. I made a batch of Roti to scoop the dal up and it was a delicious accompaniment.
Labels:
Asafetida,
Cilantro,
Coconut Milk,
Coriander,
Dal,
Fenugreek,
Garlic,
Gluten-Free,
Indian Fusion,
Lentils,
Main Meal,
Mustard Seeds,
Nigella Seeds,
Onions,
Soup,
Soy-Free,
Sugar-Free,
Turmeric
Monday, November 4, 2013
My Favorite Creamy Macaroni and Cheese...
I know I’ve been ridiculously absent since Canadian Thanksgiving and for that I’m sorry. I just haven’t had the cooking spirit lately. My Oma’s somewhat unexpected passing has been hard on me, and the rest of the past month wasn’t much better. A variety of things culminated to leave me feeling uninspired and uninterested in doing much cooking, or blogging. For almost the entire week post-Thanksgiving we ate leftovers. Then we ate simple rice bowls that tasted delicious but aren’t exactly blog-worthy in my opinion. Then the past week we’ve been having something of a pizza extravaganza - of which I meant to take photos but my camera battery is dead and every day I absentmindedly forgot to re-charge it - thanks to my latest cook book purchase of “Vegan Pizza” by Julie Hasson. But now we’re into a new month, and I’m feeling better, re-inspired, and I’ve missed the blogesphere, and so Im going to make a greater effort to be more active this month.
To kick things off I thought I’d share a favorite Mac and Cheese recipe with you. I know there are tons of mac-loving vegans out there, vegan mac is like the holy grail for some, and yet I’ve never been much of a mac lover. Blasphemy I know, but I was never one to eat food from a box, that had a lot to do with my upbringing I suppose. Certainly as a kid I ate macaroni and cheese now and then, and I’m sure I liked it well enough but I never developed that ‘ohmygodgottahaveit!’ love affair with it. After I grew up and moved out I don’t think I ate Macaroni and Cheese at all, except for maybe trying my hand at making a home-made baked mac once or twice. My husband was also not a mac and cheese fan - he didn’t like cheese at all in any form in fact - and so it was not a meal that ever made it onto our radar.
Of course, as happens with so many things, the minute you go vegan all your previous ideas and notions about food go out the window. I like Mac and Cheese much more now, then I ever did growing up, and these days I really love and appreciate creative mac and cheese recipes. While I still wouldn’t consider it anything close to being a favorite food, I do now and then find myself getting a wicked bad craving for it. One such crazy craving hit me out of the blue in mid-October as I was reminiscing about the Toronto Vegetarian Festival - more to come about that in a very belated review post. - and the epic Mac and Cheese Burrito we ate there courtesy of Hot Beans. - More on that to come as well. - My husband and I were so blown away by this absurd concoction that we just knew we’d have to eat it again. Of course Toronto is a far way to travel from Chicago just for a burrito and so I decided to try and recreate this masterpiece at home.
Now, the first step to making any mac and cheese burrito is making mac and cheese. Essentially you can use any mac and cheese recipe you like, but the following recipe is one of my very favorite mac recipes. - Inspired by THIS recipe from Vegan Mischief who also happens to be a Vancouver Vegan - Coconut milk is really the silent star here, as it gives the mac a thick and creamy texture without imparting any coconut flavor. It is hands down my favorite non-dairy milk to use when making macaroni and cheese, and I love the unique combination of spices. I hope you enjoy it as much as I do.
My Favorite Creamy Macaroni and Cheese
½ Small Yellow Onion minced
1 tbsp Olive oil
4 Garlic Cloves Minced
½ tsp Smoked Paprika
1/4-1/2 tsp Turmeric
1 tsp Mild Curry Powder
½ -1 Tbsp Ground Fenugreek
1/4 tsp White Pepper
½ tsp Dried Oregano
½ tsp Dried Basil
1 Vegan Chicken Flavor Bouillon cube
2 Tbsp White Miso
4 Tbsp Water
1/4 C Nutritional Yeast
2 C Full-Fat Canned Coconut Milk
1 Tbsp Dijon Mustard
1 Tbsp Cornstarch
1 Tbsp Water
1 Bag Daiya Cheddar Shreds
12-16oz Elbow Macaroni Noodles (Gluten-Free)
Salt and Pepper to taste (Optional)
- Cook pasta according to package directions. Drain in a colander and then return to the pot until your sauce is ready.
- Heat the olive oil in a medium sized pot over medium heat. Add in the minced onion and saute for 3-5 minutes until softened. Add in the garlic and saute another 2 minutes.
- Add Smoked Paprika, Turmeric, Curry, Fenugreek, white pepper, oregano, and basil. Saute another 2 minutes.
- Meanwhile combine the 2 tbsp of Miso with 2 tbsp of water, stir until smooth.
- Also combine the vegan chicken bouillon cube with 2 tbsp of water and mix until smooth.
- Add the Nutritional Yeast and the Coconut milk to the pot with the onions, whisk until combined and smooth. Add in the Bouillon mix, along with the miso mix, and let simmer stirring frequently for five minutes.
- Whisk together the cornstarch and the 1 tbsp of water to make a slurry.
- Add the cornstarch mixture to the Pot, along with the Dijon Mustard, and the Bag of Daiya shreds. Continue to simmer, whisking until all the daiya has melted into the sauce and the sauce has thickened. This could take roughly 5-10 minutes.
- Once the daiya has melted and the sauce has reached a creamy thickness that you like, taste for flavor and if you feel it’s needed you can add ½ -1 tsp of sea salt, along with a bit of fresh cracked black pepper.
- Then add the sauce to your cooked Macaroni and serve as is garnished with a bit of Italian parsley or use it to make an epic mac and cheese burrito - recipe to come tomorrow!
As always, enjoy!
*** Note - I typically always use gluten-free noodles, if you do then the dish is gluten-free. You can also make the dish soy free by using a soy-free miso such as chickpea miso.***
Saturday, March 30, 2013
Spanish Style Scramble with Piquillo Peppers and Spinach...
A few months ago I was in the grocery store and I just happened to stumble upon a large jar of Piquillo Peppers. I immediately became excited about this because I had a recipe for Stuffed Spanish Peppers that I really wanted to try out but it called for Piquillo’s and I couldn’t find them anywhere. Then suddenly here they were. The jar however was massive, and my recipe only called for six peppers. No matter - I bought the jar anyway and thought I’d figure out something to do with the rest another time.
Well strangely even though I was super excited to try out these Piquillo Peppers, once I got the jar home and put away in the pantry I kind of forgot about it. Until earlier this week anyway when I finally made that stuffed pepper recipe. Which was phenomenal by the way, the only problem was what was I going to do with the rest of the peppers?
Piquillo Peppers are a really delicious sweet chili, cultivated in Northern Spain, though their flavor is more reminiscent of a roasted red bell pepper then a spicy chili. After they’re picked they’re roasted over embers which gives them a distinct smokey and even slightly spicy flavor. Though when I say spicy, think Paprika not Jalapeno. Once roasted they’re seeded, peeled and packed into jars or tins for sale, and if you can find a jar or a can anywhere definitely pick it up because they are divine. I could eat them plain straight out of the jar, they’re that delicious! Of course I didn’t want to just eat them all straight out of the jar, because what If I never find Piquillo peppers again? I wanted to take advantage of them while I had them, and so I started dreaming about Piquillo pepper combinations.
The first thing that popped into my head was spinach. Piquillo’s and spinach I thought would make excellent partners and then from there I began thinking about onions, and olives. Eventually I worked my way around to Piquillo’s for breakfast and naturally came to the conclusion that they’d be excellent in a scramble. Though Piquillo’s are typically stuffed and eaten as tapa’s in Spain I wanted to do something a little bit different, besides I was really in the mood for a scramble, and who doesn’t love a good hearty veggie stuffed scramble?
The Piquillo’s really add a unique flavor component to a scramble, making it slightly sweet and slightly smoky, combined with the earthy mushrooms, the leafy spinach, the cheesy nooch, and the tart olives it’s a winning combination. You can serve your scramble over toast, or for a really heavy and hearty breakfast do what I did and serve it with avocado toast. A super simple and delicious way to eat your avo. Mashed with lime juice, sea salt, black pepper and red pepper flakes spread nice and thick on a piece of crunchy toasty bread. YUM!
Spanish Style Scramble with Piquillo Peppers and Spinach
1 Tbsp Olive Oil
½ Large Yellow Onion Diced
6 Garlic Cloves Minced
3/4 C Baby Bella Mushrooms Chopped
14oz Extra Firm Tofu drained and pressed
1/8 C Nutritional Yeast
½ tsp Thyme
1 tsp Black Salt
Black Pepper to taste
1 tsp Chili Powder
1 tsp Smoked Paprika
1 tsp cumin
½ tsp turmeric
3oz Fresh baby Spinach
5 Jarred Piquillo Peppers Chopped
1/3 C Spanish Olives with Pimento sliced
*** Note - To press the tofu either use a tofu press or place it between two sheets of paper towel and load some heavy objects on top of it. ***
- Heat olive oil in a medium sized pan over medium-high heat. Add the onions and saute for 4 minutes until beginning to get soft. Add in the garlic and the mushrooms and saute another 4-5 minutes until fragrant and mushrooms are soft.
- Crumble the pressed tofu in to the pan, and add the Nutritional yeast, thyme, chili powder, paprika, turmeric, cumin, black salt and pepper. Stir until well combined and the tofu mixture begins to look the color of scrambled eggs.
- Add in the Spinach and Piquillo Peppers. Stir to incorporate then cover and cook until the spinach has wilted. 3-5 minutes. Fold in the olives and serve.
Enjoy!
Labels:
Black Salt,
Breakfast,
Chili Powder,
European Fusion,
Gluten-Free,
Mushrooms,
Nutritional Yeast,
Olives,
Onions,
Piquillo Pepper,
Quick and Easy,
Smoked Paprika,
Spinach,
Sugar-Free,
Tofu,
Turmeric
Thursday, December 13, 2012
Coconut Curry Miso Soup...
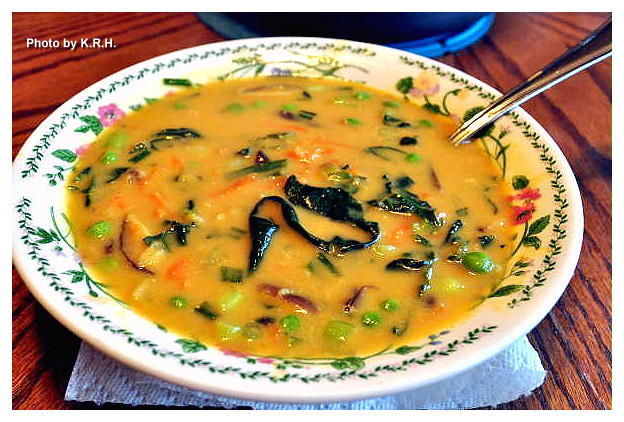
I can’t believe I forgot to post about this recipe, or maybe I can believe it. Things have been so busy around here lately that it’s easy to loose track. Well, the day I received my first CSA box I was so excited to use that Tat Soi that I decided to make it for lunch. It was a Friday afternoon and I needed something filling, hearty and warming before heading to work for the night shift. Originally I thought about making Miso soup, that seems to be my most common go to meal when I need something delicious and filling on short notice, but as much as I love Miso soup I was looking for something more. The more I thought about it the more I realized I was also in the mood for curry, and coconut. Now I know from past experiments that miso and curry actually go pretty well together but I wasn’t sure on the coconut. I envisioned like a Thai coconut curry of sorts but with the addition of Miso to give it that bold, well rounded, and savory flavor I love so much from miso soup.
I didn’t know if it would workout but in the end I thought I couldn’t do that much harm. I guess I needn’t have worried too much, because the soup turned out so good that my husband and I gobbled up the whole pot. That’s two huge heaping bowls a piece. Now as much as you may want to eat this whole pot yourself once you make it, I highly suggest you share it with a loved one instead and serve a salad alongside it to complete the meal.
Coconut Curry Miso Soup
2 ½ C Water
2/3 C Coconut Cream***
1/4 C Red Miso
4 Garlic Cloves Minced
Thumb Sized piece of Ginger minced
2 tsp Red Curry Paste
1/4 C Frozen Green Peas
1/4 C Green Onion sliced
½ Head of Tat Soi Sliced
1 Carrot Grated
1/3 C Black Soybeans
½ C Sliced Shiitake Mushrooms
1/4 tsp Ground Turmeric
2 ½ tsp Sliced Lemon Grass
Black Pepper to taste
- Combine Water, coconut cream, and red miso in a medium sized pot. Place over medium heat and stir until all the miso and coconut cream is dissolved and the mixture is smooth.
- Add in the garlic, ginger, lemon grass, curry paste, and turmeric. Mix to incorporate, until curry paste is dissolved.
- Add mushrooms, tat soi, and simmer for 10-15 minutes over medium or medium low heat until vegetables are soft.
- Add all other ingredients and simmer for 5-8 more minutes until warmed through.
-Serve hot and enjoy!
*** Note - Coconut Cream is the thick cream that normally rises to the top of a can of coconut milk. Scrape the cream out of the can and use, do not use the liquid for this recipe. Reserve it for another use. Also in some Asian groceries and markets canned coconut cream is available.
PS: If you don't have Tat Soi you can use another Asian Green, though I highly recommend searching for the tat soi.
Labels:
Asian Fusion,
Black Soy Beans,
Carrots,
Coconut,
Garlic,
Ginger,
Gluten-Free,
Green Onions,
Lemongrass,
Miso,
Mushrooms,
Oil-Free,
Peas,
Red Curry Paste,
Soup,
Sugar-Free,
Tat Soi,
Turmeric
Wednesday, October 31, 2012
Vegan Mofo #27- Joni’s Bacon and Egg Breakfast Burger...
Vegan Mofo #27- Joni’s Bacon and Egg Breakfast Burger
The Book - The Best Veggie Burgers on the Planet
The Author - Joni Marie Newman
The Recipe - Bacon and Egg Breakfast Burger
Page # 22
Difficulty - Easy
Duration - Roughly 30-40 minutes
One morning a week or so ago I was looking for something relatively quick and easy to make for breakfast that would also be delicious and filling. If I could some how manage to find another recipe that would fit into Mofo as well as fit into the parameter of those guidelines so much the better. Half heartedly and not expecting to find anything I picked up my copy of The Very best Veggie Burgers in the world and gave it a flip- through. The picture of the Bacon Egg Breakfast Burger immediately caught my attention. I’d seen the photo before of course, I’ve owned the book nearly a year and flipped through it on many occasions, but something about seeing the picture on that morning had me craving a bacon egg burger.
The recipe is pretty simple. The dough comes together fast and then it needs to rest for fifteen minutes which is no big deal. During that time if you wish you can saute up some onions and peppers as suggested in the book, which is what I did. Once the dough has rested you form it into patties and fry on each side until nice and golden, then you serve on a toasted bun or bagel - bagel in my case, and serve with fixin’s of your choice. I decided to give my bacon egg breakfast burgers a bit of a Mexicali feel and took the suggestion of adding salsa.
I smeared one half of the bagel with vegan mayo, the other half with salsa, added a patty topped it with sauteed peppers and onions then finished it with spinach. Delicious! It definitely had the texture of and egg burger, though I thought the bacon flavor was a bit mild, and it could have used a bit more black salt in my opinion, but with the toppings it all came together really well, and my husband and I devoured these morsels.
The one thing I really liked about these was that they were tofu based rather then gluten-based. They’re simple to make with a block of tofu, all purpose flour, vegan bacon bits - I used home made ones - onion powder, garlic powder, mustard, sea salt - black salt in my case - turmeric and that’s it. Only a quarter cup of bacon bits is used although next time I might be tempted to use a third cup instead. Over all though these were a really surprising and delicious breakfast, and I think a little avocado would go pretty well with them too!
Labels:
'Bacon',
'Egg'',
Black Salt,
Breakfast,
Cook Book,
Main Meal,
Sandwich,
Tofu,
Turmeric,
Vegan Mofo
Thursday, June 7, 2012
Curry Kapitan with Coconut and Chili Relish...
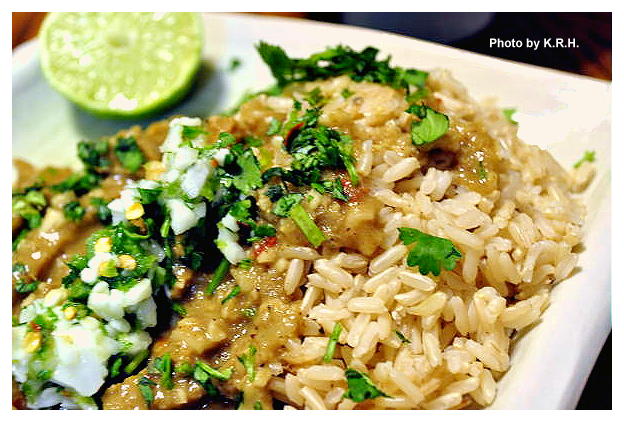
My latest foray into Malaysian Cooking. Curry Kapitan is traditionally made with chicken, and it’s said that the dish recalls the traditional role of the Chinese Kapitan, who was a man of considerable social standing amongst the Malay and Chinese people in old Melaka. Possibly invented by the Peranakans - the Malay-Chinese - to present to the Kapitan or to celebrate his role. It owes it’s flavor to the cultural melting pot of Old Melaka, and to the traditions of Chinese, Malay, Portugese, and Indian cuisine. Of course for my version I used homemade seitan instead of chicken, and decided to use soy sauce for a salty taste instead of dried shrimp paste.
This dish is nothing if not flavorful. The aroma alone is mouth-watering, but the taste... incredible! Though the ingredient list may seem long, this dish actually comes together rather quickly and it is worth every ounce of effort. When I first set out to make this dish I had no idea what to expect, and there were a few moments at least where I thought the whole thing would end in disaster. However when it came time to eat, and I took my first bite of curry Kapitan I was in love. The flavor is so complex that it’s hard to describe, but it has every flavor note you could possibly want in a dish. You can adjust the seasonings to make it as hot or mild as you like, but a little bit of kick is part of what makes this dish so fantastic. Use the chilies as a garnish, with a squeeze of lime and you won’t be disappointed. It tastes even better the next day!
Curry Kapitan with Coconut and Chili Relish
For the Rempah
½-1 tsp red pepper flakes
1 large red onion
10 cloves garlic
thumb sized piece of ginger
1 tbsp soy sauce
½ tsp ground turmeric
2 tsp Chinese five spice powder
1/4-1/2 tsp ground cinnamon
For the Curry
2 Tbsp tamarind paste
Flesh from half of 1 Fresh Thai Coconut (roasted)
2 tbsp peanut oil
1 15oz can coconut milk + 1/3 c water
1-2 Pack Stevia
1 ½ lb Seitan (Homemade or Store bought)
For the Chili Relish
½ - 1 Jalapeno Minced (Depending on how spicy you want it)
½-1 Red Chili Minced or ½-1 tsp red pepper flakes
½ Bunch Cilantro Minced
Flesh from half of 1 Fresh Thai Coconut
Juice of 1 Lime
To Serve
1 Lime
Extra Cilantro minced
Cooked Brown Rice
- First you must open your coconut. To do this the easiest way is to get a cleaver. It doesn’t have to be a good cleaver, it doesn’t have to be a $500 one, a $50 one will work just as good. Use the cleaver to whack your coconut a couple of times to break through. Drain the liquid out into a bowl or measuring cup and refrigerate to dink later, it’s not needed for the recipe.
- Once the liquid has been drained from the coconut you can split it in half. Use your cleaver and give the coconut a great whack in the middle. If like me you’re not strong enough to get the cleaver all the way through the coconut in one whack, and not skilled enough to keep hitting it in the exact same spot, use a rubber mallet to hammer the cleaver down through the coconut. This works really great, and fast.
- Once your coconut is in half use a spoon to scoop out the delicious white flesh. Once all the flesh has been removed rinse it under cold water and rub any filament away. Pat the coconut dry, and then slice it thin. Reserve half the amount of coconut in a bowl, to use as part of the relish and dry roast the other half in a pan over medium heat until it’s golden brown. Be careful not to burn it. The coconut should emit a slight nutty aroma.
- Once the coconut is a nice golden brown remove it and grind it either in a food processor or mortar and pestle until it resembles corse sugar grinds. Place in a bowl and set aside.
- Now to make the Rempah. In a food processor blend together the garlic, ginger and onion. Add in the soy sauce and pulse to combine. Stir in the turmeric, cinnamon and five spice powder.
- Heat the oil in a large pan over medium-high heat and stir in the rempah. Fry for five to eight minutes until the mixture becomes fragrant.
- Add the seitan to the pan and fry another 3-5 minutes, to let the seitan brown a little.
- Add in the coconut milk, water, Tamarind, stevia and season with sea salt and black pepper. Bring the mixture to a boil, then reduce heat and let simmer for 10-20 minutes. Add in the reserved roasted coconut.
- In the meantime combine all the relish ingredients in a bowl.
- Serve the Curry Kapitan over a bed of brown rice, garnished with extra cilantro, some squeezed lime, and the chili relish.
*** Note - To make this dish Gluten-Free use Wheat Free Tamari and a soy-based ‘meat’ or tofu. To make this dish Soy-Free use Coconut Amino’s instead of soy sauce.***
Labels:
Chinese 5 Spice,
Cilantro,
Cinnamon,
Coconut,
Coconut Milk,
Curry,
Garlic,
Ginger,
Gluten-Free,
Jalapeno,
Limes,
Onions,
Red Pepper Flakes,
Seitan,
Soy Sauce,
Soy-Free,
Sugar-Free,
Tamarind,
Turmeric,
Veganize-It
Subscribe to:
Posts (Atom)