Showing posts with label Liquid Smoke. Show all posts
Friday, September 18, 2015
Vegan Mofo #21: Seitan aux Pruneaux d’Agen...
I came across this recipe in Joanne Harris’s book “The French Market” and found it interesting. The original recipe calls for Rabbit which I have no idea how to veganize since I’ve never eaten it before but I thought seitan would make a good stand-in. I love the idea of cooking savory dishes with fruit, and so the combination of seitan and prunes really got me thinking. A bit of Googling told me this is a pretty popular recipe in Southern France where Prunes from Agen are a pretty big deal. I like interesting culinary traditions so I was excited to give it a try. Obviously the original recipes call specifically for prunes from Agen but you can use any large plump pitted prunes, California Plums are what I used and it worked out great. I know it probably sounds weird to you, but give it a try, you might be really surprised.
Seitan with Prunes
(A.K.A Seitan aux Pruneaux d’Agen)
2 Tbsp Nondairy Butter
4 Garlic Cloves Minced
2 Bay Leaves
1/3 C Brandy
2 Stalks Celery Diced
1 Tbsp Fresh Thyme
2 Cups Red Wine
1 ½ lb’s Beef Style Seitan
25 Pearl Onions
2 tsp Liquid Smoke
20 Agen Prunes (or Large Dried California Plums) Halved
Sea Salt and Black Pepper as Needed
- Heat a small pot of water over high heat, when boiling add the onions. Boil 1 minute then drain and drop into a bowl of iced cold water to blanch. Slide off the skins and put the onions aside.
- Heat a large pan over medium-high heat. Melt 1 Tbsp of the nondairy butter and cook the seitan until brown on all sides. In batches if necessary. About 8-10 minutes. When browned, remove from the pan and set aside.
- Heat the remaining nondairy butter in the pan and add the peeled onions. Saute for 5 minutes until golden, add the garlic and celery. Saute another 3-5 minutes until celery is soft.
- Pour the wine into the pan, and add bay leaves, thyme, and the browned seitan back with it. Let come to a boil, then reduce heat and let simmer for 30 minutes.
- Add in the Brandy, the Prunes, liquid smoke and season with salt and pepper as desired. Let simmer another 20-30 minutes.
- Remove from the heat, taste for seasonings and adjust as needed. Remove the bay leaves and serve with mashed potatoes and peas as I did, or whatever your favorite side dish. Some crusty bread wouldn’t hurt either!
*** Note - Unfortunately this recipe is my best approximation as I didn’t actually write anything down while cooking. Since I made this several days ago I’m relying solely on memory here.***
Monday, December 8, 2014
Zuppa Toscana...
This may come as a surprise to ‘die-hard’ Zuppa Toscana fans but I have never had a bowl of this - seemingly - famous soup, until today. Unbeknownst to me this is everyone’s favorite soup at the ‘Italian’ Restaurant chain Olive Garden, and though I’ve eaten there many times I’ve never had it. So why did I decide to make a vegan version? Well, the answer is really quite simple, this past week I kept seeing recipes for homemade Zuppa Toscana popping up on Facebook and other social media. My first reaction after reading the ingrieients list was ‘gross’ and ‘so unhealthy’ as the original contains loads of sausage, bacon and heavy cream, but then my second thought was ‘but what if it was vegan?’ and so for the past few days I’ve been dreaming of a veganized version of a soup I’ve never eaten, crazy right?
Today, as it happens was also a perfect day for soup as it’s quite damp, cold and rainy outside. Wonderful soup weather and so I happily set to the kitchen to try my hand at this unknown delicacy. I’m not quite sure what I was expecting, something creamy, salty, smokey and spicy I guess, and really this soup did not disappoint. It’s loaded with so much delicious flavor, and made me go back for a second bowl. Further proof that food doesn’t need animal flesh or secretions to be tasty and decadent.
Zuppa Toscana
1 Tbsp Olive Oil
1lb Vegan Italian Sausage Sliced - I used Field Roast
1 Large Yellow Onion diced
12 Garlic Cloves minced
1 tsp Red Pepper Flakes
1 tsp Fennel Seeds
4 ½ C Vegan Chicken Broth - or Vegetable Broth
6-8 Russet or Yukon Gold Potatoes diced- I used 8 and made a mix of both
1 tsp Sea Salt
2 C Kale torn into bite-sized pieces
½ to 2/3 of a 15oz Can Full Fat Coconut Milk - How much you use depends on how many potatoes you use.
1-2 tsp Liquid Smoke - I used 2 tsp.
Ground Black Pepper to taste
1/4 C Minced Parsley
- Heat half the Olive Oil in the medium sized sauce pan over medium-high heat.
- When sizzling, add in the sliced Italian Sausage and cook until browned. About 5 minutes. Remove the sausage from the pot, and place on a plate, set aside.
- Heat the remaining oil in the pot, and add the onions and garlic. Saute for 3-5 minutes until golden and fragrant.
- Add in the red pepper flakes, and fennel seeds, saute another 2 minutes.
- Add in the Vegan Chicken broth, the potatoes, and the salt. Bring to a boil, and cook for five minutes. Reduce to a simmer and cook an additional 10-15 minutes until the potatoes are tender.
- Using a potato masher or the back of a wooden spoon crush some of the potatoes to thicken the soup. Leave some potatoes whole because you want the soup chunky, you want to crush just enough to get a nice creamy thickness.
- Once potatoes have been crushed, add in the cooked Italian Sausage, and simmer for five minutes.
- Add in the Kale, and coconut milk and simmer for an additional 6 minutes until the kale is wilted and tender.
- Turn off the heat, add in the minced parsley, and liquid smoke and stir to combine. Add in black pepper as desired and taste for seasonings, adjust as needed. Let stand 10 minutes before serving so that the flavors have time to develop.
- Enjoy with some nice crusty bread and a glass of red wine.
*** Note - Field Roast is NOT gluten-free, but you can make this soup Gluten-Free buy using a GF Vegan Sausage.***
Monday, July 22, 2013
Mixed Green Salad with Maple Roasted Rutabaga, Edible Flowers, and Creamy Maple Dijon Dressing...
Sometimes the best thing to ever happen in my kitchen is we run out of food. Im sure many of you start running out of the essentials, as well as fresh produce by the weeks end, - I know it often happens to me, - but rather then look at this as a negative I try and turn it into a positive. Sometimes you have your most creative moments when you’re at your most limited.
Take this salad for instance, it came about entirely out of necessity. The day I made it all I had left in my fridge were a few sparse handfuls of mixed greens, a couple of tomatoes, a lonely avocado, some green onions and 3 rutabaga and I’d procured for some other purpose and then promptly forgot about. My pantry of course had other things like canned tomatoes, pasta, canned beans, olives but I didn’t want that. I was craving something fresh and light, that was fast, filling and satisfying. Normally when I feel that way a salad is my ‘go-to’ so I quickly began thinking about how I could turn these meager offerings into a salad that would inspire and satisfy my tastebuds.
Now, I can’t say I’ve ever actually eaten a rutabaga before this, and if you asked me why I originally bought them I couldn’t tell you because I can’t for the life of me remember what I had planned to use them for. But, since I had them, and a salad of tomato, avocado and onion isn’t very inspiring - or filling - I thought I’d give them a try. How bad could they be roasted and thrown in with the greens? Maybe they’d taste kind of like beets, sweet and earthy, that works in salad!
So once the salad began taking shape I needed a dressing. This too came into existence out of necessity. I used the things I had on hand, and I chose to use coconut milk yogurt again to provide creaminess because I needed to use the remainder of the container ASAP. Plus it worked out so well on my arugula, beet and walnut salad I thought it was worth trying out again.
While the rutabaga was roasting it filled the kitchen with a heavenly smell, that had me drooling as I diced my veggies and whisked the dressing. By the time they popped out of the oven I couldn’t resist snapping one up and giving it a taste. Wow! Seriously guys, roasted rutabaga? This is like my new favorite thing ever. The tiny bit of maple syrup made it sweet and the Bragg’s made it smokey, this was an absolutely perfect combination. I happily tossed them into the salad, garnished my bowl with some edible flowers I’d picked up in the market, and drizzled on the dressing.
I took my first bite and knew instantly that it was magic! Maybe this combination sounds weird to you, but I assure you it’s not. The flavors blend so much better then even I could have imagined while I was creating it. You get the sweet smokey rutabaga, the bitter arugula, the creamy avo, the acid-sweet tomatoes, mixed in with a rainbow of flavors from wild flowers, and a dressing that is sweet, smokey and tangy. What more could you want?
Mixed Green Salad with Maple Roasted Rutabaga, Edible Flowers, and Creamy Maple Dijon Dressing
Salad - Makes 2 servings
2 Handful Arugula
2 Handful Mixed Baby Greens
2 Tomatoes sliced
1 Avocado sliced
Sunflower Seeds to taste
Green Onions to taste
2oz Edible Flowers
1 Recipe Maple Roasted Rutabaga
- Maple Roasted Rutabaga
3 Small Rutabaga Cut into small chunks
1 tsp Olive Oil
1 tsp Maple Syrup
1 tsp Bragg’s Liquid Amino’s
Preheat Oven to 425'F and roast for 10-15 minutes
- Creamy Maple Dijon Dressing
4 Tbsp Plain Coconut Milk Yogurt
2 Tbsp Dijon Mustard
1 Tbsp Maple Syrup
1 tsp Liquid Smoke
- Preheat Oven to 425'F. Place the cut rutabaga chunks into a bowl and drizzle over the olive oil, maple syrup and Bragg’s. I’ll be honest and say I didn’t measure exactly, but I didn’t use a lot so you can change the tsp quantity to suit your taste. Give the bowl a few good shakes to make sure all the rutabaga is covered in the mixture then spread the rutabaga out onto a baking sheet.
- Bake for 15 minutes until the rutabaga is smelling wonderful, and it’s a nice golden brown. It should be tender-firm.
- While the Rutabaga is roasting prepare your salad by evenly distributing the salad ingredients amongst two bowls.
- Next make the dressing. Whisk all ingredients in a small bowl until well combines and smooth. Since the yogurt may want to curdle when you add the mustard in this may take a couple of minutes of vigorous whisking to turn smooth. It will get there however.
- Once the Rutabaga is cooked divide it amongst the two bowls and drizzle the dressing over top of each salad.
Enjoy, on a lazy summer afternoon with a good book, and a drink.
Labels:
'Yogurt',
Arugula,
Avocados,
Bragg's Liquid Amino's,
Dijon Mustard,
Edible Flowers,
Gluten-Free,
Green Onions,
Liquid Smoke,
Maple Syrup,
Quick and Easy,
Rutabaga,
Salad,
Sugar-Free,
Sunflower Seeds,
Tomato
Wednesday, October 17, 2012
Vegan Mofo #17 - Celine & Tamasin's Tofu Pomegranate Pockets...
Vegan Mofo #17 - Celine & Tamasin's Tofu Pomegranate Pockets
The Book - Vegan Sandwiches Save the Day!
The Author - Celine Steen & Tamasin Noyes
The Recipe - Tofu Pomegranate Pockets
Page # 67
Difficulty - Easy
Duration - 20-30 minutes not including the time it takes to press and drain tofu, or if you want to marinate your tofu as I did before baking. Once tofu is done it comes together in under 10 minutes.
I chose to make this recipe for one reason and one reason only, Pomegranate! Growing up Pomegranate was one of my favorite fruits, it was one of my favorite parts about the autumn and winter season. As a kid I remember my mom would come home from grocery shopping and she’d have 1 pomegranate for each of us, sometimes there would be extras, but pomegranates were/are expensive and so they were usually a treat. I would cut my Pom open, grab a bowl then hunker down in front of the t.v. watching some show while pulling all the little pom kernels free of their membrane. Snapping and crunching them between my teeth, enjoying their sweet and sometimes sour, occasionally bitter flavor. I tend to eat pomegranates a lot less these days, pomegranate juice sure, pomegranate flavored stuff definitely but actual pomegranate fruit? It’s rare. I’ve got so many fillings, plus a crown and all that fibrous pulp gets stuck between my teeth. When I saw this recipe however I knew I couldn’t pass it up. First of all pomegranate on a sandwich? Who would have thought! I love the originality of that. Plus it’s combined with smoky baked tofu, bitter greens, and a creamy dressing, what’s not to love?
So first, the tofu. Now you all know how picky I am about my tofu I’m sure, so this bare-bones approach to tofu had me a bit skeptical to say the least. All it is, is Tamari, Liquid Smoke, onion powder, sea salt, black pepper and Maple Syrup. The recipe says to coat the tofu in this mixture and then cut it into cubes and bake it for twenty minutes. Instead I decided to let my tofu marinate in the mixture to really give it a chance to soak up the flavor. I probably let it marinate about an hour before slicing it into cubes. Then I made a little extra marinade - because by then all of the original had been soaked up - to brush the cubes with before popping them into the oven. I probably let them back for about 25-30 minutes until they were really nice and brown because I wanted my cubes really crispy and I have to say - these were freaking amazing! No lie, the tofu cubes were so delicious I was eating them plain, right out of the oven. This is definitely a method I’ll be coming back to again and again.
Second there is the sauce which is super easy-peasy. All it is, is Cashews, Apple Juice and Ume vinegar. That’s it! You blend it all together and somehow you get this super creamy, all flavorful sauce that reminded me a bit of a Ranch or a Cesar. I truly appreciate that the ingredients for the sauce were simple and wholesome and it just goes to show that you don’t need a laundry list of items or any fancy vegan this or that to make a good sauce.
Lastly the recipe says to combine the sauce with sliced red onion, and spinach or arugula. Unfortunately I didn’t have either of those greens but I had a box of mixed salad greens in the fridge that needed to get used. Arugula was one of the greens in the mix so I thought it was a good choice. Once the salad is mixed you stuff it into the pockets along with sliced cucumber, the tofu bits and the pomegranate kernels and bam! The most amazing, delicious combination ever! I really, really urge you to give it a try. It’s so simple, yet so impressive, I know I’ll be making it for years to come.
Wednesday, May 9, 2012
Veggie Bacon Bites...
This recipe is inspired by every single recipe I’ve ever seen for Vegan Bacon, or Vegan Bacon Bits. Honestly, they are all pretty much the same, and they all use some combination or other of the same ingredients. It’s very rare to find a truly original vegan bacon recipe, with a truly creative combination of flavors. So I won’t claim that my recipe is in any way original, it is however absolutely freaking delicious! And I don’t say that lightly. I’ve been disappointed over and over again by vegan bacon and vegan bacon bits, so for this batch I basically took all the things I love about every recipe I’ve ever seen for them and threw it together into one recipe. Aside from having amazing flavor these Veggie Bacon Bites also have the benefit of being free of cholesterol. - Unlike Pork, Beef, or Turkey bacon. - There’s no grease when you cook them, they’re much lower in fat and salt then pork, beef, turkey bacon and yet you don’t have to sacrifice on delicious taste or protein.
I must also point out that I don’t typically eat TVP. In fact I try to avoid it whenever I can, however I do use it on very rare occasions when a certain texture or effect is needed. This is one of those occasions, and while I typically don’t eat vegan bacon either this was a necessary ingredient for another recipe I developed last week. So I’m posting this recipe first, so you have it when I post the second recipe tomorrow. Trust me, you’re going to want to try it out! Though even if you decide you don’t want to go to all the trouble of making the second recipe, this will taste amazing in anything you’d typically use bacon. Make a tofu Firtatta and add some in, make a vegan Caesar and sprinkle some on top, or make a Cobb salad. Throw it into lentils or baked beans, really no matter how you choose to use these veggie bacon bites, you can not go wrong!
Veggie Bacon Bites
1 C TVP (Textured Vegetable Protein
2 Tbsp GF Soy Sauce
3 tsp Mesquite Flavor Liquid Smoke (or your favorite flavor)
2 tsp Toasted Sesame Oil
1 ½ tsp Dijon Mustard
3-4 Garlic Cloves minced
1 tsp granulated onion
½ tsp Paprika
1/4 tsp Smoked Paprika
1/4 tsp Ground Mustard
1 Tbsp Pure Maple Syrup (1 ½ - 2 Tbsp if you like it sweeter)
Water
- In a measuring cup mix together all ingredients except TVP and Water.
- Once combined add enough water to reach 1 cup.
- Place the TVP in a heat proof bowl and pour liquid over top. Give it a stir then cover it tightly with plastic wrap and microwave for 5 minutes.
- Lightly spray a small pan with non-stick spray, and heat over medium.
- Remove plastic wrap from the TVP bowl and add TVP to the pan. Saute over medium heat for about 10 minutes until any liquid has absorbed, veggie bacon bites are dray, lightly browned and lightly crispy.
- Enjoy immediately wherever bacon is needed!
*** Note - If you use GF Soy Sauce they veggie bacon bites are Gluten-Free.***
Friday, February 17, 2012
Japanese 7 Spice Rice Bowl with Greens...
Yesterday I was really craving greens, all kinds of greens! Anything from broccoli to kale to collards to cabbage. Originally I had planed to make some sauteed Swiss Chard with Baked Tempeh but as the day drew nearer it’s close I started longing for something a little less involved. I started thinking about rice, which got me thinking about Japanese food, which in turn got me thinking about sushi. Sushi, now there was an idea! Except it was eight o’clock at night and after a couple hours of hard study I wasn’t really in the mood to break out the bamboo mat and start rolling Maki.
Instead I decided to make a Japanese inspired rice bowl. One that would combine the flavors I love about sushi, with simplicity and my desire for a plate loaded up with greens. Though you can really use any green veggie you like I strongly suggest the broccoli asparagus combination. Not only do they taste good together but they always taste great with rice. Initially I chose them out of convenience, as I always have bags of frozen broccoli on hand and I had just bought a pound of asparagus the day before yesterday. Convenience or not though it turned out to be a stellar choice.
This bowl is so full of flavor, and I particularly like the application of Japanese 7 Spice here - also known as Shichimi Togarashi - for the subtle heat and refreshing citrus flavor it lends to the dish. This meal is both satisfying and filling yet light. Which is exactly what you want if you’re forced to have a late dinner. You don’t want to be bogged down with digestive distress and gastric upset right before you slip into bed right?
Japanese 7 Spice Rice Bowl with Greens
Rice
2 C Brown Rice
2 1/4 C Water
2 tsp Kelp Granules
2 Tbsp Brown Rice Vinegar
1 Tbsp Sugar
½-1 Tbsp Grated Ginger
6 Garlic Cloves Minced
1 tsp Sesame Oil
Sauce
2 Tbsp non-dairy Mayo
2 tsp Liquid Smoke
1 tsp Umeboshi Plum Pate
½ tsp Agave Nectar
1 1/4 tsp Japanese 7 Spice Seasoning (or to taste)
1lb Asparagus trimmed
½-1 lb Broccoli Florets
1 tsp Sesame Oil (or to taste. Optional)
2-4 tsp Sesame Seeds (to taste)
- To make the rice combine rice, water, vinegar, kelp, and sugar in a rice cooker and cook as directed by manufacturer. Or combine in a pot and cook the old fashioned way. (Bring to a boil, then reduce heat to simmer and let cook for 30-45 minutes making sure to check and stir occasionally so the rice doesn’t burn.)
- While rice is cooking heat the tsp of sesame oil in a small pan over medium heat. Add the grated ginger and minced garlic. Saute for a few minutes until fragrant and golden. About five minutes. Remove from heat and set aside.
- Trim asparagus of tough ends and place into a steamer basket along with the broccoli. Or if your steamer basket is small work in batches. Asparagus first then broccoli. Steam the vegetables until they are tender but still a bit crisp, about 5-8 minutes. They should be bright green and vibrant!
- To make sauce combine Mayo, liquid smoke, umeboshi paste, agave and 7 spice seasoning. Taste for flavor and adjust as needed. A word of caution though, both umeboshi and 7 spice seasoning are strong, so a little goes along way. It’s important that you taste the sauce before deciding to add more and If you do add more add it in small increments. Once sauce is combined set aside.
- Once the rice has finished cooking add the sauteed ginger and garlic mixture to the pot. Stir until combined.
- Divide the rice mixture amongst two bowls. Into each bowl place 1-2 Tbsp of the sauce and mix it into the rice until well combined. Top each bowl with an equal amount of asparagus and broccoli.
- Drizzle any remaining sauce over top of the veggies. Divide the remaining 1 tsp of sesame oil and drizzle a half tsp over each bowl. (Optional but recommended) Then sprinkle 1-2 tsp of sesame seeds over top of each bowl. I used black sesame seeds because it was all that I had but feel free to use brown.
- Serve and enjoy!
Labels:
‘Mayo’,
Agave,
Asian Fusion,
Asparagus,
Broccoli,
Garlic,
Ginger,
Gluten-Free,
Kelp,
Liquid Smoke,
Main Meal,
Rice,
Sesame Seeds,
Umeboshi
Thursday, January 12, 2012
Sesame Asparagus Maki...
Ah... see, yesterday I promised sushi and today I shall deliver it. I’ve been in a real sushi kind of mood lately, there’s something about that combination of brown rice and seaweed that’s got me jonesing bad - Sounds strange I know - but seriously it’s all I could think about last week. I made sushi twice, and this is one of the Maki’s I came up with. As I mentioned yesterday Asparagus sushi was always one of my favorites, and it’s been so long since I’ve had asparagus that I broke down and bought a bundle even though it’s not technically in season. - Very bad of me I know. - Though this Maki is kind of on the simpler side, it is super delicious either on it’s own or dipped lightly in soy sauce. It has a flavor and texture slightly reminiscent of a ‘traditional’ California Roll, which used to be me husband’s favorite. I’m proud to say that out of all the Maki I’ve ever made, in fact out of all the Maki he’s eaten, after eating this one he generously claimed that it was his new hands down favorite.
So, go ahead, and don’t be afraid to roll your own. It isn’t really that hard, and it’s not overly time consuming. You just need a little patience, and delicacy. If you can manage that, you can roll your own Maki and impress your family and friends by making them think you’re a super awesome sushi chef!
Sesame Asparagus Maki
1 ½ C Brown Rice
3 C water
1 Tbsp Granulated Cane Sugar
2 Tbsp Brown Rice Vinegar
1 lb Asparagus
4 Tbsp Sesame Seeds
4 Sheets Nori Seaweed
4 Tbsp Vegan Mayo
Wasabi paste to taste
Liquid Smoke to taste
- The quickest and easiest way to make sushi is to have everything prepared and ready to go. Meaning clean off a good sized work space. Have all your pots, pans, steamers, and bowls set up and ready to go. Have your ingredients laid out on the counter with your knives and measuring tools, and don’t forget your sushi mat!
- First, start your rice. Now if you’re like me you own a rice cooker for ease and convenience sake. I use it so often that it really is the most used appliance in my house after the Vitamix. If you have a rice cooker, dump your rice, water, vinegar and sugar into it. Mix to combine and then cook according to manufacture directions. However if you are not so fortunate to own a rice cooker you’re going to have to make your rice the old fashioned way, but you should be used to that I’d think. Pour rice, water, vinegar and sugar into a pot, stir to combine cover and bring to a boil. Reduce heat and let simmer until all water is absorbed and rice is cooked. Cooking time varies but for brown rice I’d say it’s usually done within 35-45 minutes so just check on it every now and again and make sure to stir so the bottom doesn’t burn. Add more water if necessary.
- When rice is done cooking fluff it with a fork and set aside to cool. About 10-15 minutes. Or you could put it in the fridge for a quick cool.
- While rice is cooking, trim the corse ends from the Asparagus and discard. Also trim off the leafy tips of the Asparagus, though save those to toss into salads, stir-fries or soups etc... Place asparagus in steamer basket and steam for 5 or so minutes until Asparagus is bright green and tender crisp.
- Remove asparagus from steamer and set aside till cool enough to handle.
- While your rice and asparagus are cooling combine the mayo, wasabi and liquid smoke in a bowl. Taste for flavor and adjust as needed. The sauce should not be overly spicy in fact it should only have a hint of wasabi heat, and a bit of sweet smokiness. However if you prefer more heat by all means feel free to add it. 3-4 small drops of wasabi paste should be sufficient for achieving the flavor I intended.
- Now comes the trickiest part, but trust me you’ll be okay. On your clean work surface. - I use a clean bamboo cutting board - lay down your bamboo sushi rolling mat. On top lay down 1 sheet of Nori with the shiny side facing up. Have a bowl of cold water at your work station and with wet - but not profusely dripping - hands grab handfuls of rice and spread evenly over the sheet of nori. Spread the rice as close to the edges as possible but leave about a half to a quarter inch of space on the horizontal side of the Nori furthest from you. This little boarder will help your rolled Maki stick together. Rinse your hands before moving onto the next step.
- Spoon 1 Tbsp worth of the mayo sauce horizontally along the edge of rice closest to you. Then sprinkle 1 Tbsp of the sesame seeds - by the way you can use toasted or not it doesn’t matter. Mine weren’t toasted - over the rice.
- Next layer in 3 spears of asparagus on the left parallel with the horizontal edge of the nori closest to you. Laying them down over the mayo layer you just created. If they’re not long enough to reach from left to right then layer in 3 more spears on the right so that the edge closest to you is completely filled with asparagus. If some poke out past the nori you can trim them off, and use them on the next roll or eat them.
- Now, using your mat, and working slowly pull the mat up slightly and roll it over. Moving slowly and using both hands slowly roll your Maki, using the bamboo mat to press down and make the roll tight. You may have to stop at some point to push the filling back under the Nori or to help guide the roll. Stop just before you get to the opposite edge that you’ve left empty. Dip your fingers into the water, run them along the empty edge then roll your nori closed. Press down tightly to seel.
- It’s okay if it’s not perfect, rolling Maki takes practice and even though I’ve done it a ton of times I still don’t make a perfect roll each time. Sometimes my rolls are to fat, sometimes they don’t seel properly, sometimes I don’t cut them well. It happens, don’t beat yourself up about it. Remember that you’re doing it for the fun of it, and it’s - maybe - your first time, you’ll get better the more you practice.
- Next, and this step is very important. Before cutting your Nori into one inch sections run your chef knife under cold water. By the way you should always use a chef knife or other similar smooth edged knife to cut sushi. If you use a steak knife, or a bread knife or some other kind of knife with a jagged edge your Maki is going to get shredded and will likely fall apart. Once seaweed is wet it is very, very durable, your roll will fall apart before the seaweed cuts properly. I know from experience. So run your Chef knife under cold water. Give it a shake and then starting from one edge and working towards the other cut your roll into rounds.
- The best way to cut your roll is to do it in one smooth motion. Do not use your knife as a saw. Press down firmly it’s okay if the roll doesn’t cut right away, it’s okay if it looks like it’s getting squished a bit this is normal. Use one fluid motion, press down on the knife with your knife hand and hold the long end of the roll steadily in place with the opposite hand. Press the knife firmly down until it has cut all the way through. To separate the round from the rest of the roll you may have to give one quick saw motion depending on the sharpness of your knife, but otherwise that is it. Run your knife under cold water before EACH cut! This is important. Before each cut your knife must be wet. The drier your knife Is the more difficult this will be and the more likely your roll will fall apart.
- Congratulations! Now that one roll is finished - You should have gotten 6-8 rounds out of it by the way - give yourself a pat on the back, and then begin again from step one. Repeat all steps until ingredients are used up. At the end you may have some leftover rice. If this is the case no worries, stick it in the fridge and toss it into a salad tomorrow!
- To serve arrange on plates and serve with dipping bowls of soy sauce, and my favorite Sweet Thai Chili Sauce. Serve with addition dollops of wasabi if desired and pickled ginger, yum!
PS: As you can see in the pictures two of my rolls were coming apart at the seam, so don’t fret if yours do too. Also end pieces are always kind of ugly so don’t worry about them either. If you’re making this for a friend you’d like to impress you can always stuff the ends with extra filling once they’ve been cut. This way you have greater control and the filling won’t fall out on you.
*** Note - Can be made Sugar-Free by Omitting the Cane Sugar***
Labels:
‘Mayo’,
Asparagus,
Gluten-Free,
Liquid Smoke,
Nori,
Rice,
Seaweed,
Sesame Seeds,
Sugar-Free,
Sushi,
Wasabi
Wednesday, August 17, 2011
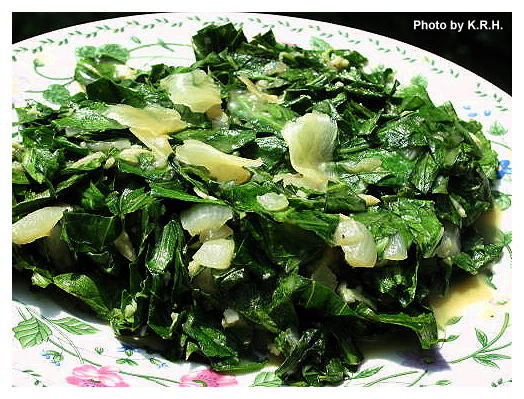
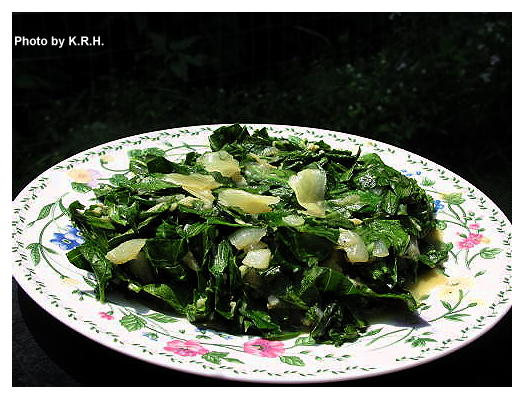
Sweet Smokey Miso Collards with Pickled Ginger...
Greens are amazing, everyone should know that by now and if you don’t it’s time for you to wake up. Dark leafy green vegetables are one of the most vital, healthful foods we can eat, in fact calorie for calorie they are the most nutrient dense foods on the planet! They are absolutely loaded with essential vitamins and minerals, and have been shown to have anti-cancer benefits as well as cholesterol lowering properties. Collards in particular really rock out at the top of the list. 1 cup of cooked collards contains a mere 49 calories! Yet it also packs 880% of your daily vitamin K, 118% of vitamin A, 57% of vitamin C, 53% of manganese, 45% of your Folate, nearly 25% of your Calcium, 20% Fiber, 15% Potassium, nearly 15% Vitamin B6, & B2, 10% Protein, Vitamin E, and Omega-3 fatty acids and roughly 8% of your daily Iron. That’s all in just ONE cup! Incredible right? And people wonder where Vegans and Vegetarians get our nutrients from!
Now I know what you’re thinking. You’re thinking "But collards are boring, they’re bland etc..." but you couldn’t be more wrong. I truly believe that culturally we have such a negative opinion of greens, because we’ve never really eaten them cooked properly. All to often our parents either undercooked and under seasoned our greens so that they were tough and bland. Or worse, they overcooked our greens, boiled them down until they were a watery slimy mush. Definitely not appetizing. However when greens are cooked properly and seasoned well, they are the most scrumptious thing, and the more you eat them the more you’ll crave them. The other fantastic thing about them is that they’re quick and easy to cook. At most they take about 10 minutes, and who doesn’t like that?
I know the other big problem with greens is trying to find inventive ways to incorporate them into our diets daily. Ideally we should be eating some kind of dark leafy green each day, though I know most of us don’t. I too occasionally slip into a pattern of neglecting my greens, and in all honesty when I don’t eat them regularly I start to feel a bit sluggish. The past month in particular I’ve been neglecting them, but over the past few days I’ve been back on track.
The following recipe I whipped up for lunch today, and man was it good. Seriously the flavors mingled so well, that the dish exceeded all expectations. So give it a try. Introduce your tastebuds to a new way of thinking about greens and I promise you will fall in love.
Sweet Smokey Miso Collards with Pickled Ginger
For the Collards
1 ½ - 2 Bunches Collard Greens chopped into bite size pieces, large ribs removed
1-2 tsp Sesame Oil
1 Large Yellow Onion chopped
8-10 Garlic Cloves minced (or to taste)
For the Sauce
1/2C Water (or more or less to taste)
2 Tbsp Mellow White Miso
1 Tbsp Agave (or to taste)
1-2 tsp Liquid Smoke (or to taste)
Dash of black pepper
1 Tbsp Lemon Juice
2 tbsp pickled ginger (or to taste) (Optional but highly recommended)
- Place sesame oil into a large pan and heat to medium.
- Mince garlic, chop onions and add to the heated pan. Saute, stirring occasionally to avoid sticking, until onions are soft and translucent. About 7-10 minutes.
- While onions and garlic are sauteeing, chop your collards. I find the easiest way is to run my knife down one side of the rib until I have a huge piece, then do the same along the other side of the rib so that the rib is removed but all the leaf is intact. Then I fold the halves, slice them in half lengthwise once, and then cross-wise into bite sized pieces. When done set your chopped collards aside.
- To make your dressing whisk together the water, white miso, liquid smoke, black pepper, and agave nectar. Taste for flavor and adjust as needed. Though with the liquid smoke I suggest adding it in 1 tsp at a time, and once you’ve reached 2 tsp add it in at a 1/4 - 1/2tsp increments.
- When onions and garlic are ready add the collards to the pan. Mix until evenly coated with oil, garlic and onion then cover and let cook for 2-3 minutes. Then add in your sauce stirring to evenly coat and cook another 3 minutes. You want your collards to decrease in size slightly and break down a bit. You want them to be soft, with just a hint of firmness to them. You don’t want them to be chewy or mushy. If after a total of 6 minutes your collards still aren’t quite there give them another 2 minutes.
- When collards are cooked, add the 1 tbsp lemon juice and stir to mix. It’ll really make the flavor pop, and brighten up the greens a bit. Then distribute evenly amongst 2 plates. (Or pile one plate super high) and add in the ginger. About 1 tbsp sliced pickled ginger per serving, or more or less to taste. This is entirely optional but super delicious. It gives the collards a little something extra, a nice sweet gingery bite.
Enjoy as part of your main course, a first course, or a side dish.
Labels:
Agave,
Collard Greens,
Garlic,
Ginger,
Gluten-Free,
Lemon,
Liquid Smoke,
Miso,
Onions,
Sugar-Free
Subscribe to:
Posts (Atom)