Showing posts with label Earth Balance. Show all posts

Wednesday, September 25, 2013

Vegan Mofo #23 - Mark’s Tofu Scallops with Saffron Herb Butter...


Vegan Mofo #23 - Mark’s Tofu Scallops with Saffron Herb Butter

The Region - France
The Book - The 30 Minute Vegan’s Taste of Europe
The Author - Mark Reinfeld
The Recipe -Tofu Scallops with Saffron Herb Butter
Page # 82
Difficulty - Easy
Duration - About 30 minutes


Can I make a confession? Never in my life has there ever been a day where I thought to myself “You know what would be good right now? Scallops.” Ew, yuck, ick! Even when I ate animals and fish scallops were never on the menu. I hated them, absolutely, positively despised them. I thought they were one of the most disgusting things you could put into your mouth - right up there on my gross radar with oysters and veal. - I know people go gaga for these little sea creatures but I never understood the appeal. To me they had the texture of rubber, the flavor of the sea, and a mildly sweet aroma that I found somewhat off-putting. I think I only ever ate scallops twice in my life.


Strange then how veganism changes a person, and opens whole new worlds of possibility. I don’t mean to say that now that I don’t eat animals anymore I crave to try scallops again quite the contrary. It seems that it’s precisely because of the fact that I’m vegan that I want to eat a scallop, not because I miss scallops but because vegan scallops aren’t scallops at all, you dig? In his recipe Reinfeld uses tofu in place of the scallops, and I love tofu you see, so cooking it using the method usually reserved for scallops, and slathering it in a ‘buttery’ herb sauce that is common when serving scallops appeals to me.  As is often the case most people are more interested in the things they put on their food then the actual food itself - Omnivores are particularly guilty of this - and so I was particularly intrigued to try Reinfeld’s saffron herb butter sauce. As for what Scallops have to do with France I’m not entirely sure, and Reinfeld doesn’t say. Although seafood is popular in France and the French are particularly well known for their culinary ingenuity when it comes to sauces and particularly ones based on butter so perhaps this is enough to warrant the inclusion of this recipe in the French chapter. Who knows, but either way it was a delicious meal.


Now, I didn’t go through the trouble of cutting the tofu into little scallop rounds. I figured what was the point? Besides I don’t own any cookie cutters - small or otherwise - anyway. Instead I cut my tofu into squares and then marinated them in the olive oil, cayenne, and lemon juice mixture, before baking them until golden. As the tofu bakes you make your butter sauce which is a mixture of vegan butter, saffron, garlic, white wine, lemon juice, marjoram, and thyme. Once the two are complete you plate your tofu scallops, drizzle some sauce over them and garnish with fresh minces parsley and voila! You have a lovely plate of Hors d'oeuvre! Bon appetite!


So now you’re wondering how they taste. Well, I can’t tell you that they taste like scallops because they don’t. Scallops are disgusting and fishy and these delicate little roasted tofu bites are neither of those things. I think the tofu, and the roasting of it mimic’s the texture of a scallop pretty well, and I love the tart, tangy lemon flavor from the marinade they go into but if you’re looking for a dead-accurate vegan scallop you’ll be disappointed. However adding a bit of kelp powder or nori into the marinade might help on that count. As for the herb butter it is simply magnificent, and it tastes absolutely divine when poured over the lemony tofu cubes. Simply a perfect combination.


Saturday, March 16, 2013

Boxty Potato Pancakes...


Get your Irish on St. Paddy’s Day morning with a delicious, hearty, Irish Breakfast or Brunch. This meal is filling enough to keep you powered through your entire morning and well into mid or late afternoon, as most traditional Irish breakfasts are. Boxty Potato Pancakes are said to have originated sometime during the Irish famine, and it’s not surprising since the word Boxty - which is derived from the Irish aran bocht ti - means ‘poor house bread.’ Boxty are mostly associated with the Northern Midlands, especially the counties of Mayo, Sligo, and Donegal and are so much a part of the local culture that they’ve inspired many a folk rhyme.


Though these delicious potato pancakes may have started off as ‘poor man’s food they are anything but poor. Like most traditional Irish breakfasts they are hearty and filling, filling enough to power you through your entire morning, and well into the afternoon. Though they are delicious served with just a pat or two of Earth Balance they are more typically served wrapped around a hot savory filling tortilla style. Shredded meat and vegetables are the usual filling of choice, and cabbage and bacon are strongly recommended. Though it must be pointed out that when I say Bacon what I really mean is ham. - Vegan ham of course - The Irish refer to almost every part of the pig as bacon, so if you’re an American think of Ham as their actual meaning, if you’re Canadian imagine Back Bacon. In my case however I’ve used home-made Vegan seitan Ham, and I hope you do as well!  There are many good vegan ham recipes out there, or you could simply buy some tofurky ham, or use a vegan bacon of your choice. I chose to make the Vegan Ham from “500 Vegan Recipes” by Celine Steen and Joni Marie Newman.


Lastly, if the idea of blending potatoes in milk makes you cringe trust me when I say these pancakes are fantastic! What sets them apart from other potato pancake and latke recipes is that they’re very smooth like an actual pancake, ant not rough or grainy like most other potato pancake recipes. Flavor wise the pancakes themselves remind me very much of a German kartoffelpuffer which really pleases me because kartoffelpuffer are one of my favorite things from childhood and one of my favorite things that my Oma makes. Wrapped around lightly fried cabbage, vegan ham, and a savory, tangy and slightly sweet mustard sauce served with fresh tomatoes, there’s really no beating it!


Boxty Potato Pancakes

1lb Russet Potatoes Peeled and Chopped (2 Large ones)
2/3 C Unsweetened Almond Milk
½-2/3 C Whole Wheat Pastry Flour
3/4 tsp Celtic Sea Salt

Mustard Sauce 

2 Tbsp Earth Balance
½ Yellow Onion finely chopped
4 Garlic Cloves Minced
½ C Vegetable Broth
1 Tbsp Cornstarch
3-4 Tbsp Dijon Mustard
3-4 Tbsp Unsweetened Almond Milk
Celtic Sea Salt and Black Pepper to taste
½ Tbsp Agave or Maple Syrup (Optional)

Bacon & Cabbage 

½ Tbsp Peanut Oil
½- 1lb Vegan Ham or Vegan Bacon
½ Head Green Cabbage Thinly Sliced


To Make the Mustard Sauce 

- Melt the Earth Balance in a medium sized pot over medium-high heat. Add the onion and saute for 5 minutes until beginning to soften. Add the garlic and saute an additional 2-3 minutes.

- Add the vegetable broth and the cornstarch. Whisk until thickened, then reduce the heat and add in the mustard, and almond milk. Whisk until the sauce is creamy. Simmer for 5 minutes then season with salt, pepper and agave if desired.

- Remove from heat and keep warm until ready to use.

To Make the Bacon and Cabbage 

- Heat the Peanut Oil in a large pan over medium-high heat. When sizzling hot add the cabbage and vegan bacon or ham.

- Stir-fry for 5-6 minutes until the ham is brown and the cabbage is bright green and tender but still crisp.

- Remove from heat and keep warm until ready to use.


To Make the Boxty Potato Pancakes 

- Place the chopped potatoes into a blender with the milk and blend on a highspeed until completely smooth.

- Pour the potato/milk mixture into a medium sized bowl and stir in the flour and salt. How much flour you use depends on how thin or thick you want the batter. When it reaches desired consistency heat a large pan over medium-high heat.

- Spray the pan with non-stick cook spray. Using a quarter or third cup measuring cup drop the batter out onto the heated pan, and using the back of the cup spread out to thin a little. As if you were going to make a thin pancake or a crepe.

- Cook for roughly 3-5 minutes on each side until the pancakes are golden brown.

- Remove to a plate and keep warm.


Assembly

- Spoon 1-2 Tbsp of Mustard Sauce into each pancake.

- Place 3-4 Tbsp worth of bacon cabbage filling on top of the mustard sauce

- Roll the pancake like you would a soft taco

- Dab the top of each pancake with a little extra dollop of Mustard Sauce

- Serve with fresh slices of tomato, and enjoy!

Monday, March 11, 2013

Irish Tea Time Seed Cake...


When it comes to traditional Irish baking the only thing I ever seem to hear about in North America is Irish Soda Bread. Now I love Irish Soda Bread as much ad the next person but there’s way more to Irish baking then just that! So forget all your Soda bread recipes today and make this delicious tea cake instead. Seed cake as it’s known utilizes one ingredient that I would never have thought ot put into a sweet dessert, caraway. In fact I rarely use Caraway anyway even though I like it, it just never seems to feature in anything I make, so I was particularly interested to see how this cake would turn out.


Seed Cake is apparently a long standing feature of Irish baking and is - or was - particularly common in rural and farming communities. It’s perfect for tea time because it’s packed with flavor, yet it’s light, moist and only mildly sweet. Though you could also serve It for a light dessert perhaps alongside a scoop of vanilla coconut milk ice cream. However you decide to serve it, you must give this cake a try, trust me when I say that the caraway lends a really magical element to the cakes complexity. In fact I enjoyed the flavor combination so much I think I just might use caraway in my baking more often.


Irish Tea Time Seed Cake 

1 C Unbleached All Purpose Flour
1 C Whole Wheat Pastry Flour
½ C Earth Balance slightly melted
½ C Raw Sugar + ½ Tbsp
2 Tbsp Ground Flax Seed - Mixed with 6 heaping Tbsp Water until frothy
1 tsp Baking Powder
2 tsp Ground Caraway + 1 tsp
1 tsp Ground Cinnamon + ½  tsp
1/4 tsp Ground Nutmeg + 1/4 tsp
3 Tbsp - 1/4 C Unsweetened Almond Milk (Depending on consistency)

- Preheat the Oven to 350'F

- In a large bowl mix the flour, baking powder, and spiced together.

- In a separate bowl cream the Earth Balance and sugar using an electric hand mixer on high-speed. Once creamed beat in the flax seed/water mixture.

- Make a well in the center of the dry ingredients. Pour the wet into the dry and mix with a wooden spoon until thoroughly combined.

- Add three Tbsp of Almond Milk to make a smooth consistent batter. It shouldn’t be wet, but it shouldn’t be too dry either. If it looks a little stiff add additional almond milk up to 1/4 C.

- Pour the batter into a greased loaf pan or small cake pan. Then evenly sprinkle ½ Tbsp of sugar, along with 1 tsp of caraway, ½ tsp of cinnamon , and 1/4 tsp nutmeg over the top.

- Place in the oven and bake for 45 minutes to 1 hour until a toothpick inserted into the center comes out dry and the top is a nice golden color.

- Enjoy with tea in the afternoon or as a dessert after an Irish inspired dinner!

*** Note - Traditionally Seed Cakes contain whole Caraway seeds, both in the cake and on top of the cake. I however did not have whole Caraway seeds just ground. If you do have whole Caraway seeds or would prefer to make it with them use roughly 1 Tbsp of Whole Seeds in the cake with another ½ Tbsp of seeds sprinkled over top. Or more or less depending on how you feel about Caraway.***

Wednesday, March 6, 2013

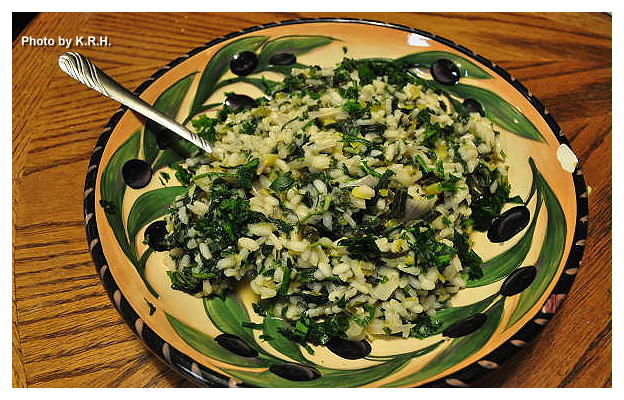
Arugula Risotto with Leek and Fresh Herbs...


Risotto is one of those pain in the ass Italian dishes that everyone loves and noone likes to make. Well, actually I don’t mind making risotto, yes it’s usually a lot of prep work, and it’s definitely a lot of stirring, but there’s something about it that I kind of love. I love watching the rice go from small hard granules to this very rich, and creamy aromatic concoction. There’s something really satisfying in witnessing this transformation, and risotto is universally perfect for cold winter nights and late summer evenings. It’s the kind of dinner you decide to make when you just want to chill by the oven and daydream. You put on some good music, open a nice bottle of wine to sip, and you daydream about far away places.


Anyway this particular recipe was inspired by a recent trip to the library. I was browsing through the cook books as I so often do when I’m there and book entitled ‘La Tartine Gourmande’ caught my eye. This is by no means a vegan cook book, or even a vegetarian cook book, I wouldn’t say that it’s even particularly vegan friendly but the cover photo was so beautiful and I was intrigued by the French so I picked it up and started flipping through it. Now it’s not very often that I find myself inspired by non-vegan recipes but when I saw the author Beatrice Peltre had made a risotto utilizing Arugula I knew I would have to try the combination. Ever since my trip to Europe I’ve been obsessed with Arugula I use it frequently these days and throw it into all sorts of dishes. I’m always on the lookout for creative ways to use this new favorite green of mine, so when I saw this recipe I knew it was a must.


Initially I wasn’t sure how arugula would go In a risotto since it has the tendency to be bitter but it worked out perfectly and wasn’t bitter at all. I love the accent from the lemon and subtle flavor of the wine and the leek. The parsley and basil make it almost reminiscent of a light pesto, and the miso gives it that rich, tart flavor that cheese would traditionally provide. However if you prefer you can leave the miso out and I’m sure it would be just as delicious! So here is my recipe adapted from ‘La Tartine Gourmande’ No matter how you decide to make it, just make it!


Arugula Risotto with Leek and Fresh Herbs

4 C Packed Arugula
1 C Packed Fresh Basil
1 C Packed Fresh Parsley
1-2 Tbsp Fresh Minced Rosemary
2 Tbsp Olive Oil
1 Large Leek Sliced thin
½ Red Onion chopped
Zest of 1 Lemon
1 tsp Garlic Powder
½ tsp Sea salt
1 ½ C of Arbrorio Rice
½ C Dry White Wine
2 C Vegetable Broth + 2 C Vegan Chicken Broth
1 Tbsp Earth Balance
1 ½ Tbsp White Miso mixed with 3 Tbsp water
Black Pepper to taste
Fresh Minced Parsley for garnish

- Bring a medium pot of salted water to a boil over high heat. Once boiling add the Arugula, Basil, and Parsley. Blanch for one minute then drain and run under cold water.

- Once cool enough to handle squeeze all the excess water from the arugula and herbs. Then place on a cutting board and finely chop and set aside.

- In the same pot you used to blanch the arugula heat the vegetable/vegan chicken broth and keep warm.

- Meanwhile heat the olive oil in a large pot over medium-high heat. Add the leek, and red onion. Saute for 4-5 minutes then add the lemon zest and garlic powder. Saute for another 2 minutes then add the rice, and saute for 1 minute, stirring constantly.

- Add the white wine, and cook stirring until the liquid has been absorbed.

- Add the salt and minced Rosemary along with 1 cup of warmed broth and cook stirring occasionally until the liquid has been absorbed. Repeat this process until you have no more broth left and the rice is thoroughly cooked and creamy. This takes roughly 20 minutes or so depending on your oven. Depending on how hot your burners get you may need to readjust the heat to a lower setting. Either medium, or even medium low so that the rice doesn’t cook too quickly.

- With the last cup of broth add in the chopped Arugula and herbs. Stir to thoroughly mix the arugula and herbs in. Once the liquid has been absorbed turn off the heat and stir in the tablespoon of Earth Balance, along with the white miso/water mixture, and black pepper to taste. Stir until fully incorporated.

- Taste for flavor and adjust seasonings as needed. Garnish with fresh minced parsley.

Enjoy on a cold winter night with some crusty bread, a glass of wine and dreams of a warm Mediterranean climate.


*** Note - If you prefer you can use all vegetable broth or all vegan chicken broth. I used half and half because I only had 2 cups of vegetable broth left, so I subbed in 2 cups of water with one vegan chicken bouillon cube. Also if you need to be soy-free you can use a soy-free barley miso or chickpea miso instead, or as I already suggested you can leave it out altogether.***


Tuesday, February 19, 2013

Product Review - Earth Balance: Sweet Cinnamon Spread...


Today I have another product review for you. I know, two product reviews in as many days? But I’ve been sitting on this one for a while and I’ve been dying to share it with you. I promise to give you an actual recipe tomorrow, and then later in the week I have a restaurant review for you.

So last month some time I discovered that Earth Balance had introduced two new flavors of non-dairy butter to their product line. Sweet Cinnamon Culinary Spread, and Garlic & Herb Culinary Spread. Now I love me some Earth Balance! Everything from their regular buttery spreads, to their coconut spread, to their mindful mayo. Everything I’ve tried from them has been delicious and I use both their original buttery spread and shortening in my baking all the time. I also really love cinnamon, and I’m obsessed with trying new vegan products regardless of what they are or who makes them. So needless to say I was pretty damn excited when I aw the two new spreads being stocked in my local health food store. I picked up a tub of the Sweet Cinnamon flavor back in January, but with the juice fast and everything else going on lately I just didn’t get around to posting about it until now.


This spread is seriously special, I’d go so far as to say it’s magical. It spreads easily, and melts just like every other EB butter, but the flavor is really something amazing! I first tried this spread on simple slice of sprouted grain bread and it instantly transported me back to my childhood. I mean, did you ever eat cinnamon toast when you were sick as a kid? I know I did. Whenever I would get sick as a child - and I mean puking sick - and couldn’t eat anything or keep anything down my mom would always make me cinnamon toast. Which is basically toasted bread slathered with butter and loads of ground cinnamon. It was often the only thing I could eat when I was really sick, or the only thing I wanted to eat when I was sick. Even now if I ever feel ill I always want cinnamon toast, and even when you’re not sick there’s something really comforting about this simple childhood pleasure. Well, Earth Balance Sweet Cinnamon spread slathered on toasted bread tastes just like cinnamon toast without having to actually sprinkle cinnamon on it. It also tastes fantastic slathered over warm biscuits with some maple syrup, or melted over pancakes. It also works wonderfully in baking as to all of Earth Balances butters. I have yet to try it in a savory dish, but I would really love to make mashed sweet potatoes with this spread.  The cinnamon flavor of it is very pronounced, and it’s sweet without being overly so.

Earth Balance Sweet Cinnamon Spread is also vegan - of course - gluten free, Organic, non-GMO, uses Expeller-pressed oil, and is of course lactose & Casein free. Oh yean and it’s made with real organic cinnamon not cinnamon flavor. If you’re interested in more information beyond that you can check out their website Earth Balance Natural But I highly recommend that if you see this spread in your local health food store or grocery that you pick up a tub. It’s inexpensive, and so delicious that I know you wont be sorry!


PS: I'm also super excited and curious to try the Garlic & Herb Spread, when I do i'll be sure to let you know what I think.

Sunday, December 2, 2012

Memories of Ireland, Potato and Leek Soup


When my husband and I were in Ireland in 2009 we ate a ton of Potato and Leek soup, we probably ate it once everyday, served with a few slices of thick dark bread. It was the main staple of our diet on that particular trip, and not because we were vegetarian - at the time neither of us were - but because it was cheap, abundant, delicious and filling. My husband and I have never been the kind of people that travel for the food. We don’t seek out exotic culinary delights, or spend copious amounts of money on fine dining. When we travel we spend our money on seeing and doing amazing things, because if you’re not going to get the most out of your trip then what’s the point in going right? Which explains the potato and leek soup. You see, it’s a pretty standard offering in most pubs and restaurants in Ireland, and when we were there you could get a nice hearty bowl of it with bread for between four to six euro, four to six pounds if we’re talking about Northern Ireland. That makes for a pretty cheap lunch or dinner for two people while traveling and because potatoes are so heavy one bowl really is sufficient. If you’re extra hungry you might want to throw a three euro side salad into the mix, but it still keeps the cost pretty low.


We traveled to fourteen different cities in Ireland, and we ate Potato and Leek soup all the way from Dublin to Belfast, to Derry, to Galway, to Killkenny, to Cork, to Waterford, back to Dublin. No matter where we went the soup was always phenomenal, and I just fell in love with it - as I did so many other things about Ireland. After we returned home, despite having eaten it every day for the duration of our trip I wanted more potato leek soup. So began my mission to make a potato leek soup from scratch that was just as good as those I’d sampled in Ireland. For the past 2 and a half years I’ve failed at every turn and I have tried so, so many recipes. Whether the recipes be vegetarian or vegan I was never able to find a good recipe, not online and not in any cook book. Every recipe I’ve tried the soup was too bland, too thick, too much potato, too much thyme. The consistency was never right, the flavor was never spot on, it was never quite rich enough or creamy enough, and for a while I thought all was lost.


Then Friday I woke up to cold weather as one so often does in Chicago at the end of November, and I found myself with a hankering for potato and leek soup! I looked through a handful of my cook books trying to find recipes for said soup that I hadn’t yet tried, but to no avail. Nothing was catching my eye. After some moments of impatient contemplation I realized I didn’t really need a recipe at all. All I needed was my own creativity and knowhow, and so I went to the kitchen and set myself to work, with nothing to guide my endeavor except countless memories of Irish pubs and magical landscapes.


After having tried so many recipes - some from very renown people in the culinary profession - I had no hope that my little effort would yield anything palatable, but I had to try, and in the end, when I tasted what I had created I knew I had come as close to the perfect Irish bowl of potato and leek soup that I ever would. This soup turned out so rich and creamy, and bursting with flavor. It is everything a good potato and leek soup should be, and it’s fairly quick and easy to prepare. If you’re a potato leek soup fan I urge you to try it, and serve it a long a nice thick slice of pumpernickel bread.


Memories of Ireland, Potato and Leek Soup

2 Tbsp Earth Balance or other Vegan non-dairy Butter
1 Very large leek, washed and sliced.
3 medium sized Yukon Gold Potatoes skin on chopped
2-3 Celery Ribs chopped
4 Garlic Cloves Minced
2 Bay Leaves
1 tsp Thyme
½ tsp Sage
½ tsp White Pepper
1/4 tsp Smoked Paprika
Sea salt and Black Pepper to taste
1 ½ C Vegetable Broth
1 ½ C Water + 1 Vegan ‘Chicken’ Bouillon Cube
1 Bunch Parsley Minced
2/3 C Cashews + additional 1/3 C Cashews as needed
1 C Water
1 Tbsp Lemon Juice
1 Tbsp White Miso

- Melt Earth Balance in a pot on the stove over medium heat. Add in the leek and celery. Saute for 4 minutes then add in the garlic, bay leaves, thyme and sage and saute another 4-5 minutes until leeks are tender and bright green.

- Add in the potatoes, the vegetable broth and the water with the bouillon cube. Bring to a boil then reduce heat to a good simmer. Allow to simmer for 15-20 minutes or until potatoes are tender when pierced with a fork.  Around the last five minutes of simmering add in the white pepper, smoked paprika, black pepper and salt. Stir to combine.

- While the soup is simmering combine the cashews, the water, the lemon juice and the white miso in a high speed blender and process on high until completely smooth. About 1 minute. If the mixture looks a little to watery you can add in up to another 1/3 cup of cashews for a thicker cream.

- Remove the cashew cream to a measuring cup and set aside. It should have yielded roughly one and a half cups of cream.

- No need to clean the blender out, instead remove the bay leaves from the soup and discard then transfer the hot soup to the blender being careful not to spill any or burn yourself. Once all of the soup is in the blender blend on high until completely smooth and creamy. Return the soup to the pot.

- Stir in 1 cup of the cashew cream. Stir in minced parsley, and season with any additional salt and pepper.

- Ladle the soup into bowls and serve with an additional swirl of the cashew cream, and a few twists of a black pepper mill. Enjoy!

PS: You can make this soup oil-free by using water to saute instead of earth balance. You can make the soup soy-free by using a chickpea or barley based miso instead of a soy one, or just leave the miso out altogether.

PPS: If you’ve never been to Ireland you really must go. It is one of the most spectacular places I have ever been! 

Thursday, November 29, 2012

Heidi's Seed Crusted Amaranth Biscuits...


More and more lately I find myself interested in cooking and baking more with whole grain flour types that aren’t wheat. I don’t have a problem with wheat, or a gluten-intolerance but I like the idea of expanding my palate, and there is such a wealth of different kinds of flour out there that it seems almost criminal not to try them out. Not to mention that switching up your flours keeps things interesting.

My pantry is well stocked with a variety of flours, all of them organic. I have unbleached all-purpose, whole wheat, whole wheat pastry, white rice flour, soy flour, almond flour, buckwheat flour, amaranth flour, and several starches like potato, tapioca and corn. Despite having these things I rarely use the non-wheat flours, and so I didn’t really know what to use nor what to make. Then one afternoon I was sitting at my desk flipping through Heidi Swanson’s cook book “Super Natural Cooking” which is a book I never use and found total inspiration in her recipe for Seed Crusted Amaranth Biscuits. The recipe isn’t gluten-free - which is fine for me but not for those who may have a gluten-intolerance, - but it does utilize amaranth flour which I was really interested in trying out. I also really liked the idea of a seedy biscuit. I love seeds, and anyway I can include more of them into my cooking is a good enough reason for me to try. I particularly love seeds in bread, which probably stems from my childhood. As my mom always makes homemade bread - and it’s the best - and her bread recipes usually include seeds of some kind.


So anyway I decided to give these biscuits a go. It’s an easy enough recipe to veganize just swap butter for Earth Balance, Milk for your favorite non-dairy milk, and leave out the egg-white. The egg is really not necessary anyway as it’s used for a wash to coat the tops of the biscuits before sprinkling on the seeds. You can achieve the same effect by brushing them with a little melted Earth Balance which is what I did. For the seed mixture I used a combination of poppy, brown sesame, black sesame, and nigella seeds. Nigella seeds are another thing I’ve had in my pantry for a long time and never used, but I’m so glad I took Heidi’s suggestion and tried them in this recipe because they give the biscuits a nice subtle onion flavor which I loved. Also because I only had about 3/4 C left of unsweetened almond milk, I also ended up using about a 1/2 C of Vanilla Almond milk and making up the remaining difference with water. I thought this might make the biscuits sweet, or have them taste like vanilla but it didn't do either. At least not that we could tell. They certainly didn't taste like vanilla, and neither of us found them to be sweet. They were very savory, but because vanilla almond milk is richer then unsweetened almond milk perhaps it did something subtle to the overall flavor or the texture.

Though these biscuits smelt like heaven when they were baking, my husband was rather skeptical about them when he saw them. My husband loves his biscuits, and has always been a ‘traditional biscuit’ kind of guy, not to mention the fact that he’s not as over the moon about seeds as I am. Yet he sat down with a plate of three earth balanced smeared biscuits and began to eat. I waited with baited breath as he took his first bite, and then his second. I watched his facial features change and contort and was ready to call the experiment a fail when he suddenly declared that “These are the best biscuits I’ve ever eaten!” Wow! High praise from him indeed. I took a bite of my own biscuit and had to agree. That’s not to say that we’ll never return to eating the regular kind of biscuit again, but it does inspire my tastebuds to make these more and more often, they are just to good to pass up, and way to good not to at least try.


This recipe used whole what flour and whole wheat pastry flour in addition to the amaranth flour and at first you might think that would make these pretty dense but they are surprisingly light and fluffy, even flaky. They are super moist which I love and have a really great well rounded flavor, thanks both to the flour and the seeds. These biscuits really are a joy to eat, and when you eat them you really feel as though you’re putting something good into your body, like you’re fueling it properly for the day. They’re also very filling thanks to their whole-grainyness. If you have this book you should definitely try these out, and if you don’t have the book it may be worth checking out just for these biscuits alone. I’m certainly glad I gave this cook book a second look, because it’s reminded me that just because a book is vegetarian instead of vegan doesn’t mean it doesn’t have some recipes worth trying.

Monday, June 4, 2012

Indo-Malaysian Shami Kebabs...


Just incase you thought I was finished experimenting with Malaysian cooking, this post it to assure you that I’m not. I’ve just been very busy lately preparing for vacation, so I haven’t been cooking quite as much as usual, and much of the cooking I have been doing has been for the express purpose of cleaning out my fridge before I take off. Before I do however, this dish really needs to be shared!


Even though a Shami Kebab isn’t exactly the sort of kebab we here in the west are used to, they are delicious. Originally of Indian Origin these kebabs are traditionally made from a mix of lentils and ground lamb. They are a popular item at the Malay and Muslim Hawker stalls and are often served alongside a dish or rice, and a sambal, however they are also sometimes eaten as a burger which is sort of how I chose to enjoy mine.


Of course my Shami Kebabs were not made with ground lamb, (Ew!) Instead to get that kind of texture and ‘sticking together’ effect I decided to use two different kinds of lentils, as well as cashews and mushrooms. The end result was so fantastic and delicious that both my husband and I failed to see how the dish could have in any way been improved by the addition of lamb. These kebabs, or patties as they should more accurately be called - are hearty, flavorful, and down right scrumptious. I dare you to eat just one.


Also instead of eating these kebabs with a heavy side or rice, or on a burger bun I decided to slayer them onto a sliced French Baguette, piled with lettuce, tomato, cilantro, mango chutney, and a drizzle of tamarind sauce, and mint yogurt. Now that I think of it a few sliced onions would have gone perfectly on there as well. Next time!


Shami Kebabs 

1/3 C Red Lentils
1/3 C Green Lentils
2 Onions finely diced
10 Garlic Cloves minced
1 Thumb Size Piece Ginger grated
1 Small Green Chili minced (Optional)
6oz Baby Bella Mushrooms finely diced
½ C Cashews Ground into a meal
1/4-1/3 C Chickpea Flour (depending on how wet your mixture is)
2 tsp Curry Powder
1 tsp Ground Coriander
1 tsp Ground Cumin
1 tsp Gram Masala
½ tsp Ground Turmeric
Sea Salt to taste
2-3 Tbsp Earth Balance
½ Bunch Cilantro minced

Optional Garnishes 

Cilantro
Sliced Tomato
Lettuce
Thin Sliced Red or Yellow Onion
French Baguette or Italian Loaf
Mango Chutney

Quick Tamarind Sauce 

2 tbsp tamarind paste
2 packets stevia or to taste
water to thin

Quick Mint Yogurt 

1/4 C Sour Cream
1 Tbsp Lemon Juice
1 Tbsp White Miso
2 Tbsp Water
Minced Fresh Mint to taste
Salt and Pepper to taste

- Rinse Lentils then place them in a medium sized pot and add enough water to cover. Bring to a boil then reduce heat to simmer and cook lentils until the water has absorbed and the lentils are tender. Roughly 20-40 minutes. If your water absorbs before your lentils are tender add more water.

- When lentils have finished cooking drain and set aside.

- Meanwhile melt the Earth Balance in a large pan. Stir in the diced onions, garlic, ginger, and green chili. Saute over medium-high heat for 5-10 minutes until mixture is fragrant and onions are translucent.

- Add in the diced mushrooms, the curry powder, coriander, cumin, gram masala, and turmeric. Saute for 3-4 minutes then add the lentils. Saute another 5-10 minutes until mushrooms are soft and moisture has evaporated. Transfer the mixture to a large mixing bowl and set aside to cool.

- Once mixture is cool enough to handle season with sea salt and pepper and add in the ground cashews, the minced cilantro and the chickpea flour. Thoroughly combine until the mixture becomes cohesive enough to form patties.

- Form the mixture into 10-12 palm sized patties. Place on a lightly greased baking sheet and bake at 400'F for 10-15 minutes. Remove the baking sheet, gently flip the patties over and bake for another 10-15 minutes until the patties are browned and have firmed up. Let cool for 5-10 minutes before serving if serving as a sandwich. It serving with rice serve immediately.

- To assemble your Shami Kebab sandwich. Slice a French Baguette in half crosswise then slice each half lengthwise down the middle so you have two roughly 6inch sandwiches. Slice three patties in half then layer three halves on each baguette. Top with mint yogurt, mango chutney, tamarind sauce, lettuce, tomato and cilantro and serve!


- To make Tamarind Sauce and Mint Yogurt simply whisk the ingredients for the Tamarind sauce in a bowl. Taste, adjust for seasoning and thickness and serve. For Mint Yogurt whisk all ingredients together in a bowl taste for seasoning and thickness and serve.

Thursday, May 17, 2012

Gluten-Free Fettuccine With Broccoli Rabe and Ramps...


This was the final dish I made with the last of my bounty of ramps. I really hadn’t wanted to use them in another pasta dish, but my husband loves pasta and seeing as how I had a huge bunch of broccoli rabe and a large quantity of ramps that needed to get used, on a day that I didn’t have a lot of time I figured this would have to do. Though it wasn’t how I originally intended to end my love-affair with ramps it was nonetheless delicious! Everything about ramps is delicious, and if you love pasta as much as my husband does you will surely love this dish.


It has a unique blend of flavor thanks to the sour lemon, the tart tomato, the delicate ramp and the slightly bitter broccoli rabe. I’d never actually eaten broccoli rabe before though I’d seen it a million times. I only had it because I’d picked it up on a whim when I saw it on sale and I thought ‘why not?’ I was surprised at how much I liked it. Perhaps not as much as Broccolini (my absolute favorite) or regular broccoli, but enough to know that I’ll be buying many more bunches over the coming months so I can experiment with it. What I like most about this dish is that it comes together fast, and is super simply yet has an air of sophistication about it. You’re not just sitting down to another plate of spaghetti you’re sitting down to a meal! And while I’ve listed the breadcrumbs as being optional I highly suggest you use them, they add that little extra something that everyone needs in their pasta.


Gluten-Free Fettuccine With Broccoli Rabe and Ramps 

1 lb Gluten-Free Fettuccine (or your favorite gluten-free pasta)
10 Cloves Garlic Minced
2 Bunches Ramps trimmed, green and white parts (about 20)
4-5 Tbsp Non-dairy butter
1/4-1/2 tsp Red Pepper Flakes
1 Large bunch Broccoli Rabe
1 15oz can diced tomatoes
3/4-1 C dry white wine
3-4 Tbsp Lemon Juice + 1 Tbsp
1 Bunch Parsley Minced
Sea Salt and Black Pepper to taste
Italian Style Gluten Free breadcrumbs (optional)***

- Cook Pasta according to package directions

- Trim the stems from the broccoli Rabe and cut it into roughly 1 inch pieces.

- Bring a large pot of salted water to a boil, add the broccoli rabe and boil for 3-5 minutes until rabe is bright green and stems are tender. Remove rabe with a slotted spoon to a bowl of ice water to stop the cooking process. Reserve the pot of boiling water to cook the pasta.

- Melt the non-dairy butter in a large pan over medium-high heat. Add the garlic, ramps, and the red pepper flakes and saute until fragrant and ramps begin to soften. About five minutes.

- Strain the canned tomatoes through a mesh sieve over a bowl. Gently pour the liquid from the drained tomatoes into the pan with the non-dairy butter, garlic and ramps. Stirring slowly and constantly until fully combined. About 1-2 minutes of stirring should be sufficient.

- Add in the reserved tomatoes, ½ C of White wine, and lemon juice. Stir the ingredients until fully incorporated - about 1-2 minutes - and then bring to a low simmer. Simmer for 10-15 minutes or until the mixture has reduced slightly. Taste and add salt and pepper as needed.

- Add the Broccoli Rabe to the Sauce and cook until heated through.

- When Pasta has finished cooking, drain and return to the pot. Pour over the remaining 1/4-1/2C of the White Wine, the extra tbsp of lemon juice and season lightly with salt and pepper to taste. Give the pasta a good stir to incorporate.

- Pour the Sauce over the pasta, and add in the minced parsley. Stir to evenly distribute sauce over the pasta.

- Arrange pasta into bowls or on plates and garnish with a little extra parsley, some fresh cracked pepper and a good sprinkling of Gluten-Free Breadcrumbs.


*** Note - If you can’t find Gluten-Free breadcrumbs it’s easy to make your own by pulsing your favorite gluten-free bread into fine crumbs in your food processor. If you can only find plain gluten-free breadcrumbs it’s easy to make them Italian style. Just stir in dried Oregano, Basil, Rosemary and Thyme to taste, and voila! This dish can also be made soy-free if using a soy-free non-dairy butter*** 

Wednesday, May 16, 2012

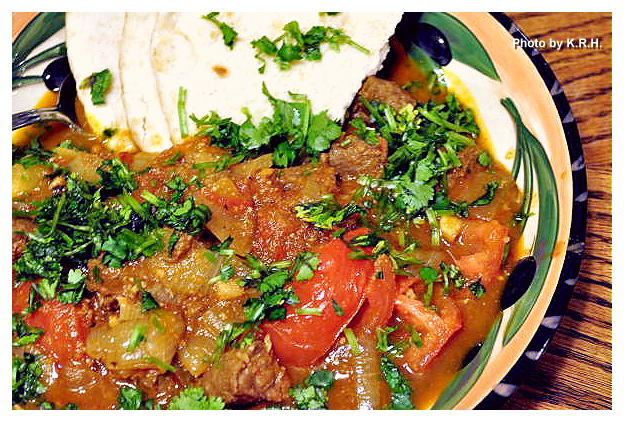
Indo-Malaysian 'Mutton' Soup...


I have never eaten mutton in my life, nor have I had any desire to. However when I came across a recipe for an Indian Mutton Soup in a Malaysian cook book recently, I found myself intrigued. Not in the least by the meat but by the idea of a rich, flavorful, lightly spiced soup with large chunks of tomato. The picture looked very appetizing, and I could feel the creative juices in my brain begin to flow. How could I make this vegan? At first I wasn’t sure how I’d be able to achieve this, because as far as I know there is not currently a vegan lamb, or sheep substitute. There is vegan beef, and vegan chicken, there is vegan tuna, and vegan shrimp, hell there is even vegan calamari and Haggis, but no vegan lamb. I considered using seitan or tempeh because they’re both chewy and easily soak up flavor but I didn’t have any seitan on hand and tempeh I decided might taste too much like tempeh. I wanted this dish to be really rich and decadent so I needed something else.


Lucky for me I had a package of Gardein Beefless Tips in my freezer. Even though they’re not in the slightest bit mutton like I figured they’d be a fine substitute. I’ve only eaten lamb a couple of times in my life and it was long ago. I recall it being stronger, gamier, and richer then beef but not necessarily that different, maybe I’m wrong there but I’ll never know. The tips in the end worked magically. They were exactly the right thing for this delicious hearty soup. The mixture of flavors in this soup is incredible, my husband and I couldn’t stop raving about the awesome flavor of the broth. It was perfectly spiced and tasted fantastic with bread. Originally I wanted to use Naan, but the store was out, and I didn’t have the time to make any so we used pita. It worked just as well I think, so when you make this soup you must get bread, any kind! You will not be sorry.


This soup apparently also goes by the name of Sop Kambing and is a particularly popular dish amongst the Muslim and Malay hawker stalls, as well as in the coffee shops. I hear it’s best when served at night as it’s said to have a restorative property. I don’t know about that, but I definitely felt sated after finishing off a large bowl, and now you can enjoy it too!


Indo-Malaysian 'Mutton' Soup

1 thumb size piece of ginger
8 Garlic Cloves
1 Red Chili or ½-1 tsp Red pepper Flakes
1 Large Yellow Onion roughly chopped
2 Tbsp Non-dairy Butter
1 ½ tsp Ground Coriander
1 ½ tsp Ground Cumin
1 ½ tsp Ground Fenugreek
1 ½ tsp Sugar
1/4-1/2 tsp Ground Cinnamon
3-4 tsp Tomato Paste
7 Green Cardamom Pods
Sea Salt and Black Pepper to taste
2 C Water + 1 Vegan ‘Beef’ Bullion Cube
3 Tomatoes, peeled, seeded, and quartered, then the quarters cut in half
10oz -1 lb Gardein Beefless Tips
1 Bunch Cilantro minced

- Spray large pan with non-stick spray and cook beef tips over high heat until browned on all sides. 3-4 minutes. Remove from pan and set aside.

- Place Ginger, Garlic and Red Chili into a food processor and process into a paste

- Heat the non-dairy butter in a large pan over medium-high heat. Add the onions and saute for 4-5 minutes until fragrant. Add the garlic, ginger paste and saute another 2 minutes. Add the coriander, cumin, fenugreek and sugar stir to combine and saute another 2-3 minutes until very fragrant and onions are golden.

- Add the water and bullion cube, along with the tomato paste, cinnamon and cardamom pods. Stir to combine, then bring to a boil.

- Reduce the heat and cover simmer for 20 minutes.

- Add the tomatoes along with sea salt and pepper to taste. Then cover and simmer another 15 minutes.

- Add in the reserved ‘beef’ tips and simmer another 10 minutes.

- Fish out the cardamom pods and discard. Garnish with the cilantro and serve with your favorite crusty bread or Naan.


*** Note - This can be made Gluten-Free if using Tempeh or soy based beef instead. Or it can be made Soy-free if using Seitan or soy-free beef and soy-free non-dairy butter instead. Although I can’t promise it’ll taste the same with either substitution.*** 


Thursday, May 10, 2012

Ramps and Bacon Buttermilk Biscuits...


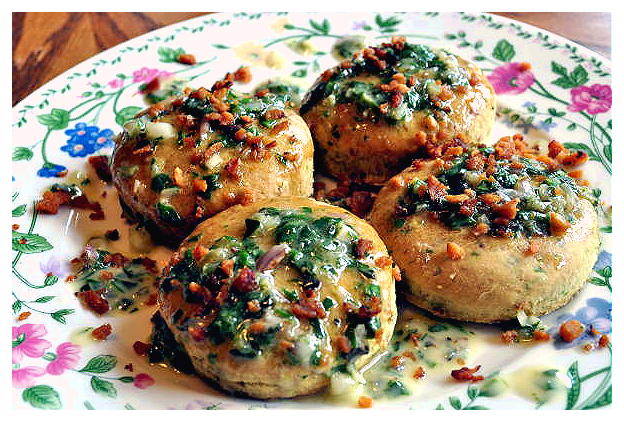
After I first discovered ramps I went a little ramp crazy, I wanted to use them in every possible way before their season came to an end. Unfortunately beyond a few obvious uses I wasn’t quite sure how to use them in a way that truly showcased them. No point using them in a recipe simply to replace onions, I thought, if I was going to use them I wanted them to steal the show!  During the course of my ‘ramp-age’ I searched the web in desperation for any interesting recipes. I very quickly came to the realization that few people out there had any better ideas than myself. None anyway that I found particularly inspiring or creative. I’d already made a ramp pesto (recipe to come) and aside from pickling them or simply grilling, sauteing, or broiling them to serve as a garnish to some kind of charred meat there didn’t seem to be much experimentation going on.  How strange I thought, since Ramps are apparently the new ‘foodie’ thing (Don’t get me started, on that ‘sub-group’) that nobody could come up with anything more innovative then serving this delicious member of the onion family as a garnish!


There was one bright spot that kept appearing throughout my search however. Every once and a while I’d see a recipe pop up for Buttermilk Ramp biscuits. The recipes were all virtually the same though apparently authored by other people, and all used an un-godly amount of butter, some form of pig flesh - either bacon, ham, or something known as smoked pork jowl. Can you say ew with me? - heaping cupfuls of cow’s milk, and eggs. Not at all a vegan friendly item, but nevertheless the idea piqued my interest. After all vegans love biscuits as much as anyone else, so why should we miss out? and while I don’t eat biscuits often - nor do I seem to have that ‘head over heels’ love for them that some do - I too can’t help but fall to the tantalizing lure of a good biscuit from time to time.


So for a few days I mulled over the idea. Trying to figure out how to best go about my biscuit making. The first and hardest step was trying to decide what to do in place of the pig flesh. I briefly considered using store-bought tempeh bacon, but quickly through that idea to the wayside in favor of the quicker process of making my own bacon style bits, and now you see where yesterday’s recipe comes in to play. After that the rest came together quite naturally. Making a biscuit after all isn’t exactly difficult, though it can be time consuming, - and if you cook anything like me, - messy!


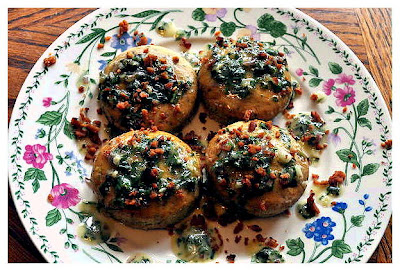
Originally I’d envisioned a flakier sort of biscuit, however these came out a bit denser then I’d planned. During the creation process I either used too much flour or over-mixed. Biscuits may not be a difficult task, but flakey biscuits it seems come down to an exact science. No matter though, because flakey or not these biscuits are fantastic. Their flavor is full bodied and the ramps infuse each bite with oniony goodness. The veggie bacon bites give the biscuits a little bit of sweet, and the whipped ramp butter soaks into the biscuits making everything rampy, buttery, and moist. You couldn’t ask for a better, heartier and more filling breakfast. My husband gobbled up six of these biscuits in one sitting! Oh and if you find this recipe makes more biscuits then you can eat before they spoil pop them in a zip-lock bag or air-tight container and freeze for a quick and easy breakfast another day. They reheat perfectly and taste just as good with regular old Earth Balance, or even better with Earth Balance Coconut Spread!


Ramps and Bacon Buttermilk Biscuits

4 C + 2 C All Purpose Flour
2 Tbsp Baking Powder
1 Tbsp Baking Soda
1 tsp Salt
½ C Vegetable Shortening (I like Earth Balance)
1-2 C Unsweetened Almond Milk
1 ½ -3 Tbsp Lemon Juice
1 Heaping Cup minced Ramps (bulbs, stalks, and greens)
1/2 Heaping Cup Veggie Bacon Bites plus more to serve

*** Note - Start off using 4 C flour and 1 C almond milk with 1 ½ Tbsp Lemon Juice. Increase flour, and milk/lemon juice mixture as needed until you reach desired consistency. You may not need the full 6 cups of flour or the full 2 cups of almond milk. ***

- Preheat oven to 425'F

- Sift 4 cups of the flour along with the baking soda, powder and salt into a large bowl. In separate smaller bowl use a knife to slice the shortening into small cubes. Place both the bowl with the flour and the bowl with the shortening in the freezer for 30 minutes to chill.

- Combine Almond Milk with Lemon juice and let sit for 5 minutes, until curdled. Once curdled return the milk to the fridge to chill until needed.

- Meanwhile prepare your ramps. Slice off root tips, clean and then mince. Spray a little non-stick spray into a small pan, and heat over medium heat. Add the ramps and saute until soft and fragrant. About 5-8 minutes. Remove from heat and set aside.

- Once everything is chilled remove from the freezer. Add the flour to a food processor, then add the cut up shortening and pulse to combine. After a few pulses the mixture should look course and pebbly.

- Add the almond milk mixture (1 C Almond Milk + 1 ½ Tbsp Lemon Juice) and pulse to combine. If the dough is too stiff add in more milk/lemon juice mixture. If the dough is too wet add in more flour by the ½ cup. You don’t want the dough to be too stiff or too wet, it should be a little sticky, not so sticky that it gets all over your hands and can’t form a ball, just sticky enough. As stated in the note add flour and milk/lemon juice mixture until you’ve reached the desired consistency. You may not need the entire quantity of either ingredient. When adding in ingredients use the pulse feature on your processor in short bursts don’t continually run the machine or you’ll overwork the dough.

- When the dough is the consistency you like add in the sauteed ramps, and the ½ C of veggie bacon bites. Pulse a few more times until just incorporated.

- Once the dough has been mixed, flour a clean counter top or other work surface. Plop your dough out of the processor and flour both your hands and a rolling pin.

- Roll the dough out to roughly 3/4 inch or desired thickness and using a biscuit cutter or clean glass or can to cut out your biscuits. When you have cut as many biscuits out as you can fit, remove them to a lightly greased cookie sheet.

- Scrunch the remaining dough back into a ball, and re-roll to desired thickness. Cut out as many biscuits as you can, then transfer them to the cookie sheet. Use a second cookie sheet if needed. Continue to repeat this process until you have used all your dough.

- Pop the biscuits In the oven and bake for 15-20 minutes until golden. Alternately you can brush the tops of the biscuits with non-dairy butter or ramp butter (recipe follows) before popping them into the oven. Enjoy these biscuits spread with a generous dollop of ramp butter and a generous sprinkle of veggie bacon bites.


Ramp Butter 

½ C non-dairy Butter at room temperature
4-5 Ramps minced (bulb, stalk and greens)
Dash of White Pepper
Dash of Garlic Powder

- Spray some non-stick spray into a pan and heat over medium. Add minced ramps and saute for 5-8 minutes until soft and fragrant.

- Transfer to the bowl holding the ½ C of non-dairy butter. Whip together and add the white pepper and garlic powder to taste.

I personally prefer my butter to be of a more melted consistency. However if you like it a little firmer, and whipped, let the ramps cool to room temperature before adding to the non-dairy butter. Once cooled whipped the ramps and non-dairy butter together with the white pepper and garlic powder to taste. Enjoy spread over piping hot biscuits, English muffins, bagels or even toast!