Showing posts with label Olive Oil. Show all posts

Thursday, February 11, 2016

Roasted Root Bowl...


I've really been craving root vegetables lately. Radishes, Turnips you name it. The problem is I eat them so seldom I don't really know what to do with them most of the time. This is one of those magical dishes born somewhat out of necessity. Meaning, it was really all I had on hand and I needed to make something for dinner.


I am beyond amazed at how well this turned out. It's a super simple dish to throw together, and despite the hour and fifteen minute cooking time it is super low effort. I kept it lightly and simply seasoned so as not to overpower any of the natural roasted flavor of the veg. All the flavors work so well together and I love the variety of texture between the different roots and the cous cous. I hope you enjoy it too!


Roasted Root bowl

2 medium Sized Turnips Diced
1 Large Parsnip cut into Half Moons
1 large Onion Diced
12 Radishes cut in Half
1/2 Bag of Baby Carrots Left whole if small otherwise cut in half
Olive Oil to taste
Maple Syrup to taste
Sea Salt to taste
Garlic Powder to taste
Black Pepper to taste

Garlic Olive Oil Cous Cous

2 Cups Pearled Cous Cous
4 cups Water
1 Vegan Chicken Bouillon Cube
1 tsp Garlic Powder
1-2 Tbsp Olive Oil
1/4 tsp Ground Turmeric
Garlic Infused Olive Oil to taste (Optional but recommended)
Minced Parsley to Garnish

- Combine everything for the Roasted Roots in a large glass baking dish. Stir it so it's all mixed together then cool it at 400'F for 1 hour.

- Increase the heat to 500'F and cook for an additional 15 minutes until the roots are nice and browned.

- Combine everything for the garlic cous cous (except the garlic infused oil, and the parsley) in a pot and bring to a boil. Reduce heat and simmer until all liquid has been absorbed.

- Drizzle garlic infused olive oil over the cous cous, and stir to combine.

- Plate the cous cous, top it with the roasted roots, and sprinkle the minced parsley over top. Add additional salt and pepper to taste if desired.

Thursday, June 27, 2013

Classic Hummus...


I love hummus - who doesn’t - I love it, and I make it often. It’s one of my favorite foods, and it’s often a saving grace when it comes to eating healthfully - and sometimes just plain eating - as a vegan traveler. No matter where you go, no matter how small the town, or how vegan-unfriendly the city, someone, somewhere has hummus. It seems to be universally loved, and it seems that everyone and their mother has a personal hummus recipe that they like best.

When it comes to hummus I don’t care if it’s thick, thin, creamy, extra-creamy, or a little textured. I love them all just so long as the flavor is good. That’s that’s really the key, because hummus just ain’t no good if it’s bland or boring. I don’t mean that you have to dress it up and make if fancy - although I love that too - I just mean that when it comes to a good hummus you should be able to taste the nutty tahini, the tart lemon, the bitter cumin, and the garlic, oh gods the garlic!  Hummus without garlic is like a hand without fingers. You definitely, definitely need the garlic!

For years and years I used to make hummus with canned chickpeas and the result was always good it comes out smooth and creamy like I like, and the flavor is wonderful. Until this year I had never made hummus with dried beans before, and this is because my old stove just wasn’t up to the challenge of cooking a bean as hard as the garbanzo. I don’t know why this is, but no matter how long I cooked them on the stove they never got soft. Now my new stove cooks these things like a champ in about an hour, and I have to say the flavor of hummus with home-cooked beans is really out of this world.

Another thing I love about hummus is that it’s so versatile. Really as long as you have chickpeas you can do basically anything else you like. You can season it with whatever you have on hand, and often times while I’ve been on vacations where I’ve had access to a kitchen - or at least a food processor - I’ve been able to whip up hummus using almond butter instead of tahini, lime juice instead of lemon, garlic powder instead of fresh garlic. Hell I’ve even used basil, oregano, curry, and other random seasonings to flavor it when I didn’t have enough cumin. It’s easy, simple, filling and oh so satisfying!

For the sake of your convenience you can use either canned or home-cooked in this recipe, but I highly recommend you trying the home-cooked method, because it really is amazing. So here I go tossing my hat into the ring and adding another hummus recipe into the


Classic Hummus 

2 ½ C Home-Cooked Chickpeas (about 1 heaping cup dried)
4-6 Garlic cloves
3 tsp Ground Cumin
2 tsp Ground Coriander
3/4 tsp Smoked Paprika
½ tsp Onion Powder
5 Tbsp Lemon Juice
3 Tbsp Olive Oil
6 Tbsp Tahini
Sea Salt and Black Pepper to taste
1/3C -2/3C water - (Or enough to reach your desired consistency, the more you use the creamier and thinner the hummus)


- Combine the chickpeas and the garlic in a food processor and process until you have corse crumbs.

- Add in the spices, salt, pepper, tahini, lemon juice, and olive oil. Process until you have a thick paste. Scrape down the sides of the bowl.

- Add in the water and process until you have a smooth creamy dip. Add enough water to reach your desired consistency. This may take a few minutes depending on your processor and you may need to scrape down the sides of the bowl a couple of times.

- Scrape the hummus out into a serving dish and garnish with a drizzle of olive oil, some smoked paprika or a dash of cayenne pepper, and a little minced cilantro. Enjoy as a dip for veggies or toasted pita or forget the serving dish and use the hummus in a wrap, on a sandwich, scooped onto a salad, spread out onto some falafels, or spread across some socca. Enjoy!

Wednesday, March 6, 2013

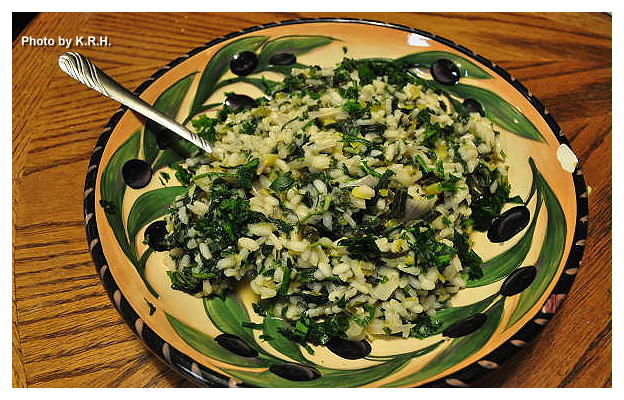
Arugula Risotto with Leek and Fresh Herbs...


Risotto is one of those pain in the ass Italian dishes that everyone loves and noone likes to make. Well, actually I don’t mind making risotto, yes it’s usually a lot of prep work, and it’s definitely a lot of stirring, but there’s something about it that I kind of love. I love watching the rice go from small hard granules to this very rich, and creamy aromatic concoction. There’s something really satisfying in witnessing this transformation, and risotto is universally perfect for cold winter nights and late summer evenings. It’s the kind of dinner you decide to make when you just want to chill by the oven and daydream. You put on some good music, open a nice bottle of wine to sip, and you daydream about far away places.


Anyway this particular recipe was inspired by a recent trip to the library. I was browsing through the cook books as I so often do when I’m there and book entitled ‘La Tartine Gourmande’ caught my eye. This is by no means a vegan cook book, or even a vegetarian cook book, I wouldn’t say that it’s even particularly vegan friendly but the cover photo was so beautiful and I was intrigued by the French so I picked it up and started flipping through it. Now it’s not very often that I find myself inspired by non-vegan recipes but when I saw the author Beatrice Peltre had made a risotto utilizing Arugula I knew I would have to try the combination. Ever since my trip to Europe I’ve been obsessed with Arugula I use it frequently these days and throw it into all sorts of dishes. I’m always on the lookout for creative ways to use this new favorite green of mine, so when I saw this recipe I knew it was a must.


Initially I wasn’t sure how arugula would go In a risotto since it has the tendency to be bitter but it worked out perfectly and wasn’t bitter at all. I love the accent from the lemon and subtle flavor of the wine and the leek. The parsley and basil make it almost reminiscent of a light pesto, and the miso gives it that rich, tart flavor that cheese would traditionally provide. However if you prefer you can leave the miso out and I’m sure it would be just as delicious! So here is my recipe adapted from ‘La Tartine Gourmande’ No matter how you decide to make it, just make it!


Arugula Risotto with Leek and Fresh Herbs

4 C Packed Arugula
1 C Packed Fresh Basil
1 C Packed Fresh Parsley
1-2 Tbsp Fresh Minced Rosemary
2 Tbsp Olive Oil
1 Large Leek Sliced thin
½ Red Onion chopped
Zest of 1 Lemon
1 tsp Garlic Powder
½ tsp Sea salt
1 ½ C of Arbrorio Rice
½ C Dry White Wine
2 C Vegetable Broth + 2 C Vegan Chicken Broth
1 Tbsp Earth Balance
1 ½ Tbsp White Miso mixed with 3 Tbsp water
Black Pepper to taste
Fresh Minced Parsley for garnish

- Bring a medium pot of salted water to a boil over high heat. Once boiling add the Arugula, Basil, and Parsley. Blanch for one minute then drain and run under cold water.

- Once cool enough to handle squeeze all the excess water from the arugula and herbs. Then place on a cutting board and finely chop and set aside.

- In the same pot you used to blanch the arugula heat the vegetable/vegan chicken broth and keep warm.

- Meanwhile heat the olive oil in a large pot over medium-high heat. Add the leek, and red onion. Saute for 4-5 minutes then add the lemon zest and garlic powder. Saute for another 2 minutes then add the rice, and saute for 1 minute, stirring constantly.

- Add the white wine, and cook stirring until the liquid has been absorbed.

- Add the salt and minced Rosemary along with 1 cup of warmed broth and cook stirring occasionally until the liquid has been absorbed. Repeat this process until you have no more broth left and the rice is thoroughly cooked and creamy. This takes roughly 20 minutes or so depending on your oven. Depending on how hot your burners get you may need to readjust the heat to a lower setting. Either medium, or even medium low so that the rice doesn’t cook too quickly.

- With the last cup of broth add in the chopped Arugula and herbs. Stir to thoroughly mix the arugula and herbs in. Once the liquid has been absorbed turn off the heat and stir in the tablespoon of Earth Balance, along with the white miso/water mixture, and black pepper to taste. Stir until fully incorporated.

- Taste for flavor and adjust seasonings as needed. Garnish with fresh minced parsley.

Enjoy on a cold winter night with some crusty bread, a glass of wine and dreams of a warm Mediterranean climate.


*** Note - If you prefer you can use all vegetable broth or all vegan chicken broth. I used half and half because I only had 2 cups of vegetable broth left, so I subbed in 2 cups of water with one vegan chicken bouillon cube. Also if you need to be soy-free you can use a soy-free barley miso or chickpea miso instead, or as I already suggested you can leave it out altogether.***


Friday, January 18, 2013

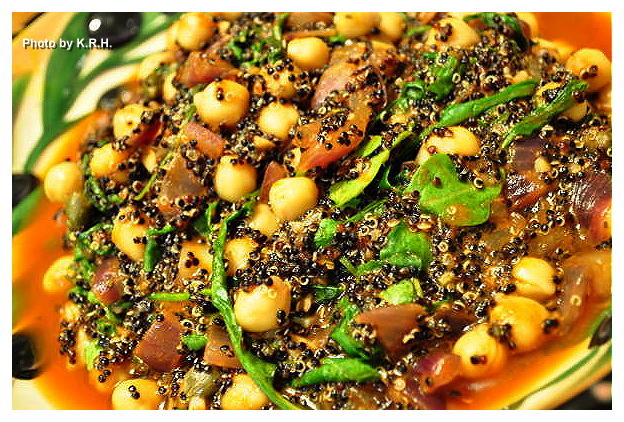
Black Quinoa, Arugula Bowl with Chickpeas and Capers


Need something quick and easy to throw together for either dinner or lunch that tastes great and has a lot of nutrition? This is the dish for you. Last weekend I needed to make something to take with me for lunch at work, but didn’t have a lot of time - or ingredients for that matter -  to prepare anything. So I took a look around the kitchen hoping for inspiration. I had onions and garlic of course - always a good base I thought to myself, - and I had a ton of arugula. - Now we’re getting somewhere! Quite often when I need a meal in a pinch I make some variation of sauteed greens, onions, and garlic and throw a can of beans into the mix. It’s quick, easy and delicious and very, very satisfying. On this particular day however I was looking for something a little more - well, creative and filling. That’s when I opened up the pantry and found a solitary can of crushed tomatoes, chickpeas and a big ‘ole bag of black quinoa. Perfect!


So I grabbed up all this stuff, dumped it onto my kitchen counter and without thinking too much about it employed my twin brother E’s favorite method of cooking. Which is “Throw some stuff in a pot and see what happens.” Well, what happened was magic. Seriously this is such a simple dish and yet ti’s so filling, satisfying and bursting with flavor. I love the flavor of arugula, love it’s bitterness, and the capers add a really neat element to the overall dish. I also love that this is a plate of all wholesome whole foods ingredients so you can eat it, and not feel guilty because you know you’re nourishing your body in the right way. I strongly recommend the black quinoa, it’s delicious and I love it! It’s really my favorite type. However if you don’t have any, or can’t find any you can always sub in Regular quinoa, or red quinoa. The contrast won’t be quite the same but it’ll still taste fantastic! The best part is you can throw this together in under 25 minutes, how awesome is that?


Black Quinoa, Arugula Bowl with Chickpeas and Capers

1 C Black Quinoa
2 C Water
1 tsp Olive Oil
10 Cloves Garlic minced
1 Large Red Onion diced
1 tsp Chili Powder
½ tsp Red Pepper Flakes
1 14 oz Can Crushed Tomatoes with Basil
4 Cups Arugula
15 oz Can Chickpeas Drained
Sea Salt and Black Pepper to taste
2-3 Tbsp Capers
2-3 Tbsp Liquid from Capers

- Add Quinoa and water to a medium sized saucepan and bring to a boil. Boil for 5 minutes then lower to a simmer. Simmer until all the water has been absorbed roughly 15-20 minutes.

- Meanwhile minced the garlic and dice the onions. Heat the olive oil in a large pan over medium-high heat and once hot add in the onions. Saute for 3-4 minutes until starting to become fragrant and a little soft. Lower the heat to medium and add the garlic, chili powder and red pepper flakes. Saute for another 3 minutes. The onions should be tender but still a little crisp.

- Add in the crushed tomatoes and lower heat to medium-low. Stir to combine with the onions and garlic and then add in the arugula. Stir until arugula has been worked into the tomato mixture and has wilted. About 3-5 minutes. If the quinoa hasn’t finished cooking by this time lower the heat to the lowest possible setting and let sit.

- Add in the cooked quinoa, the chickpeas, capers, caper liquid, and salt and pepper to taste. Taste for flavor and adjust seasoning as needed. Then spoon into large bowls and enjoy!


PS: If you don’t have crushed tomatoes with basil you can just use any crushed tomatoes and add in an additional 1-2 tsp of dried basil. Also this is a perfectly filling and delicious meal on it’s own but for a bit more substance you can serve it with some lightly roasted squash as I did. I used Acorn squash. To roast squash cut into slices, sprinkle with olive oil, sea salt, black pepper, and basil and roast at 425'F for roughly 30 minutes.

Thursday, December 20, 2012

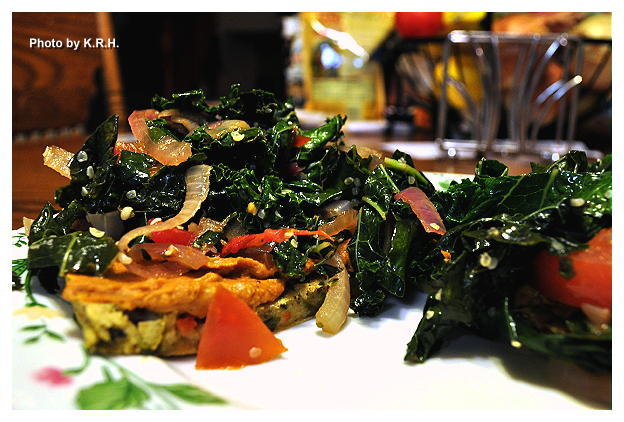
Simple Socca with Fava Bean Spread and Sauteed Kale...


I know I haven’t been keeping up with this as well as I should have been, but with the holiday season I’ve been a little pressed for time. School has been brutal the past couple of weeks as I struggled to finish all of my assignments in time to take my final - which I did today, and aced! - And any time I’ve had not devoted to school has been divided between work, holiday planning/Christmas shopping and watching documentaries on Netflix until my one month free-trial runs out on the 24th. Suffice to say I haven’t been doing a lot of cooking, or rather I have been, but I haven’t really been ‘creating. ‘ Mostly I’ve been relying on my good and trusty cook books to see me through, particularly those cook books devoted to healthful recipes that can be made in under 30 minutes. As unlike everyone else - or so it seems - I’m actually trying to keep with my routine this holiday season rather then use the holiday as an excuse to excessively binge on high fat junk foods. So I’ve been eating a lot of salad - which I’ve been craving lately anyway - and a lot of soup because the days are growing colder, a lot of things you probably wouldn’t find to enticing except for maybe the Socca.


Socca you see is my new favorite thing. - That and firtatta but more on that another time! Now Socca is a specialty in Southeastern French cuisine particularly in and around Nice. However it apparently originates in Genoa, Italy, and over time spread to Nice where it became popular throughout the region of the Ligurian Sea.  There are apparently similar dishes in countries such as Algeria, Argentina and Uruguay but I digress. The Socca I’m talking about is of the French variety. For those of you still unsure of what a Socca is, it’s a crispy thin pancake cooked in a cast iron skillet and eaten as a finger food while piping hot. It’s seasoned with fresh herbs, and generous amounts of black pepper and is typically eaten on it’s own. However I’m quite fond of turning my socca into a kind of pizza topped with a bean dip instead of a marinara sauce, and a lightly dressed salad. Making your meal an all in one sure makes cleanup a breeze! Over the past few weeks I’ve made quite a few socca’s, I’m typically making it twice a week now, and so I’ve tried a lot of different things, but this was one of my favorite combinations, and my husbands too. It’s sort of a cross between Provincial and Italian with a little red hot jalapeno thrown in for good measure, but what it really is, is delicious so I hope you try it out.


Simple Socca with Fava Bean Spread and Sauteed Kale

Socca 

1 ½ C Chickpea Flour
½ tsp Sea Salt
1/4 - ½ tsp Freshly Ground Black Pepper
3-4 Nice Sprigs Fresh Rosemary minced
1 tsp Dried Basil
1 tsp Dried Oregano
½ tsp Garlic Powder
1 ½ C Water
2 Tbsp Olive Oil
1/4 C Minced Kalamata Olives
1/4 C Minced Sun-dried Tomatoes
1/4 C Minced Green Onion
Minced Pickled Jalapeno to taste - try between 2-4 Tbsp.

Fava Bean and Sun-dried Tomato Spread

1 15oz Can Fava Beans drained and rinsed
2 Garlic Cloves - or to taste
6 Oil-Packed Sun-Dried Tomatoes
1 tsp Dried Basil
Sea Salt and Black Pepper to Taste
2 Tbsp Olive Oil - optional
1 Tbsp Lemon Juice
2 Tbsp Water to thin as needed

Topping 

1-2 Tbsp Olive Oil
1 Large Red Onion sliced thin
1 Large Bunch Kale cut into bite sized pieces.
10 Cherry Tomatoes halved
2 Tbsp Hemp or Sesame Seeds
Sea Salt and Pepper to taste
Ume Vinegar to taste


- Preheat oven to 425'F

- To make Socca whisk flour, salt, pepper, rosemary, basil, oregano, garlic powder, water and olive oil together in a bowl and set aside for 30 minutes.  - While Socca is resting you can make the Fava Spread and the topping.

- After thirty minutes whisk in all remaining ingridients.

- Heat a cast iron skillet over high heat on top of the stove. Spray with a little non-stick cooking spray. Once hot enough that water sizzles pour the Socca batter into the pan. Let the socca cook on high in the pan for 1 minute until the edges turn golden brown.

- Turn off the burner, and remove the cast iron pan, placing it into the heated oven. Bake for 15-20 minutes until light golden brown.

- To make the Fava Bean Spread combine all ingredients in a food processor and process until completely smooth and spreadable. Adding more water or oil to thin as needed. Taste for seasonings and adjust as necessary.

- To make topping. Heat olive oil in a pan over medium heat. Add onion and saute until translucent about 5-7 minutes.

- Add Kale and saute for another 5-8 minutes until kale is wilted and tender. Add in cherry tomatoes and saute for 2-3 minutes. Season with salt, pepper, ume vinegar and hemp seeds. When the mixture has reached it’s desired tenderness and flavor remove from heat.

- To assemble, cut the socca into four equal pieces and divide amongst 2-4 people. Spread each wedge of socca with a generous amount of the fava spread and top with a generous helping of the sauteed kale mixture.

- Enjoy! Seriously i'm so in love with socca you may see more recipes for it and variations of it from me in the future!


PS: Socca’s seem to be becoming a little more popular in North America. Over the past few weeks I’ve been making them I’ve seen them mentioned a few times in magazines, blog posts, and even in newly released cook books! Also another great fact about Socca is that they’re naturally gluten-free, and vegan! 

Thursday, December 6, 2012

Swiss Chard Salad with Sauteed Stems in A Dijon Vinaigrette...


Last night I felt like making a salad to go with our dinner, but I didn’t have any lettuce and I didn’t have any kale. I had cabbage but we’d just eaten a cabbage salad with dinner the night before and so I wanted something different. The only other green I had available was a huge bunch of Rainbow Swiss Chard that I bought on Sunday simply because it looked beautiful and because it was on sale. I took a good look at those big beautiful leaves and thought ‘why not? You can make a salad out of this can’t you?’ In fact I knew it was possible to make a salad out of Chard because I’d made a Romaine and Chard salad more then a year ago, but chard is just one of those greens that while I love it, I never really use it. Plus I was worried that without the subtle sweetness of romaine the chard would be too bitter. Of course since I didn’t have anything else to offset the flavor I had to do my best and make it work somehow.


In the end this salad exceeded all expectations, and for whatever reason it really felt like a winter salad. Maybe because of the dark leafy leaves, or maybe because Chard is more associated with winter, I don’t know but it felt appropriate and it tasted fantastic. Since I didn’t want to waste the stems and because I didn’t want to eat the stems raw I decided to saute them, I like sauteed chard stems, they taste vaguely of beets and I think it was a perfect topper for this salad. They were tasty, tender-crisp, made a beautiful presentation and throwing them into the salad is a great way to utilize the whole plant.


Though it may sound strange to you at first trust me when I say this salad is fan-freaking-tastic. My husband and I loved it so much we gobbled up massive bowls of it, and barely had room left for the soup I’d made as our main course. It’s got a great combination of flavors and textures, and each one really lingers on the tongue. Try it!


Swiss Chard Salad with Sauteed Stems in A Dijon Vinaigrette

1 Large bunch Rainbow Swiss Chard
1 Red Onion sliced thin
2 carrots grated
½ C dried Blueberries
1/4 C Toasted Pecans (optional)
2 Tbsp Hemp Seeds or more to taste
1 tsp olive oil

Dijon Vinaigrette 

3 Tbsp Hemp Seed Oil
2 Tbsp Apple Cider Vinegar
1 ½ Tbsp Dijon Mustard
4 Medjool Dates
1/4-1/3 C Walnuts
1-2 Garlic Cloves to taste
½-1 Tsp Onion Powder
Sea Salt and Black Pepper to taste
Dash of White Pepper
1/4 C Purified Water to thin or more/less as needed.

- Remove Chard leaves from stems. Set stems aside and cut leaves into bite sized pieces. Toss the Chard leaves into a big bowl and add grated carrots, dried blueberries, pecans, and hemp seeds. Set aside.

- Mince the reserved Swiss Chard stems then add them to a medium sized pan with the tsp of olive oil and sliced red onions. Saute over medium-high heat for 5-8 minutes until stems are tender-crisp and onions are translucent. Remove from heat and add them to the salad.

Note - It’s okay if the pan that you’re cooking the stems and onions in gets a bit dry, you don’t want the mixture to be liquidly so you may even want to use less then 1 tsp of oil. Just enough really so that they cook nicely, get a bit of flavor and don’t stick to the pan. 

- To make vinaigrette place all ingredients in a food processor or high speed blender and blend until completely smooth. Taste for flavor, and consistency and thin the dressing as needed and adjust flavor to taste.

- Poor the vinaigrette over the salad and using two wooden spoons gently massage the dressing into the salad making sure all chard leaves get covered. Massage the salad for roughly 5 minutes until the chard leaves wilt slightly and soften.

- Divide amongst bowls and enjoy!


PS: In summer when fresh blueberries are in season you can make this salad with those instead of dry. You could also probably substitute the nuts for a nut that's a little more summery, like a Macadamia. Yum! 

Tuesday, November 27, 2012

Kyleigh’s All-Time Favorite Salad Dressing...


Some days all I want is a big green salad. It doesn’t have to be fancy, it doesn’t have to be elaborate. Some lettuce, onion, and maybe a bit of tomato or some dried cranberries will do, with a light sweet garlicky vinaigrette. Now, don’t get me wrong, I love all those big honkin’ salads that are complete meals in themselves and contain upwards of fifty ingredients, but when I’m really craving greens, I go for simple more often then not, and while I love all those rich, elaborate, and creamy salad dressings too a lot of times I just want a dressing that tastes ‘clean’ without having to sacrifice on flavor.

This is the perfect summer salad in my opinion, clean and simple, but it’s also the perfect winter salad. It’s great for serving alongside heavier meals like Spaghetti and bean balls, in rich tomato sauce, or for serving next to a big ‘ole bowl of chili, or as a component to a large holiday dinner such as Thanksgiving. It’s a great starter salad, because it’s so delicious, yet it’s flavor won’t overwhelm the main course.

When I first ditched bottled salad dressing’s - years ago, before I ever went vegan or vegetarian - this was the first homemade dressing I came up with, and it was a hit with everyone. Since the day I first served a salad with this dressing to someone other then my husband I have been frequently told by people that they ‘love my salads’ and that I ‘make the best salads’ I don’t know about that, but it’s nice knowing that I’m at least capable of making something satisfying that a wide range of people can enjoy and appreciate. I hope you enjoy this simple dressing too.


Kyleigh’s All-Time Favorite Salad Dressing

4-6 Garlic Cloves
7 Tbsp Olive Oil
2 Tbsp Red Raspberry Vinegar
1-2 Tbsp Water - to thin and dilute as needed.
1 tsp Sugar - more or less to taste
A pinch of Black Pepper, Dried Basil, and Dried Oregano to taste

- Heat a dry skillet over medium heat until hot. Add the garlic cloves and toast until golden brown on both sides, stirring frequently to prevent the garlic from burning or sticking.

- Remove the garlic from the pan and place in a food processor. Add Oil, Vinegar, sugar, and spices. Blend until completely smooth. Taste for flavor and then add water as needed, adjusting oil, vinegar and spices as you see fit.

- Pour over a a big ‘ole green salad and enjoy!

PS: You could use this dressing on virtually any kind of salad but my favorite types of greens to use with this dressing are Bibb, Green Leaf, Romaine, Iceberg and Spinach. Typically I use Romaine more often then not. You also have an endless amount of ‘add-in’ options such as tomato, red onion, green onion, nuts, seeds, dried fruits, olives,  bell pepper, red cabbage, chopped veggies, apples, pears etc.. though I like to keep it simple leaving it around 3-4 ingredients at most.

PPS: If you like you can make this sugar-free by leaving out the sugar, or by adding in another mild flavored sweetener of your choice. 

Monday, October 15, 2012

Vegan Mofo #16 - Colleen’s Muffuletta Sandwich...


Vegan Mofo #16 - Colleen’s Muffuletta Sandwich 
The Book - Color Me Vegan
The Author - Colleen Patrick-Goudreau
The Recipe - Muffuletta Sandwich
Page # 245
Difficulty - Easy
Duration - Roughly 40 minutes, but most of that time is inactive.


Who doesn’t love roasted vegetables? I know I freaking love them! There is something so amazing about them. You don’t need sauce, or dressing you just pop an assortment of veggies into the oven with a little olive oil, a dash of salt and pepper and something absolutely wonderful comes out. It’s easy, clean, delicious and oh so satisfying. That’s how I felt about this sandwich. It’s full of super simple ingredients and doesn’t take a lot of time or effort to throw together and yet it’s so mind-blowingly good.


Though I’d of course heard of Muffuletta sandwiches before I’d never actually had one before making Colleen’s version. Originally I hadn’t intended to make this sandwich for Mofo, but just before Thanksgiving I was starting to feel burnt out on sandwiches, specifically the really heavy ones and I was just craving something simple. I also had some homemade white Panini rolls left over that I needed to use, plus a sad looking zucchini and a small eggplant. I had all the making’s of the Muffuletta and so there was no better time to give it a try, and you should too.


So first things first you need to roast up some veggies. You need a zucchini, an eggplant, a sweet onion, a red bell pepper and a tomato, or a couple of bell peppers and tomatoes if you like a little extra. You slice them thin toss them with oil, salt and pepper and let them do their thing in the oven. Meanwhile you make a Tapenade of green olives, kalamata olives, capers, garlic, celery, parsley, oregano, red pepper flakes, olive oil, red wine vinegar, green onions and a little more salt and pepper.


Then when the veggies are ready you spread the Tapenade over both sides of your bread of choice - a thick crusty bread or some homemade rolls would be best - layer in your veggies and chomp away. Colleen recommends that you refrigerate the Tapenade for an hour or two to let the flavors meld but I didn’t bother, and it tasted great just as it was. A perfect late afternoon lunch or light dinner.


Thursday, October 4, 2012

Vegan Mofo #6 -Alicia’s Avocado Melt Panini...


Vegan Mofo #6 -Alicia’s Avocado Melt Panini 

The Book - Vegan Comfort Food
The Author - Alicia C. Simpson
The Recipe - Avocado Melt Panini
Page #120
Difficulty - Easy
Duration - 10 minutes


This sandwich is so simple you’ll laugh and wonder why you never thought of it. Or at least that’s how I felt. I know when I first got this cook book, and I saw the recipe I thought “Why is this even in here?” It’s too simple, too easy, it never occurred to me to actually make it until I set myself the goal of making sandwiches for Mofo.

Yesterday afternoon I needed something quick and easy to whip myself up for lunch because I was busy writing essays for school and couldn’t be distracted by any long cooking times. This was the perfect thing, and it’s made even better by the fact that I love me some avocado. Besides who doesn’t love a really good oozy-gooey, melted sandwich? I know I do. What I really love about this simple sandwich is that the avocado makes it so gooey that it feels really decadent and bad, when really it’s actually not. Avocado’s are a healthy fat, so as long as you use a minimal amount of oil and cheese this sandwich is actually pretty healthful.


I know it’s hard to tell what all’s going on in this picture because it just looks like one big gooey green monster of a mess but besides avocado the sandwich also has vegan mozzarella - I used Daiya - cilantro, red onion, and tomato. It’s suppose to be served on sourdough bread brushed with olive oil and grilled in a Panini press, but I don’t have one of those. I also didn’t have sourdough - which I’m sure that would be delicious too. Instead I used regular thinly sliced Italian bread, brushed lightly with olive oil and I seared it in my cast iron skillet. Worked beautifully. I love how the heat not only melted the cheese but even melted the avocado for a little that extra ooze.


1 avocado is suppose to be enough for 2 sandwiches, but since my husband was at work and I didn’t want to waste half an avocado I just used the whole thing. I did add a little less then 4oz of shredded Daiya Mozzarella though to even it out. Also I added in a little salt, pepper, smoked paprika and garlic powder when I mashed up my avocado, that’s how I usually like my guac and so I thought it would be just as good that way on a sandwich and I was right.

The perfect mid-afternoon lunch.


Wednesday, September 12, 2012

Grilled Corn and Avocado Salsa...


This salsa is amazing! Or as some of my younger friends might say it’s Fire! And I don’t say that lightly. I’m a big fan of salsa’s and pico’s, especially strange ones, and I’ve certainly sampled my fare share of them, but this is hands down one of my favorites.

I made it for the first time a couple of months ago, right before my husband and I went on vacation. I don’t remember what possessed me to make it, but I think it had something to do with having an abundance of Fresh corn on the cob and avocados that needed to be used before we went away. Grilled corn is a favorite dish of mine particularly in the summer and so I thought why not use my favorite method for cooking corn and combine it with one of my favorite summer time accompaniments? Thus grilled corn and avocado salsa was born. Not that I’m claiming it’s a totally original concept - I’m sure someone, somewhere has thought of it before - but it is nonetheless delicious.


I know that we’re near the end of summer now and you’re probably thinking to yourself why didn’t I post a summer recipe during the heart of summer? Well, as it happens I forgot to take a picture the night I first made this delicious salsa, then I forgot to write the recipe down too! With no recipe and no picture there wasn’t much to post about, and there weren’t even any leftovers to take a picture of the next day because we gobbled the whole thing up.


Luckily my Mother-In-Law was having a get together with some of her girlfriends today and she requested that I make the Grilled Corn Salsa for her little party. I said sure, and then worked from my memory of what I did the last time to make it all over again. It came out exactly like I remember, a beautiful blend of bold flavors, with lots of potent garlic, tangy lime, and creamy avocado, not to mention that fantastic ‘just off the grill’ flavor from the corn.

This time around I made sure to take a photo, and write the recipe down. Oh and the best part? This Grilled Corn Salsa is totally omnivore approved! It was a big hit at my mother-in-law’s party and there wasn’t a vegetarian to be found amongst them - let alone a vegan - so make it for your next gathering or party and be prepared to wow your friends/family.


Grilled Corn and Avocado Salsa 

4 Ears of Corn with Husk on
4 Large Garden Tomatoes diced
8 Cloves Garlic minced (or more to taste)
1 Red Onion finely diced
1/4 C Olive Oil
1/4 C + 2 Tbsp Lime Juice
½ tsp Ground Cayenne Pepper (more if you like more heat)
1 ½ tsp Sea Salt (or more or less depending on your taste)
Black Pepper to taste
3/4 - 1 tsp Smoked Paprika (to taste)
1 Large bunch Cilantro minced
4 Large Avocados Diced

- Soak corn in a large pot of salted water for 1-2 hours.

- Remove corn from the soaking pot and shake off excess water. Using a medium heat grill corn until husks are blackened and corn kernels are bright yellow. Depending on your grill and your heat setting this can take as little as 8 minutes or as long as 20 keep an eye on it!!!

- Remove corn from grill and place onto a plate to cool. Once sufficiently cool to the touch remove the husks and any silk. Cut all the corn away from the cob and place it into a large bowl. Discard any kernels that may have burned during grilling.

- Add all the remaining ingredients except cilantro and Avocado to the salsa. Mix until thoroughly combined.

- Add in the Cilantro and Avocado mix gently until just combined. Taste for seasonings and flavor and adjust as needed. Serve with your favorite tortilla chips and for a lovely presentation garnish with thin slices of avocado and big leaves of cilantro. Enjoy!


*** Note - This recipe makes A LOT! So if you’re just making it for a couple of people, or just yourself, then half the recipe. However if you’re making it for a party or gathering this is a perfect amount. It will get eaten I assure you! Also this is super easy to make in advance. Prep everything in the morning or even the night before, then add the cilantro and avocado in at the last minute right before serving.***

Wednesday, June 6, 2012

Garlic Scape and Collard Green Pizza...


There are few things better then a truly good pizza, and I’ve made plenty of tasty pizza’s in my life, but this one beats them all by a thousand miles. The flavors in this pizza are out of this world amazing! It’s truly amazing what you can create when you’re making every effort to use every last bit of fresh produce in your fridge. Collard greens, tomatoes, and non-dairy cheese were all staring at me yesterday afternoon threatening to spoil unless I used them before vacation. A quarter of a jar of garlic and green onion olive oil had been sitting on my counter for the better part of a month. A jar of sun-dried tomatoes sat nearly empty in my fridge, and I had just purchased 4 bunches of garlic scapes from my local grocery.


I was not suppose to buy groceries this week, but when I saw that scapes were back in season I knew I’d have to have them before I left, because by the time I get back they’ll surely be gone. It was a total impulse by, and my stomach not my brain was responsible. When I got them home, I thought “What am I going to do?” I have hardly anything left in my fridge. I stared down the contents of my fridge for a good long while and then the above mentioned ingredients started calling to me. They started saying “pizza, pizza, piiiizzzzaaaa!” Until I just had to listen.


Though this was my own idea, I was skeptical at first. Collard greens on a pizza? I’d never hear of such a thing, and collards - love them though I do - are just one of those things that one immediately identifies with ‘health food’ not pizza. Still, I decided it was better to try and fail and have to through the collards out because dinner was terrible, vs throwing the collards out because they went bad. I can not tell you how amazed I was by the end result. This is literally the best pizza I have ever made, perhaps even the best pizza I have ever eaten and I do not say that lightly. We’re talking mind-blowing, mouth-watering, tastebud-tickling good, so good that you’ll crave it! Even my husband, a pizza eating fanatic said it was one of the best pizza’s he’d ever eaten, and last night he simply couldn’t get enough of it!


Instead of sauce I decided to coat the crust in home-made garlic and green onion infused olive oil. I wanted a lighter, cleaner tasting pizza, and wasn’t in the mood for a heavy acidic tomato based sauce. Of course if you’re anti-oil this may not be the pizza for you, but you can control how much oil you brush onto the crust. You don’t have to go overboard and if you’re only eating a slice or two it’s really not all that bad. You can of course try it with a tomato based sauce though I can’t grantee that it’ll taste at all the same. The infused oil is highly recommend. Also though I list the non-dairy cheese as optional I highly recommend that too. I used Daiya’s Garlic Jalapeno Havarti which was amazing and really kicked the pizza up to a new level, but you could use vegan mozzarella if that’s all you can find. Remember though to use just a little bit, you want it more as a garnish than anything else, the pizza shouldn’t be dripping with it. Just sprinkle on enough that you get a few good bites of it per slice. On it’s own the pizza is hearty and filling, but to make it even more of a meal you could serve it with a nice side salad and perhaps even a glass of red wine if wine is your thing. However you serve it, just be sure to enjoy it! And trust me when I say this comes together a lot quicker then the length of the recipe may imply. Also the topping can be made ahead and saved till needed, which makes it that much easier!


Garlic Scape and Collard Green Pizza 

Topping 

2 Leeks white and light green parts only sliced thin
2 bunches collard greens chopped into bite size pieces
3 Roma tomatoes sliced thin
1-2 Bunches garlic scapes sliced into 1 inch lengths
Garlic and Green Onion infused Olive Oil for brushing ***
1/8 C Shredded non-dariy cheese (optional)
10-15 sun-dried tomatoes sliced into strips
Rosemary sea salt ***
Fresh Black pepper to taste (Optional)
1 ½ Tbsp Balsamic Vinegar to drizzle over top

Dough

2 1/4 C All Purpose Flour
1 ½ Whole Wheat Flour
1 pack active dry yeast
1 C warm water
3/4 tsp salt
2 Tbsp Olive Oil

Preheat Oven to 400'F

- Water Saute leeks, collard greens, and garlic scapes in large pan over medium-high heat. Saute about 10 minutes until veggies are tender and all the water has been absorbed. You want the mixture to be a bit dry. Transfer to a bowl when finished and set aside, or if making ahead refrigerate until ready to use.

- To make the dough, combine all purpose and whole wheat flour, and salt in a food processor and pulse to incorporate.

- Combine Active Dry Yeast with Warm water and set aside for five minutes

- Drizzle the olive oil into the food processor and add the yeast/water mixture. Process until mixture forms a cohesive dough. If the dough is too moist or sticky add in more flour until you’ve reached your desired consistency.

- Remove the dough from the food processor, shape into a ball and set aside to rest for 10 minutes.

- After the dough has sat, you can either divide it to make two smaller thin crust pizzas or leave it as is to make one large regular crust pizza.

- Flour a clean work surface and flour a rolling pin. Gently roll dough out into a large circle. Start with the edge closest to you and roll the dough outwards in a circular motion. Flip the dough over and continue rolling outwards in a circle. Flip the dough one more time and continue to roll outwards until the circle is large enough to fit your pizza pan.

- Lightly grease your pizza pan with some non-stick cooking spray. Then gently transfer your pizza dough to the pan. There should be excess dough flowing over the edge of the pan. Roll it up to form a crust around the edge of the pan. Trim some off as needed if the excess is too much.

- Poke your pizza dough with the tings of a fork a few times. Then brush the dough with a generous amount of garlic and green onion olive oil (or regular olive oil) make sure to brush both the base of the dough as well as the crust.

- Place pan in preheated oven and cook for 10-15 minutes until dough is firm. Remove from the oven.

- Brush with a little more garlic and green onion oil, then layer sliced Roma tomatoes around the crust. Evenly distribute the collard green, leek and garlic scape mixture over top of the tomatoes. There will be a lot but that’s okay, pile it all one and spread it as evenly as possible.

- Next scatter the sun-dried tomato strips over top of the pizza, and the shredded non-dairy cheese if using.

- Finish the pizza by drizzling the balsamic vinegar over top, sprinkling with Rosemary sea salt and a few twists of a black pepper mill.

- Return the pizza to the oven and bake for 15 or so minutes until the cheese has melted, and the edges of the crust begin to golden.

- Slice and serve hot with a bowl of garlic and green onion olive oil dotted with balsamic vinegar for dipping your pizza crusts! Enjoy!


*** Note - The Garlic and Green Onion Olive Oil is super easy to make and tastes amazing on this pizza. If you prefer you can use regular olive oil, but this oil really does kick the pizza up a notch and infuses it with such great flavor. I highly recommend it, especially since it’s so easy. All you do is pour 2 cups of olive oil in a mason jar. Add 1 cup of sliced green onions (just the green parts) ½ cup of finely minced parsley or basil (or a mixture of both) a pinch of sea salt, and 10-12 garlic cloves finely minced. Screw a lid on tight, give it a good shake then leave it on your kitchen counter for 24 hours to let the flavors develop. So delicious! ***


*** Note - Rosemary Sea Salt is easy to make. All you need is fresh Rosemary springs and sea salt. Remove the Rosemary leaves from the stems and grind in a food processor. Then add to a shaker with an equal (or slightly less) amount of sea salt. Use on everything because it tastes delicious! ***


*** Note - This pizza is only soy-free if you use a soy-free non-dairy cheese.***